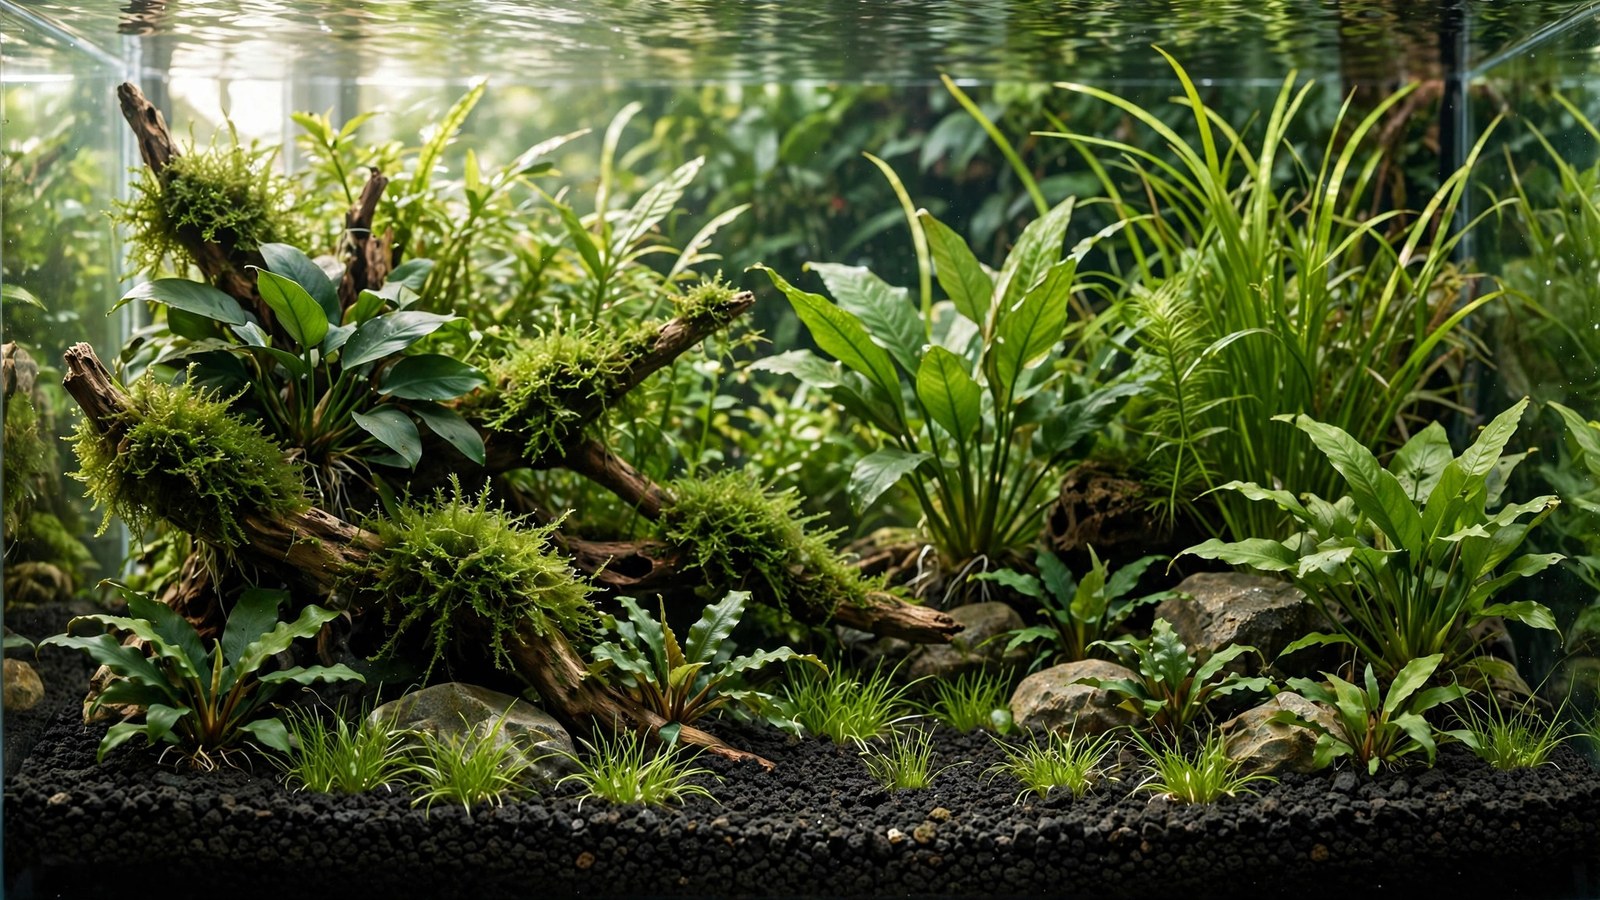
CaribSea Eco-Complete has been sitting on fish-store shelves for two decades, promising planted-tank success in a bag — "no rinsing, no cycling, just pour and plant." It's one of the best-selling planted substrates in North America, and also one of the most misunderstood. Is it a nutrient-rich aquasoil competitor, or just expensive gravel? After years of watching tanks run on it, here's the honest Eco-Complete review: what it is, what it isn't, and who should buy it.
What Eco-Complete Actually Is
Eco-Complete is basalt-based volcanic gravel — black, porous, iron-rich crushed basalt, roughly 2–4 mm grains. It ships wet in a sealed bag with liquid containing (per CaribSea) beneficial bacteria and "liquid Amazon" water conditioner. The marketing implies a living, nutrient-loaded substrate. The reality is more modest:
- It is NOT an aquasoil. It contains no meaningful nitrogen, phosphorus, or potassium reserve. Plants cannot live on Eco-Complete alone any more than on plain gravel.
- It IS high-CEC and porous. The basalt grains have substantial cation exchange capacity and internal porosity — they absorb nutrients from root tabs and the water column and hold them where roots can reach. This is its real, legitimate value.
- The "live bacteria" claim is mostly marketing. Any bacteria surviving months in a sealed bag at warehouse temperatures are negligible compared to what colonizes from your filter and environment in days. Cycle the tank normally.
- Iron-rich is real but limited. Basalt contains iron, but it's mineral-bound and releases very slowly — helpful as a long-term trace source, not a substitute for fertilization.
Think of Eco-Complete as premium inert gravel with excellent CEC — a permanent, plant-friendly bed that makes your fertilizers work better, not a fertilizer itself. That framing explains every experience people report with it.
Setup: The "No Rinse" Claim
CaribSea says don't rinse — the bag liquid contains the good stuff. In practice: pour it in straight from the bag, and yes, the tank will be cloudy for a few hours to a day. The cloudiness is fine basalt dust plus the bag liquid. Run your filter with fine mechanical media and it clears. Don't do a big water change to clear it faster — you'll just discard the liquid you paid for (for whatever it's worth).
Practical notes:
- One 20-lb bag covers roughly a 20-gallon tank at 2–3 inches depth. Big tanks need multiple bags, and the cost adds up fast — price it before committing.
- The grains are angular and a bit rough — fine for most fish, but dedicated corydoras/loach keepers often prefer smooth sand. It's not sharp enough to injure, but it's not barbel-optimal either.
- It holds slopes decently thanks to the angular grains, better than rounded sand.
Performance: Growing Plants on Eco-Complete
Here's where the honest review lands: Eco-Complete performs exactly like a good high-CEC inert substrate — which is to say, well, provided you fertilize.
What works great
- With root tabs + liquid ferts: grows everything. The high CEC holds tab nutrients in the root zone instead of letting them wash away, so heavy root feeders (swords, crypts) do particularly well. This is the intended use and it delivers.
- Long-term stability: it never breaks down, never exhausts, never leaches ammonia, never alters pH. The bed you pour on day one is the bed you have in year five.
- Beginner forgiveness: no ammonia leach to manage (unlike cycling aquasoil), no buffering surprises, no replacement cycle. Pour, plant, fertilize, done.
What disappoints people
- Expecting aquasoil growth without fertilizer. The #1 complaint — "my plants are starving in Eco-Complete!" — comes from keepers who believed the marketing and added no tabs or liquid ferts. It's inert; feed it.
- The price for what it is. You're paying a premium over plain gravel for CEC and convenience. Whether that's worth it depends on your budget and how much you value the pour-and-go setup.
- Algae on the black grains. Like any dark substrate, film and spot algae show clearly on it. Normal maintenance handles it — see our cleaning guide.
Eco-Complete vs The Competition
| Substrate | Nutrient reserve | CEC | Ammonia leach | Lifespan | Cost |
|---|---|---|---|---|---|
| Eco-Complete | None (inert) | High | None | Permanent | Mid-high |
| Seachem Flourite | Iron only | High | None | Permanent | Mid-high |
| ADA Amazonia | Very rich | High | Heavy (weeks) | 1–3 years | Premium |
| Pool filter sand + tabs | None (inert) | Low | None | Permanent | Very cheap |
The closest comparison is Seachem Flourite — also a porous baked-clay high-CEC inert, similar price, similar philosophy. Differences: Flourite is reddish-brown (some love it, some hate it), dustier out of the bag (rinse thoroughly), and has a more established track record in high-tech tanks. Eco-Complete is black (universally flattering), cleaner to set up, and more beginner-marketed. Performance with proper fertilization is essentially equivalent. Our Flourite guide covers it in depth.
Against aquasoil, the trade is clear: aquasoil gives you 12–18 months of free, rich nutrition and then declines (see our exhaustion guide); Eco-Complete gives you nothing free but never declines. Over a 5-year tank life, Eco-Complete + tabs is cheaper and less work than two rounds of aquasoil.
Who Should Buy Eco-Complete?
- Buy it if: you want a black, permanent, plant-friendly bed with zero startup drama; you're comfortable with root tabs + liquid ferts; you keep fish that would churn aquasoil into mud; you want the easiest possible setup.
- Skip it if: you're on a tight budget (pool filter sand + tabs performs similarly for much less — see our inert substrates guide); you want maximum growth with minimum dosing knowledge (aquasoil's rich reserve suits you better — compare in our aquasoil roundup); your tank centers on delicate bottom-dwellers (smoother sand is kinder).
Getting the Best From It: The Protocol
- Pour straight from the bag, no rinse. Slope it deeper in back (3–4 inches) per our depth guide.
- Fill slowly, run the filter — cloudiness clears in hours with decent mechanical filtration.
- Cycle normally. Ignore the "instant cycle" implication; test ammonia/nitrite and stock gradually like any new tank.
- Root tabs from day one — grid pattern, every 4–6 inches, pushed deep. Replace every 2–3 months. This is the entire root nutrition supply.
- Liquid fertilizer from week one — a complete macro/micro formula, since the substrate contributes nothing to the water column.
- Vacuum normally — unlike aquasoil, Eco-Complete tolerates real gravel vacuuming. Work the siphon into the bed in open areas.
Long-Term Reports: What 5-Year Eco-Complete Tanks Look Like
Eco-Complete's permanence claim is testable — the product has been on the market since the early 2000s, so there are plenty of decade-old beds to learn from. The long-term reports are consistently positive with two caveats:
- The grains don't change. Ten-year-old Eco-Complete looks and performs like year-one Eco-Complete — no crumbling, no mud, no compaction from breakdown. Keepers who've run it long-term cite this as the reason they'd never switch: the substrate becomes one less variable to think about.
- CEC saturates in hard water. In very hard tap water, calcium and magnesium gradually occupy the exchange sites over years, slightly reducing nutrient-holding efficiency. The practical effect is small — you might notice tabs seeming to "run out" a bit faster at year 5+ — and a partial refresh (replacing a third of the bed) resets it. In soft-to-moderate water, it's a non-issue.
- Color holds well. Unlike some black substrates that fade to gray, basalt's black is through-and-through — there's no coating to wear off. Old beds darken slightly with biofilm patina, which most keepers prefer.
The takeaway from the long-timers: Eco-Complete is a buy-it-once substrate in the truest sense. The total cost of ownership over a decade — one purchase plus root tabs — undercuts every aquasoil by a wide margin, since aquasoil needs full replacement 3–5 times in the same period.
Frequently Asked Questions
Do I really not need to rinse Eco-Complete?
Correct — pour it straight in. The cloudiness clears within a day with filtration. Rinsing would wash away the bag liquid (whatever value you assign it) and the fine basalt particles that contribute to its CEC. This is one of the few "no rinse" claims in the hobby that's actually legitimate.
Can I mix Eco-Complete with aquasoil or sand?
With sand as a cap, yes — though the black-on-tan contrast looks odd to most eyes; black blasting sand is the more natural cap partner. Mixed into aquasoil, no — you'd dilute the soil. As a base layer under aquasoil, it's pointless expense; the soil does everything the base would do.
How long does Eco-Complete last?
Indefinitely. It's crushed volcanic rock — there's nothing to break down or exhaust. Keep replacing root tabs and dosing liquid fertilizer on schedule, and the bed performs identically in year ten as year one. This permanence is arguably its strongest selling point.
Is Eco-Complete safe for shrimp?
Yes — it's inert and doesn't alter water chemistry, so it's safe for both neocaridina and caridina shrimp. Note it won't create the soft acidic water caridina prefer (for that you need a buffering substrate or RO water), but it won't harm them either.
Why are my plants melting in new Eco-Complete?
Almost certainly transplant melt (emersed-to-submersed transition), not a substrate problem — or missing fertilizer. Eco-Complete contributes no nutrients, so new plants with no tabs and no liquid dosing starve while also adapting. Add root tabs, start liquid ferts, and give plants 2–4 weeks to transition.
The Verdict
Eco-Complete is a good product wrapped in oversold marketing. Strip away the "live" claims and what remains is genuinely useful: a black, porous, high-CEC, permanent planted substrate with the easiest setup in its class. It's not aquasoil and doesn't pretend to be once you understand it — it's the premium inert option for keepers who'd rather fertilize deliberately than manage a rich soil's lifecycle. Buy it for what it is, feed your plants, and it will serve you well for as long as you keep the tank.
External reference: CaribSea's Eco-Complete product page for manufacturer specs and claimed features.
Tissue-culture plants are the exception — they’re grown in sterile gel and adapt with minimal melting, which is part of what you’re paying for. Plants bought submersed from another hobbyist’s tank also transition with little melt, since they’re already in the right form.
Which Plants Melt Most (and Least)
Heavy melters (expect significant leaf loss)
- Cryptocorynes — infamous for “crypt melt,” sometimes dropping every leaf after any disturbance. They almost always recover from the roots within weeks.
- Stem plants grown emersed — rotala, ludwigia, and hygrophila often shed lower emersed leaves while the growing tips transition.
- Amazon swords — emersed-grown swords typically lose their broad oval aerial leaves and replace them with longer submersed ribbon leaves.
Light melters
- Anubias, java fern, bucephalandra — slow-growing rhizome plants transition gradually; occasional old-leaf melt but rarely dramatic.
- Vallisneria — usually transitions well, though it dislikes the move itself and may sulk for a week.
- Floating plants — minimal melt since their leaves were already at the air-water interface.
The Acclimation Protocol
Step 1: Quarantine or dip first
Before acclimating to your tank’s conditions, make sure you’re not acclimating pests along with the plant. Run new arrivals through our quarantine and dip protocol — it adds days upfront but prevents months of regret.
Step 2: Float to temperature-match (30 minutes)
Float the bag or container in your tank for 20–30 minutes to equalize temperature. Plants are less temperature-sensitive than fish, but a 10°F shock on top of transplant stress is an avoidable insult.
Step 3: Trim before planting
Remove any leaves that are already damaged, yellowing, or heavily algae-covered — they won’t recover and they’ll rot in your tank, feeding algae. For stem plants, trim off the bottom inch and any emersed leaves that look unlikely to adapt; the plant wastes energy maintaining leaves it’s going to shed anyway. Keep the healthy growing tips — that’s where recovery starts.
Step 4: Plant correctly the first time
Follow our planting guide — right depth, crown exposed on rosettes, rhizomes unburied on epiphytes. Every uprooting and replanting restarts the acclimation clock, so get placement right on the first attempt. Decide where each plant goes before it goes in the water.
Step 5: Run a gentle first week
For the first 7 days after planting:
- Moderate light — run your normal photoperiod but consider dropping intensity 20–30% if your light is dimmable. Blast-level light on a melting plant grows algae on the dying leaves, not recovery.
- Stable CO2 — if you inject CO2, keep it consistent. Fluctuating CO2 during acclimation is a melt accelerator. If you’re low-tech, this doesn’t apply — see growing without CO2.
- Half-strength fertilizer — new plants with damaged leaves can’t use full dosing, and the excess feeds algae. Ramp to full strength over 2–3 weeks per our fertilizer schedule.
- No disturbance — don’t move, trim, or “check on” new plants for at least two weeks. Every touch resets root establishment. This is especially critical for crypts.
Step 6: Remove melt, keep the base
As emersed leaves melt, remove the mushy material promptly — decaying leaves release ammonia and grow fungus that can spread to healthy tissue. But never discard the plant while the crown, rhizome, or roots are firm and alive. A crypt that’s lost every leaf but has firm roots is a plant that’s about to recover, not a dead plant. Give it 3–4 weeks before judging.
Telling Normal Melt From Real Problems
Normal transition melt:
- Affects oldest/emersed leaves first, newest growth last
- New submersed leaves emerge even as old ones dissolve
- Roots and crown stay firm and white/green
- Timeline: 1–4 weeks, then obvious new growth
Concerning melt (see our full melting diagnosis guide):
- New growth also melts or emerges deformed
- Rhizome or crown turns mushy and brown — this is rot, not transition
- Entire plant dissolves within days with no new growth after 4+ weeks
- Melting spreads to established plants that weren’t recently moved
Buying Tips to Minimize Melt
- Buy submersed-grown when available — hobbyist-grown cuttings transition with almost no melt.
- Choose tissue culture for sensitive species — crypts and delicate stems establish far more reliably from sterile cups.
- Avoid plants already melting in the store tank — some melt is normal, but a plant that’s mostly mush at purchase has less energy for recovery.
- Transport carefully — keep plants damp and out of direct sun/heat. A plant that dries out or cooks in a hot car melts far worse than one transported properly.
The First-Month Timeline: What to Expect Week by Week
Knowing what’s normal when removes most acclimation anxiety. Here’s the typical timeline for a healthy plant adapting to a new tank:
Week 1: The quiet week
Almost nothing visible happens. The plant is growing roots you can’t see and assessing its new environment. Some species (vallisneria, stem plants) may start shedding their lowest leaves. This is normal. Resist the urge to “help” — no moving, no extra fertilizer, no light changes. The most common beginner mistake is intervening during a week when the correct action is nothing.
Week 2: Melt peaks
This is when emersed leaves give up in earnest. Crypts may drop everything; swords shed their broad aerial leaves; stem plants lose lower foliage. It looks catastrophic and it’s usually fine. Keep removing mushy material, keep conditions stable, and watch the crown and growing tips — if those are firm and green, recovery is already underway.
Week 3: The turn
New submersed-adapted leaves emerge — smaller, thinner, often a slightly different shade of green than the emersed foliage. Stem plant tips start growing visibly; crypts push tiny curled leaves from the crown; swords unfurl narrow ribbon leaves. This is the moment most beginners exhale for the first time.
Week 4+: Established
New growth outpaces melt, and the plant is functionally yours. You can resume full-strength fertilizer, normal trimming, and stop treating it as fragile. Some slow growers (anubias, bucephalandra) take 6–8 weeks to show obvious progress — that’s their normal speed, not a problem.
Acclimating Different Plant Formats
Tissue-culture cups
Sterile, pest-free, and already adapted to high-humidity (not emersed) growth — tissue cultures melt the least of any format. Rinse the agar gel off gently (leftover gel rots and feeds fungus), split the portion into small plantlets, and plant per our planting guide. They establish slowly for the first two weeks, then accelerate. No dip needed, minimal acclimation stress — this is the premium experience you’re paying for.
Potted plants
Remove the pot and strip away the rockwool completely — leftover rockwool traps debris and rots. Tease the root mass apart gently; if it’s a dense mat, splitting it into 2–3 smaller portions actually establishes faster than planting one big clump (more growing points, better water flow around roots). Potted plants are usually emersed-grown, so expect the standard 2–4 week melt cycle.
Bare-root / bunched stems
Typically sold as weighted bunches. Remove any bands, foam, or weights, strip the lower leaves, and plant stems individually or in small groups. Bunched stems from the store are often already transitioning — check for new submersed growth at the tips, which tells you the plant is mid-adaptation and will settle quickly.
Hobbyist cuttings
Already submersed-grown and the fastest to establish — often showing new growth within days. The main acclimation factor is water-parameter difference between the two tanks. Float to temperature-match, plant promptly, and they’ll usually take off with minimal melt. This is why experienced hobbyists prefer trading cuttings over buying potted plants.
Frequently Asked Questions
Should I use a “plant starter” or transplant fertilizer?
Products marketed for transplant shock are mostly B-vitamins and mild hormones. They don’t hurt, but there’s no strong evidence they help aquarium plants specifically. Stable conditions and patience outperform any bottle. Save the money for more plants.
My new plant melted completely — bare crown, no leaves. Is it dead?
Probably not, if the crown or rhizome is firm. Crypts and swords routinely lose 100% of their leaves and regrow from the base within a month. The test is firmness: firm and pale/green means alive; mushy and brown/black means rot. Give firm-but-leafless plants a full 4 weeks before declaring them dead.
Can I speed up acclimation with extra light or CO2?
No — and trying usually backfires. A melting plant can’t use extra light; the excess just grows algae on its dying leaves. Keep light moderate and CO2 stable (not boosted) during acclimation. Growth speed comes from the plant’s own adaptation timeline, which you can’t rush, only avoid delaying.
Should new plants go straight into my main display tank?
After quarantine/dipping, yes — there’s no benefit to a separate “growing-in” tank for most plants. They acclimate to your water fastest in the tank they’ll live in. The exception is very delicate species going into a tank with boisterous fish; give those a few weeks in a calm corner or breeder box first.
The Patience Rule
The single most important acclimation skill is restraint: plant it right, set gentle conditions, remove decay, and then leave it alone for a month. The hobbyists with the best plant growth aren’t doing something clever in week one — they’re simply not interfering in weeks two through four while the plants do what they’ve evolved to do. Melt looks like failure and feels like failure, but in most cases it’s the visible part of a plant successfully becoming yours.