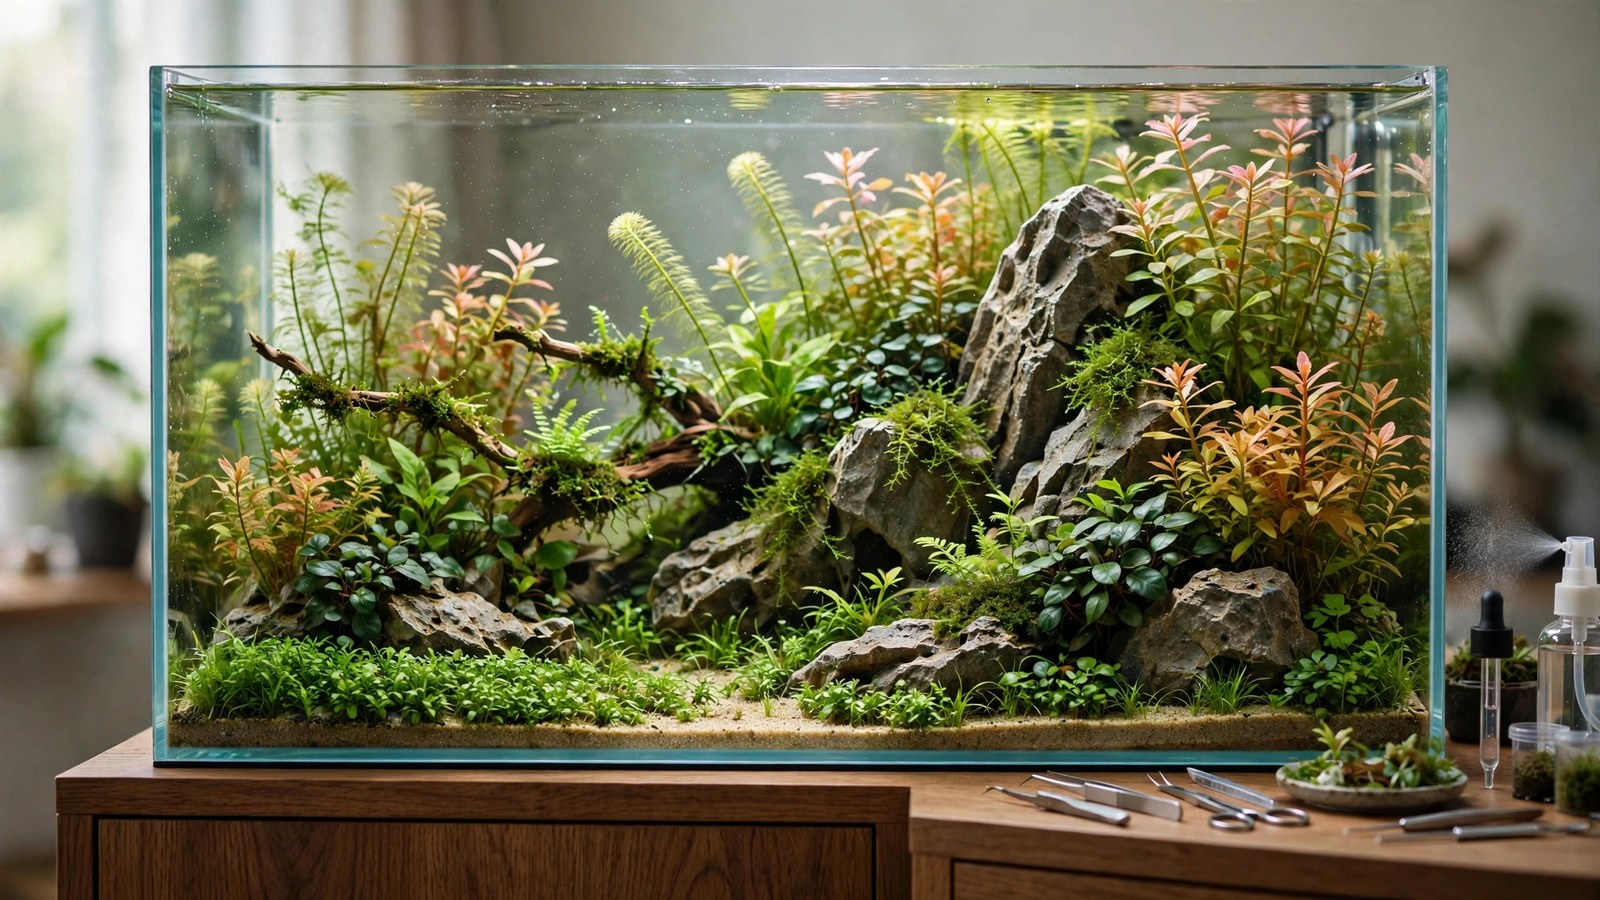
Aquascaping contests are where the hobby's art gets judged seriously — and entering one will improve your aquascaping more than a year of casual tank-keeping. The deadline forces planning, the photography requirement forces presentation, and the judges' feedback (when offered) is a masterclass. Whether you're eyeing the IAPLC, AGA, or your local club's show, this guide explains how judging actually works, what wins, how to enter, and how to photograph and present your tank like a contender.
The Major Contests
- IAPLC (International Aquatic Plants Layout Contest): the world championship, run by ADA in Japan. 2,000+ entries yearly from 70+ countries. One photo per entry, judged blind. Winning it is the hobby's highest honor — and simply placing in the top 100 is a career credential for professional aquascapers.
- AGA (Aquatic Gardeners Association) International Aquascaping Contest: the premier US-based contest, with categories by tank size and style (including biotope and paludarium categories). Excellent feedback culture — judges' comments are published.
- EAPLC / regional contests: European and various national contests (UK, Germany, Brazil, etc.) — smaller fields, better odds, same rigor.
- Biotope Aquarium Project: the dedicated biotope world championship — judged on habitat accuracy as much as beauty. See our biotope guide for entry prep.
- Local club shows: the best starting point — friendly, educational, and judged in person (you learn enormously watching judges discuss tanks).
How Judging Works: The Criteria
Most major contests score on variations of these pillars (IAPLC's published criteria are the reference standard):
- Overall impression / artistic merit (~30%): the gut reaction — does the layout move the viewer? Composition, creativity, emotional impact. This is the largest single factor and the hardest to engineer; it comes from the design fundamentals in our Nature Aquarium, triangle, and concave guides.
- Composition and layout (~25%): the technical execution of design — focal point placement (see focal placement), balance, use of space, depth. Judges spot centered focal points and flat substrates instantly.
- Plant health and condition (~20%): are the plants thriving? Algae on leaves, melting patches, and leggy growth lose points fast. Long-term trimming maintenance is what separates contenders from also-rans.
- Fish and livestock (~10%): appropriate species, good condition, natural behavior, numbers that suit the layout. A wrong-continent fish in a biotope entry, or a single lonely tetra, costs points.
- Originality (~10%): fresh ideas score; copies of famous layouts don't. Judges have seen every Amano homage — homage is fine, imitation is penalized.
- Technical/photography (~5%): the photo itself — exposure, clarity, presentation. A great tank photographed badly loses to a good tank photographed well. Our photography guide is essential pre-contest reading.
Key insight: judges reward completeness. A modest layout executed flawlessly (healthy plants, perfect photo, thoughtful fish) routinely beats an ambitious layout with algae, a crooked photo, and a melting corner. Polish beats ambition.
What Wins: Patterns From Top Rankings
Studying a decade of IAPLC top-100 entries reveals patterns:
- Depth wins. The layouts that place highest almost universally create extraordinary depth — layered topography, forced perspective, atmospheric backgrounds. Flat tanks don't place.
- Restraint wins. Limited palettes (one hardscape material, 6–10 plant species, one accent color) dominate. Busy tanks rarely crack the top ranks.
- Negative space wins. Top entries use open space boldly — the confidence to leave a third of the tank empty signals mastery.
- Naturalism wins (in IAPLC/AGA). Layouts that could plausibly be real places score higher than obviously artificial constructions — with the notable exception of Dutch categories, where formal artifice is the point.
- Fish matter more than people think. A well-chosen school, caught mid-formation in the photo, elevates entries measurably. Photograph the tank 50 times; submit the frame where the fish cooperate.
Preparing an Entry: The Timeline
6+ months out: design and plant the contest tank. Contest layouts are grown, not assembled — judges can tell a 6-week tank from a 6-month one by plant density and maturity.
3 months out: the layout should be structurally complete; now it's refinement — trimming rhythms established, algae under control, fish settled and behaving naturally.
1 month out: peak-condition maintenance. Trim to the photo-ready shape 7–10 days before shooting (fresh cuts need days to look natural), do extra water changes, clean equipment, replace anything worn.
Photo week: shoot across several days at the tank's daily peak (usually mid-photoperiod when plants pearl and fish are active). Take hundreds of frames; judge the best ruthlessly. Clean the glass obsessively — every speck shows at contest resolution.
Submission: follow the rules exactly — file dimensions, no watermarks (most contests), accurate tank-size and equipment data. Disqualification on technicalities is heartbreaking and common.
Common Entry Mistakes
- Entering too early: the tank isn't mature. Wait a year if needed — contests are annual; the tank will be better next year.
- Bad photography: reflections, crooked framing, blown highlights, visible equipment. The photo is the entry — budget as much effort for shooting as for scaping.
- Ignoring the rules: wrong file size, visible brand logos, digitally altered elements (most contests forbid Photoshop beyond basic exposure/color correction — read the rules).
- Copying winners: judges recognize homages to famous layouts instantly. Be inspired, not derivative.
- Neglecting fish: submitting the photo where the school hid behind the filter. Wait for the fish.
- Dirty details: algae on the glass edge, a visible heater, substrate scattered on leaves — judges zoom in. Detail-clean before shooting.
Beyond Winning: Why Enter
- The deadline effect: nothing improves a tank like a submission date. You'll maintain better, trim sharper, and photograph more carefully.
- Feedback: AGA publishes judges' comments; club shows give verbal critiques. Professional-level critique of your tank is invaluable.
- Community: contest season is the hobby's social peak — build threads, speculation, shared excitement. You'll make friends.
- Benchmarking: seeing where your work lands against the field calibrates your eye honestly.
- Portfolio: rankings, even modest ones, credential you for aquascaping work, shop positions, and content creation.
Judging in Person: Club Shows
Local club shows judge differently from photo contests — judges walk the tanks, viewing from multiple angles, and often discuss entries aloud with the audience. This is invaluable education: you hear exactly what experienced eyes notice (the algae on the back glass you stopped seeing, the slightly crooked hardscape, the fish choice that doesn't fit). Prepare differently: clean all glass panels (judges look from the sides), ensure the tank looks good from slightly above (viewing angle at shows), and be present to answer questions — judges appreciate hobbyists who can explain their design decisions. Many club shows use the AGA score sheet, so the criteria above apply directly. And volunteer to clerk (assist) a judging panel once — watching judges score twenty tanks in an afternoon teaches more than entering ten contests.
Frequently Asked Questions
Do I need an expensive tank to place well?
No — contests judge the layout and photo, not the equipment list. Modest tanks place every year; our budget guide's under-$100 build is contest-eligible. What money buys is ease (better light = healthier plants), not points. Design and condition win.
Can I enter the same tank in multiple contests?
Usually yes, unless a contest claims exclusivity (rare). Many aquascapers enter one mature tank in IAPLC, AGA, and regional contests in the same season. Check each contest's rules — some require the photo be taken within a specific window.
How much Photoshop is allowed?
Varies by contest — IAPLC permits basic adjustments (exposure, contrast, color balance, cropping) but forbids adding/removing elements or compositing. AGA is similarly strict. When in doubt, submit the honest frame: a well-shot photo needs little editing, and disqualification for manipulation is permanent reputation damage.
What's the best tank size for contests?
The 60–90cm range dominates entries (manageable maturity, photographable, affordable) — but large tanks have less competition and photograph spectacularly (see our large tank guide). Nano categories exist in most contests and are excellent for first-time entrants: less work to mature, cheaper to build, judged on equal artistic terms.
Should I enter my first tank?
Enter your first mature tank — there's no minimum skill requirement, and the experience (deadline, photography, feedback) accelerates learning enormously. Just calibrate expectations: you're entering to learn and participate, not to win. Every champion's first entry placed nowhere.
How do judges view AI-assisted or heavily staged entries?
Poorly — contests reward living aquascapes maintained over time. Anything that misrepresents the tank (staged temporary arrangements, digital fabrication) violates the spirit and usually the letter of the rules. The community is small; reputations are permanent. Build it, grow it, shoot it honestly.
Enter to Grow
The contest is a forcing function for excellence: it makes you plan like a designer, maintain like a professional, and photograph like an artist. Whether you enter the IAPLC or the county fair's fish show, the process upgrades your aquascaping permanently — win or lose. Build your layout with our composition guides (diagonal, concave, triangle), maintain it with trimming discipline, shoot it with our photography guide, and submit. The worst outcome is a better tank and a learning experience — which is to say, there's no bad outcome.
Tissue-culture plants are the exception — they’re grown in sterile gel and adapt with minimal melting, which is part of what you’re paying for. Plants bought submersed from another hobbyist’s tank also transition with little melt, since they’re already in the right form.
Which Plants Melt Most (and Least)
Heavy melters (expect significant leaf loss)
- Cryptocorynes — infamous for “crypt melt,” sometimes dropping every leaf after any disturbance. They almost always recover from the roots within weeks.
- Stem plants grown emersed — rotala, ludwigia, and hygrophila often shed lower emersed leaves while the growing tips transition.
- Amazon swords — emersed-grown swords typically lose their broad oval aerial leaves and replace them with longer submersed ribbon leaves.
Light melters
- Anubias, java fern, bucephalandra — slow-growing rhizome plants transition gradually; occasional old-leaf melt but rarely dramatic.
- Vallisneria — usually transitions well, though it dislikes the move itself and may sulk for a week.
- Floating plants — minimal melt since their leaves were already at the air-water interface.
The Acclimation Protocol
Step 1: Quarantine or dip first
Before acclimating to your tank’s conditions, make sure you’re not acclimating pests along with the plant. Run new arrivals through our quarantine and dip protocol — it adds days upfront but prevents months of regret.
Step 2: Float to temperature-match (30 minutes)
Float the bag or container in your tank for 20–30 minutes to equalize temperature. Plants are less temperature-sensitive than fish, but a 10°F shock on top of transplant stress is an avoidable insult.
Step 3: Trim before planting
Remove any leaves that are already damaged, yellowing, or heavily algae-covered — they won’t recover and they’ll rot in your tank, feeding algae. For stem plants, trim off the bottom inch and any emersed leaves that look unlikely to adapt; the plant wastes energy maintaining leaves it’s going to shed anyway. Keep the healthy growing tips — that’s where recovery starts.
Step 4: Plant correctly the first time
Follow our planting guide — right depth, crown exposed on rosettes, rhizomes unburied on epiphytes. Every uprooting and replanting restarts the acclimation clock, so get placement right on the first attempt. Decide where each plant goes before it goes in the water.
Step 5: Run a gentle first week
For the first 7 days after planting:
- Moderate light — run your normal photoperiod but consider dropping intensity 20–30% if your light is dimmable. Blast-level light on a melting plant grows algae on the dying leaves, not recovery.
- Stable CO2 — if you inject CO2, keep it consistent. Fluctuating CO2 during acclimation is a melt accelerator. If you’re low-tech, this doesn’t apply — see growing without CO2.
- Half-strength fertilizer — new plants with damaged leaves can’t use full dosing, and the excess feeds algae. Ramp to full strength over 2–3 weeks per our fertilizer schedule.
- No disturbance — don’t move, trim, or “check on” new plants for at least two weeks. Every touch resets root establishment. This is especially critical for crypts.
Step 6: Remove melt, keep the base
As emersed leaves melt, remove the mushy material promptly — decaying leaves release ammonia and grow fungus that can spread to healthy tissue. But never discard the plant while the crown, rhizome, or roots are firm and alive. A crypt that’s lost every leaf but has firm roots is a plant that’s about to recover, not a dead plant. Give it 3–4 weeks before judging.
Telling Normal Melt From Real Problems
Normal transition melt:
- Affects oldest/emersed leaves first, newest growth last
- New submersed leaves emerge even as old ones dissolve
- Roots and crown stay firm and white/green
- Timeline: 1–4 weeks, then obvious new growth
Concerning melt (see our full melting diagnosis guide):
- New growth also melts or emerges deformed
- Rhizome or crown turns mushy and brown — this is rot, not transition
- Entire plant dissolves within days with no new growth after 4+ weeks
- Melting spreads to established plants that weren’t recently moved
Buying Tips to Minimize Melt
- Buy submersed-grown when available — hobbyist-grown cuttings transition with almost no melt.
- Choose tissue culture for sensitive species — crypts and delicate stems establish far more reliably from sterile cups.
- Avoid plants already melting in the store tank — some melt is normal, but a plant that’s mostly mush at purchase has less energy for recovery.
- Transport carefully — keep plants damp and out of direct sun/heat. A plant that dries out or cooks in a hot car melts far worse than one transported properly.
The First-Month Timeline: What to Expect Week by Week
Knowing what’s normal when removes most acclimation anxiety. Here’s the typical timeline for a healthy plant adapting to a new tank:
Week 1: The quiet week
Almost nothing visible happens. The plant is growing roots you can’t see and assessing its new environment. Some species (vallisneria, stem plants) may start shedding their lowest leaves. This is normal. Resist the urge to “help” — no moving, no extra fertilizer, no light changes. The most common beginner mistake is intervening during a week when the correct action is nothing.
Week 2: Melt peaks
This is when emersed leaves give up in earnest. Crypts may drop everything; swords shed their broad aerial leaves; stem plants lose lower foliage. It looks catastrophic and it’s usually fine. Keep removing mushy material, keep conditions stable, and watch the crown and growing tips — if those are firm and green, recovery is already underway.
Week 3: The turn
New submersed-adapted leaves emerge — smaller, thinner, often a slightly different shade of green than the emersed foliage. Stem plant tips start growing visibly; crypts push tiny curled leaves from the crown; swords unfurl narrow ribbon leaves. This is the moment most beginners exhale for the first time.
Week 4+: Established
New growth outpaces melt, and the plant is functionally yours. You can resume full-strength fertilizer, normal trimming, and stop treating it as fragile. Some slow growers (anubias, bucephalandra) take 6–8 weeks to show obvious progress — that’s their normal speed, not a problem.
Acclimating Different Plant Formats
Tissue-culture cups
Sterile, pest-free, and already adapted to high-humidity (not emersed) growth — tissue cultures melt the least of any format. Rinse the agar gel off gently (leftover gel rots and feeds fungus), split the portion into small plantlets, and plant per our planting guide. They establish slowly for the first two weeks, then accelerate. No dip needed, minimal acclimation stress — this is the premium experience you’re paying for.
Potted plants
Remove the pot and strip away the rockwool completely — leftover rockwool traps debris and rots. Tease the root mass apart gently; if it’s a dense mat, splitting it into 2–3 smaller portions actually establishes faster than planting one big clump (more growing points, better water flow around roots). Potted plants are usually emersed-grown, so expect the standard 2–4 week melt cycle.
Bare-root / bunched stems
Typically sold as weighted bunches. Remove any bands, foam, or weights, strip the lower leaves, and plant stems individually or in small groups. Bunched stems from the store are often already transitioning — check for new submersed growth at the tips, which tells you the plant is mid-adaptation and will settle quickly.
Hobbyist cuttings
Already submersed-grown and the fastest to establish — often showing new growth within days. The main acclimation factor is water-parameter difference between the two tanks. Float to temperature-match, plant promptly, and they’ll usually take off with minimal melt. This is why experienced hobbyists prefer trading cuttings over buying potted plants.
Frequently Asked Questions
Should I use a “plant starter” or transplant fertilizer?
Products marketed for transplant shock are mostly B-vitamins and mild hormones. They don’t hurt, but there’s no strong evidence they help aquarium plants specifically. Stable conditions and patience outperform any bottle. Save the money for more plants.
My new plant melted completely — bare crown, no leaves. Is it dead?
Probably not, if the crown or rhizome is firm. Crypts and swords routinely lose 100% of their leaves and regrow from the base within a month. The test is firmness: firm and pale/green means alive; mushy and brown/black means rot. Give firm-but-leafless plants a full 4 weeks before declaring them dead.
Can I speed up acclimation with extra light or CO2?
No — and trying usually backfires. A melting plant can’t use extra light; the excess just grows algae on its dying leaves. Keep light moderate and CO2 stable (not boosted) during acclimation. Growth speed comes from the plant’s own adaptation timeline, which you can’t rush, only avoid delaying.
Should new plants go straight into my main display tank?
After quarantine/dipping, yes — there’s no benefit to a separate “growing-in” tank for most plants. They acclimate to your water fastest in the tank they’ll live in. The exception is very delicate species going into a tank with boisterous fish; give those a few weeks in a calm corner or breeder box first.
The Patience Rule
The single most important acclimation skill is restraint: plant it right, set gentle conditions, remove decay, and then leave it alone for a month. The hobbyists with the best plant growth aren’t doing something clever in week one — they’re simply not interfering in weeks two through four while the plants do what they’ve evolved to do. Melt looks like failure and feels like failure, but in most cases it’s the visible part of a plant successfully becoming yours.