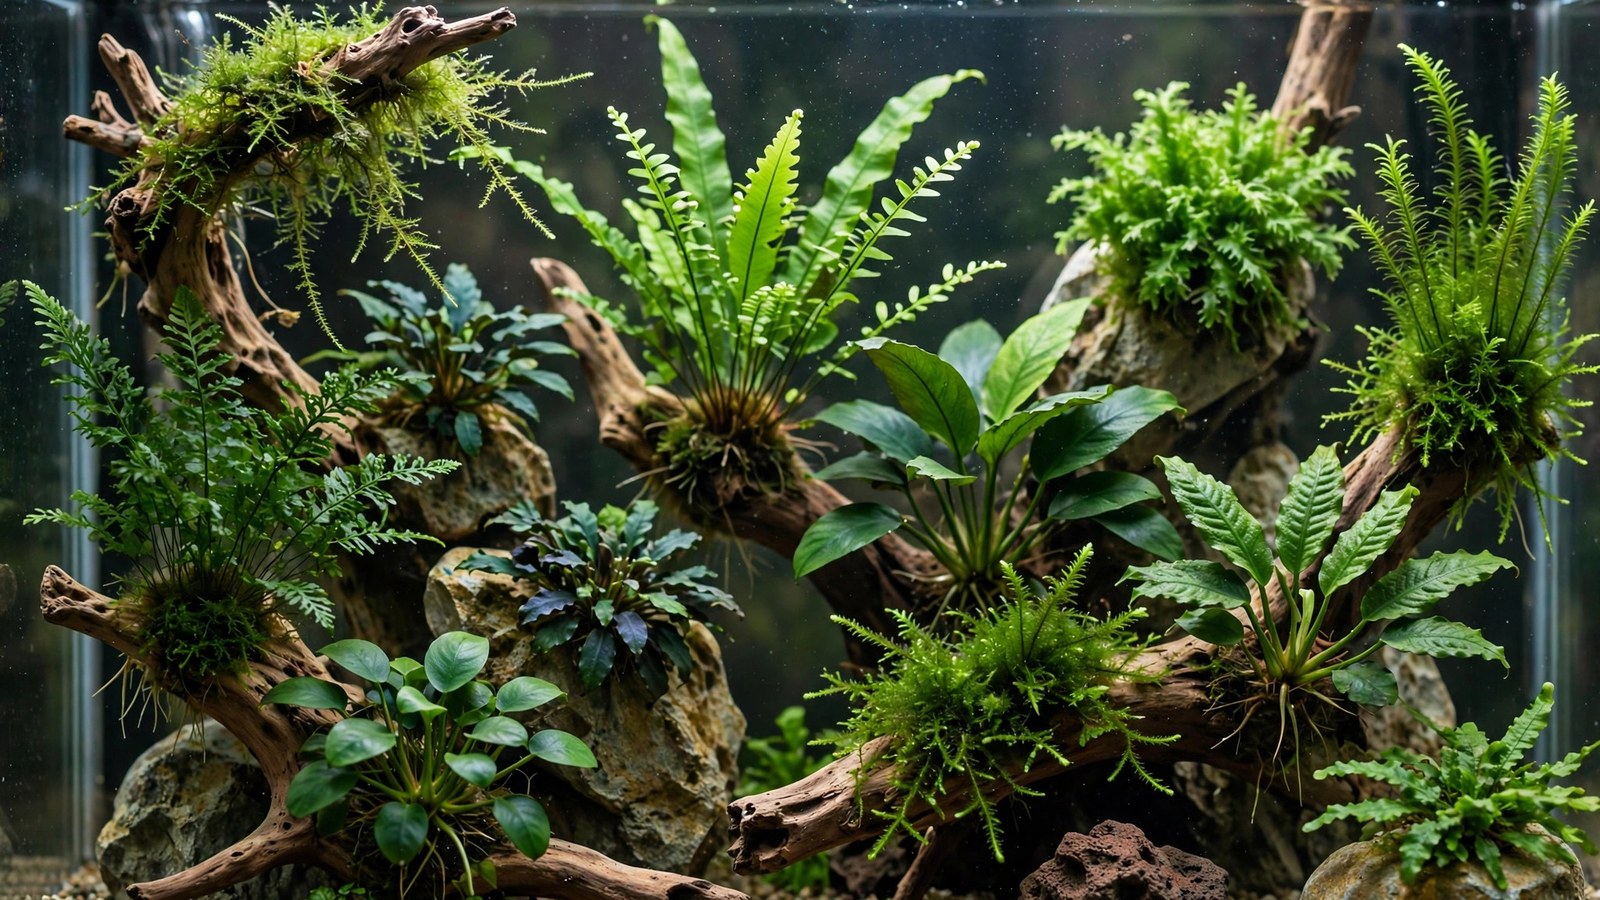
Epiphytes are the cheat code of aquascaping: plants that grow attached to wood and rock instead of planted in substrate. No planting depth to get wrong, no root tabs, no uprooting disasters — you glue or tie them to hardscape and they take care of the rest. Anubias, java fern, and bucephalandra are the famous trio, but the epiphyte world is bigger and more interesting than that. These are the 11 best epiphyte aquarium plants that never need planting.
What Is an Epiphyte?
In nature, epiphytic aquarium plants grow attached to submerged wood, rocks, and riverbanks — never rooted in soil. They anchor with a thick horizontal rhizome (a stem-like structure) from which leaves grow upward and roots dangle down to grip surfaces. Those dangling roots absorb nutrients directly from the water, which is why epiphytes feed from the water column and couldn't care less about your substrate.
The golden rule: never bury the rhizome. A buried rhizome rots, and rhizome rot kills the plant. Attach epiphytes to hardscape with the rhizome fully exposed to water flow, and they'll thrive for years — many anubias in the hobby are decades old.
How to Attach Epiphytes
Cyanoacrylate superglue (gel)
The fastest method: dab gel superglue on the rhizome or roots, press onto dry-ish wood or rock for 30 seconds, done. It's aquarium-safe once cured (seconds), and the plant grows over the glue spot. Use the gel type — liquid runs everywhere. This is how most aquascapers attach anubias and buce today.
Tie with thread or fishing line
The traditional method: loosely tie the rhizome to wood with cotton thread (dissolves over months) or fishing line (remove later). Don't strangle the rhizome — snug, not tight. Roots will grip the surface within weeks.
Wedge into cracks
The laziest method and often the best: jam the rhizome into a crevice in driftwood or between rocks. No glue, no thread, completely natural. Works beautifully for java fern and anubias nana in textured wood.
For a full walkthrough with photos of each method, epiphytes are the stars of our no-substrate planting guide.
The 11 Best Epiphyte Aquarium Plants
1. Anubias barteri var. nana
The most popular aquarium plant in the world for good reason. Anubias nana is nearly indestructible: it tolerates low light, ignores water parameters, grows slowly but forever, and fish leave it alone thanks to tough bitter leaves. Attach to wood or rock; expect a new leaf every few weeks. The "petite" variant stays under 2 inches for nano tanks and foreground hardscape detail.
2. Java Fern (Microsorum pterotoides)
The classic epiphyte — broad green leaves on a creeping rhizome, undemanding and long-lived. Java fern propagates by growing baby plants on the undersides of old leaves; when plantlets develop roots, pluck them off and attach elsewhere. Variants like 'Windelov' (split leaf tips) and 'Trident' (narrow forked leaves) add texture variety. Tough enough for goldfish tanks and cichlid tanks where other plants get eaten.
3. Bucephalandra 'Wavy Green'
Buce (from Borneo) is the connoisseur's epiphyte: small, slow-growing, with waxy leaves that shimmer blue-green to purple under good light. 'Wavy Green' is the hardiest and most affordable variety — a good first buce. All buce grows slowly (patience required) and appreciates stable conditions, but it's no harder than anubias. Keep it shaded; direct bright light invites algae on its slow leaves.
4. Anubias barteri (standard)
The big brother of nana — broad 4-inch leaves on a thick rhizome, growing into an impressive specimen over years. Perfect for large driftwood pieces and cichlid or goldfish tanks where its leathery leaves survive abuse. One of the longest-lived plants you can buy; specimens decades old exist in the hobby.
5. Java Moss (Taxiphyllum barbieri)
Strictly speaking a moss rather than a rhizome plant, but functionally an epiphyte: tie it to wood or rock and it creeps into a lush green carpet of texture. Java moss is the most forgiving moss in the hobby — it grows in almost any conditions, provides fry and shrimp shelter, and propagates by division. Our aquarium moss comparison covers java moss against its fancier cousins.
6. Bolbitis heudelotii (African Water Fern)
A larger, more dramatic fern with translucent dark-green fronds that wave beautifully in current. Bolbitis wants what most epiphytes want — shade, flow, stable water — but is fussier about sudden changes; it may shed leaves when introduced, then regrow adapted foliage. Superb on tall driftwood in larger tanks, where its size (up to 16 inches) makes a statement.
7. Bucephalandra 'Kedagang'
A step up in the buce world: longer, narrower rippled leaves with reddish-brown new growth. Slightly more light-hungry than 'Wavy Green' but still easy by buce standards. Its distinctive leaf shape adds variety to a hardscape planted with rounder anubias. As with all buce, buy from reputable sellers — mislabeled varieties are common.
8. Anubias 'Coffeefolia'
An anubias with deeply puckered, textured leaves that look almost quilted — dramatic texture contrast against smooth-leaved tankmates. Grows larger than nana (6–10 inches), making it a midground hardscape plant. Same bulletproof care as all anubias: attach, shade lightly, ignore.
9. Creeping Jenny? No — Hydrocotyle tripartita (as epiphyte)
Usually grown planted, but Hydrocotyle tripartita also creeps beautifully over wood and rock as a semi-epiphyte, its clover-like leaves cascading down hardscape. Wedge stems into crevices and it spreads into a living waterfall of green. Faster-growing than true rhizome epiphytes, so it fills hardscape quickly — trim regularly to keep it in bounds.
10. Fissidens fontanus (Phoenix Moss)
The most beautiful moss for hardscape: tiny feather-like fronds that grow in neat, slow-spreading patches on wood and rock. Phoenix moss is slower than java moss but far more refined-looking — it doesn't get stringy. Superb for detail work on bonsai-style driftwood trees. Attach with glue; it grips within weeks.
11. Anubias 'Pangolino'
The tiniest anubias — leaves the size of a fingernail on a miniature rhizome. Pangolino is a specialist plant for nano tanks and detailed hardscape work, creating the illusion of scale on small wood pieces. Slow and a bit pricier than nana petite, but unmatched for tiny-scale aquascaping.
Epiphyte Care: The Essentials
Light: less is more
Nearly all epiphytes evolved in shaded forest streams. Moderate to low light keeps them healthy; strong direct light grows algae on their slow leaves faster than the leaves grow. If algae coats your anubias, the fix is usually less light or more shade from floating plants — see our floating plants guide for natural shading options — not more fertilizer.
Feed the water column
Epiphytes eat from the water, so a comprehensive liquid fertilizer is their food. Dose lightly but regularly; they're slow growers with modest appetites. They also appreciate the gentle flow that delivers nutrients to their leaves — position them where the filter current passes, not in dead spots.
Clean the leaves
Slow leaves accumulate biofilm and algae. During water changes, gently brush anubias and fern leaves with a soft toothbrush, or let algae-eating shrimp and otocinclus graze them. A leaf too far gone (covered, melting) should be cut at the rhizome — the plant will replace it.
Watch for rhizome rot
If a rhizome turns brown and mushy, cut away ALL soft tissue back to firm green rhizome, even if that means a tiny fragment remains — firm fragments regrow. Rhizome rot spreads, so act fast. It's almost always caused by burial, physical damage, or prolonged poor water quality.
Designing with Epiphytes
Epiphytes are hardscape plants — think in terms of decorating wood and rock, not filling substrate zones. The classic approach: anubias nana and buce clustered at the base and forks of driftwood, java fern masses on the upper branches, moss softening every joint and edge. This creates the aged, overgrown look that wins aquascaping contests.
Combine epiphytes on hardscape with stem plants in the background and rosettes in the midground for a complete three-layer aquascape where every plant is in its ideal position. Epiphytes also shine in tanks where planting is impossible — bare-bottom breeding tanks, turtle tanks (see plants for turtle tanks), and cichlid setups.
Frequently Asked Questions
Can I just drop anubias in the tank without attaching it?
It'll survive floating or resting on the substrate, but it won't thrive — unattached plants tumble around, get buried, and grow poorly. Attachment takes 30 seconds with superglue gel and transforms results. Even just wedging the rhizome into a crack is enough; the plant does the gripping from there. Tropica's plant database notes which species grow best attached versus planted.
Is superglue really safe for aquariums?
Yes — cyanoacrylate gel is the aquascaping standard and cures inert within seconds underwater. Use plain gel without added fragrances or "antibacterial" claims. Apply outside the tank or with the hardscape briefly lifted out, press for 30 seconds, and it's done. Millions of aquascapes are held together with it.
Why is my java fern growing plantlets on its leaves?
That's reproduction, not disease — java fern grows baby plants on mature leaves, especially when it's happy (or occasionally when stressed). Wait until plantlets have several leaves and visible roots, then gently pluck them off and attach them elsewhere. Free plants, courtesy of your fern.
Do epiphytes need CO2?
No — all the plants on this list thrive without injected CO2. They're slow growers adapted to shaded streams, and their modest metabolism is easily fed by a low-tech tank. CO2 speeds their growth somewhat, but the difference is far less dramatic than with stem plants or carpets. For more no-CO2 options, see our easiest no-CO2 plants.
My anubias leaves are turning yellow — what should I do?
Check the rhizome first: firm and green means a nutrient or light issue; mushy and brown means rhizome rot (cut back to firm tissue immediately). Yellowing on a firm rhizome usually means too much light (move to shade) or a general nutrient shortage (start liquid fertilizer). Old leaves yellowing one at a time is normal aging — remove them at the rhizome.
Can epiphytes grow emersed or in a paludarium?
Many can — anubias, buce, and mosses grow beautifully emersed in humid setups, often flowering. Keep humidity high and the rhizome moist. This is also how most commercial stock is grown, which is why store-bought epiphytes transition to submerged life with minimal melting compared to stem plants.
Never Plant Again (Unless You Want To)
Epiphytes free you from the substrate entirely — glue a rhizome to a beautiful piece of wood, and you have a permanent, evolving decoration that outlives most other plants in the tank. Start with anubias nana and java fern, graduate to buce when you're feeling fancy, and let moss soften every edge. Your hardscape will never look bare again.
Tissue-culture plants are the exception — they’re grown in sterile gel and adapt with minimal melting, which is part of what you’re paying for. Plants bought submersed from another hobbyist’s tank also transition with little melt, since they’re already in the right form.
Which Plants Melt Most (and Least)
Heavy melters (expect significant leaf loss)
- Cryptocorynes — infamous for “crypt melt,” sometimes dropping every leaf after any disturbance. They almost always recover from the roots within weeks.
- Stem plants grown emersed — rotala, ludwigia, and hygrophila often shed lower emersed leaves while the growing tips transition.
- Amazon swords — emersed-grown swords typically lose their broad oval aerial leaves and replace them with longer submersed ribbon leaves.
Light melters
- Anubias, java fern, bucephalandra — slow-growing rhizome plants transition gradually; occasional old-leaf melt but rarely dramatic.
- Vallisneria — usually transitions well, though it dislikes the move itself and may sulk for a week.
- Floating plants — minimal melt since their leaves were already at the air-water interface.
The Acclimation Protocol
Step 1: Quarantine or dip first
Before acclimating to your tank’s conditions, make sure you’re not acclimating pests along with the plant. Run new arrivals through our quarantine and dip protocol — it adds days upfront but prevents months of regret.
Step 2: Float to temperature-match (30 minutes)
Float the bag or container in your tank for 20–30 minutes to equalize temperature. Plants are less temperature-sensitive than fish, but a 10°F shock on top of transplant stress is an avoidable insult.
Step 3: Trim before planting
Remove any leaves that are already damaged, yellowing, or heavily algae-covered — they won’t recover and they’ll rot in your tank, feeding algae. For stem plants, trim off the bottom inch and any emersed leaves that look unlikely to adapt; the plant wastes energy maintaining leaves it’s going to shed anyway. Keep the healthy growing tips — that’s where recovery starts.
Step 4: Plant correctly the first time
Follow our planting guide — right depth, crown exposed on rosettes, rhizomes unburied on epiphytes. Every uprooting and replanting restarts the acclimation clock, so get placement right on the first attempt. Decide where each plant goes before it goes in the water.
Step 5: Run a gentle first week
For the first 7 days after planting:
- Moderate light — run your normal photoperiod but consider dropping intensity 20–30% if your light is dimmable. Blast-level light on a melting plant grows algae on the dying leaves, not recovery.
- Stable CO2 — if you inject CO2, keep it consistent. Fluctuating CO2 during acclimation is a melt accelerator. If you’re low-tech, this doesn’t apply — see growing without CO2.
- Half-strength fertilizer — new plants with damaged leaves can’t use full dosing, and the excess feeds algae. Ramp to full strength over 2–3 weeks per our fertilizer schedule.
- No disturbance — don’t move, trim, or “check on” new plants for at least two weeks. Every touch resets root establishment. This is especially critical for crypts.
Step 6: Remove melt, keep the base
As emersed leaves melt, remove the mushy material promptly — decaying leaves release ammonia and grow fungus that can spread to healthy tissue. But never discard the plant while the crown, rhizome, or roots are firm and alive. A crypt that’s lost every leaf but has firm roots is a plant that’s about to recover, not a dead plant. Give it 3–4 weeks before judging.
Telling Normal Melt From Real Problems
Normal transition melt:
- Affects oldest/emersed leaves first, newest growth last
- New submersed leaves emerge even as old ones dissolve
- Roots and crown stay firm and white/green
- Timeline: 1–4 weeks, then obvious new growth
Concerning melt (see our full melting diagnosis guide):
- New growth also melts or emerges deformed
- Rhizome or crown turns mushy and brown — this is rot, not transition
- Entire plant dissolves within days with no new growth after 4+ weeks
- Melting spreads to established plants that weren’t recently moved
Buying Tips to Minimize Melt
- Buy submersed-grown when available — hobbyist-grown cuttings transition with almost no melt.
- Choose tissue culture for sensitive species — crypts and delicate stems establish far more reliably from sterile cups.
- Avoid plants already melting in the store tank — some melt is normal, but a plant that’s mostly mush at purchase has less energy for recovery.
- Transport carefully — keep plants damp and out of direct sun/heat. A plant that dries out or cooks in a hot car melts far worse than one transported properly.
The First-Month Timeline: What to Expect Week by Week
Knowing what’s normal when removes most acclimation anxiety. Here’s the typical timeline for a healthy plant adapting to a new tank:
Week 1: The quiet week
Almost nothing visible happens. The plant is growing roots you can’t see and assessing its new environment. Some species (vallisneria, stem plants) may start shedding their lowest leaves. This is normal. Resist the urge to “help” — no moving, no extra fertilizer, no light changes. The most common beginner mistake is intervening during a week when the correct action is nothing.
Week 2: Melt peaks
This is when emersed leaves give up in earnest. Crypts may drop everything; swords shed their broad aerial leaves; stem plants lose lower foliage. It looks catastrophic and it’s usually fine. Keep removing mushy material, keep conditions stable, and watch the crown and growing tips — if those are firm and green, recovery is already underway.
Week 3: The turn
New submersed-adapted leaves emerge — smaller, thinner, often a slightly different shade of green than the emersed foliage. Stem plant tips start growing visibly; crypts push tiny curled leaves from the crown; swords unfurl narrow ribbon leaves. This is the moment most beginners exhale for the first time.
Week 4+: Established
New growth outpaces melt, and the plant is functionally yours. You can resume full-strength fertilizer, normal trimming, and stop treating it as fragile. Some slow growers (anubias, bucephalandra) take 6–8 weeks to show obvious progress — that’s their normal speed, not a problem.
Acclimating Different Plant Formats
Tissue-culture cups
Sterile, pest-free, and already adapted to high-humidity (not emersed) growth — tissue cultures melt the least of any format. Rinse the agar gel off gently (leftover gel rots and feeds fungus), split the portion into small plantlets, and plant per our planting guide. They establish slowly for the first two weeks, then accelerate. No dip needed, minimal acclimation stress — this is the premium experience you’re paying for.
Potted plants
Remove the pot and strip away the rockwool completely — leftover rockwool traps debris and rots. Tease the root mass apart gently; if it’s a dense mat, splitting it into 2–3 smaller portions actually establishes faster than planting one big clump (more growing points, better water flow around roots). Potted plants are usually emersed-grown, so expect the standard 2–4 week melt cycle.
Bare-root / bunched stems
Typically sold as weighted bunches. Remove any bands, foam, or weights, strip the lower leaves, and plant stems individually or in small groups. Bunched stems from the store are often already transitioning — check for new submersed growth at the tips, which tells you the plant is mid-adaptation and will settle quickly.
Hobbyist cuttings
Already submersed-grown and the fastest to establish — often showing new growth within days. The main acclimation factor is water-parameter difference between the two tanks. Float to temperature-match, plant promptly, and they’ll usually take off with minimal melt. This is why experienced hobbyists prefer trading cuttings over buying potted plants.
Frequently Asked Questions
Should I use a “plant starter” or transplant fertilizer?
Products marketed for transplant shock are mostly B-vitamins and mild hormones. They don’t hurt, but there’s no strong evidence they help aquarium plants specifically. Stable conditions and patience outperform any bottle. Save the money for more plants.
My new plant melted completely — bare crown, no leaves. Is it dead?
Probably not, if the crown or rhizome is firm. Crypts and swords routinely lose 100% of their leaves and regrow from the base within a month. The test is firmness: firm and pale/green means alive; mushy and brown/black means rot. Give firm-but-leafless plants a full 4 weeks before declaring them dead.
Can I speed up acclimation with extra light or CO2?
No — and trying usually backfires. A melting plant can’t use extra light; the excess just grows algae on its dying leaves. Keep light moderate and CO2 stable (not boosted) during acclimation. Growth speed comes from the plant’s own adaptation timeline, which you can’t rush, only avoid delaying.
Should new plants go straight into my main display tank?
After quarantine/dipping, yes — there’s no benefit to a separate “growing-in” tank for most plants. They acclimate to your water fastest in the tank they’ll live in. The exception is very delicate species going into a tank with boisterous fish; give those a few weeks in a calm corner or breeder box first.
The Patience Rule
The single most important acclimation skill is restraint: plant it right, set gentle conditions, remove decay, and then leave it alone for a month. The hobbyists with the best plant growth aren’t doing something clever in week one — they’re simply not interfering in weeks two through four while the plants do what they’ve evolved to do. Melt looks like failure and feels like failure, but in most cases it’s the visible part of a plant successfully becoming yours.