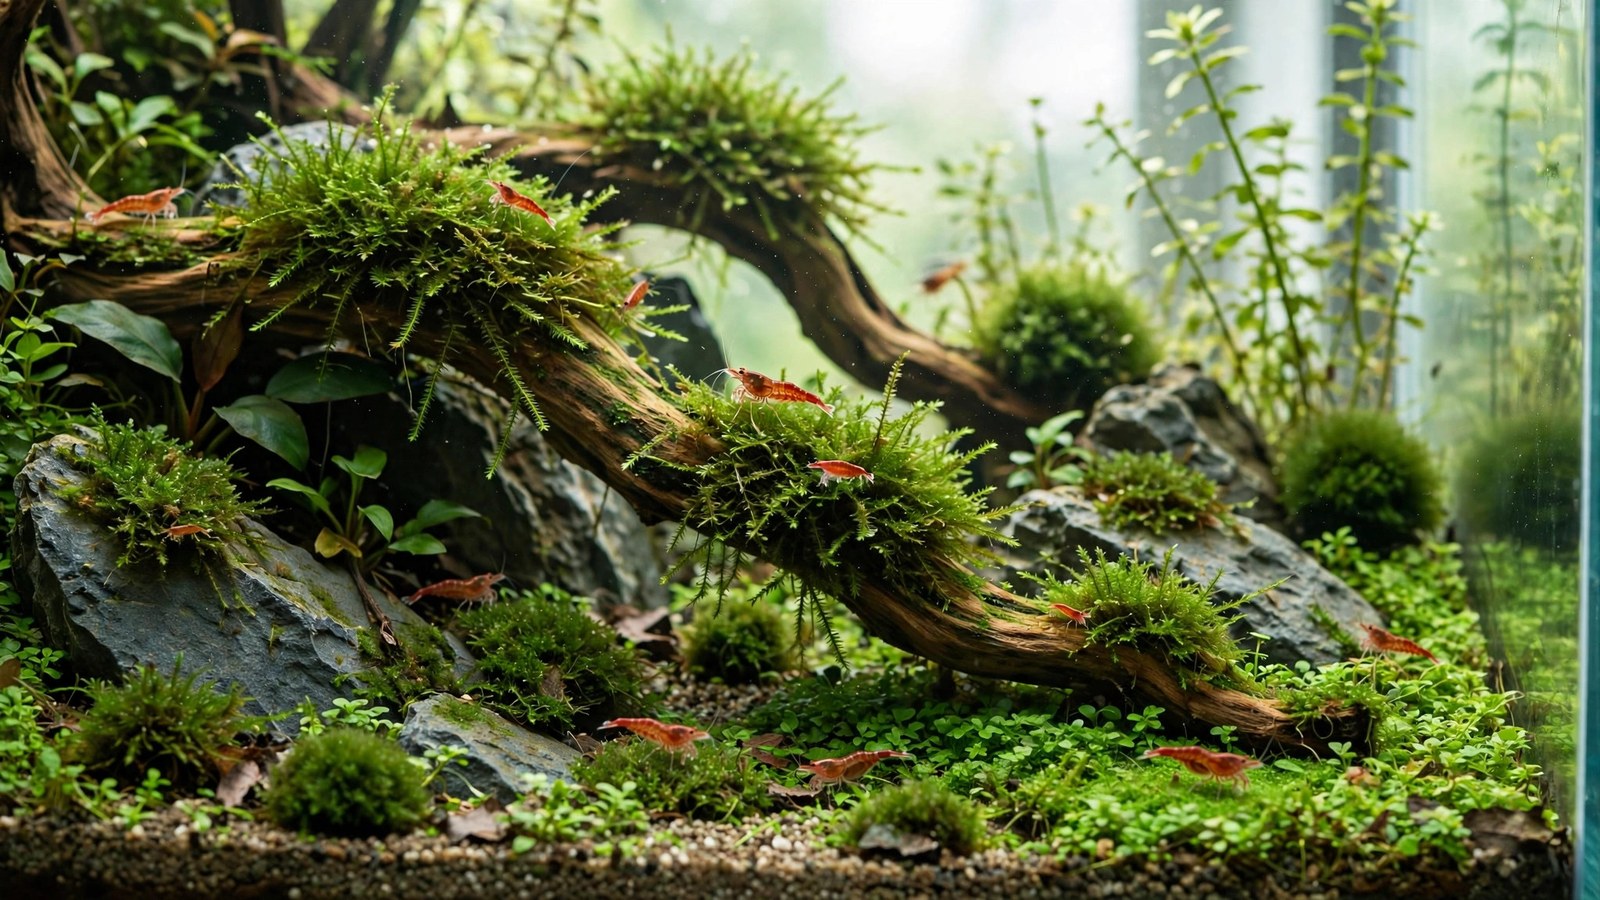
Shrimp are the perfect aquascaping livestock — tiny, colorful, constantly active — but they have specific needs that generic planted layouts ignore. Shrimp tank aquascaping is about grazing surface: every leaf, moss frond, and biofilm-coated stone is a pasture, and the best shrimp tanks maximize edible surface area while providing the hiding places that make shrimp bold. Get the scape right and your colony explodes; get it wrong and expensive shrimp hide forever. Here's how to scape for shrimp.
What Shrimp Need From a Layout
- Grazing surface: shrimp eat biofilm and aufwuchs off surfaces. Mosses, fine-leaf plants, cholla wood, leaf litter, and textured stone maximize the menu. A bare tank starves shrimp; a mossy jungle feeds them.
- Hiding places: paradoxically, shrimp that can hide are shrimp you'll see — security makes them bold. Dense moss, caves, and plant thickets give berried females and fresh molts refuge.
- Molting safety: freshly molted shrimp are soft and vulnerable for hours. They need immediate cover within centimeters of wherever they molt — which means cover everywhere, not one hide on the far side.
- Stable parameters: shrimp (especially Caridina) demand stability. Layouts should accommodate gentle filtration, avoid parameter-swinging hardscape (no pH-spiking rocks for Caridina), and keep maintenance low-disturbance.
- Baby survival: shrimplets are nearly microscopic. Fine mosses and dense carpets are nurseries; open water with hungry fish is a graveyard. Shrimp-first tanks often skip fish entirely.
The Moss-First Philosophy
If shrimp tanks have a signature plant, it's moss — and lots of it. Mosses (java, Christmas, weeping, peacock, flame) provide the holy trinity: grazing surface (biofilm colonizes every frond), hiding places (dense enough for shrimplets), and nursery habitat. A shrimp tank should have moss on wood, stone, and in free-floating clumps.
Moss placement strategy:
- On hardscape: tie or glue moss to every wood branch and stone face — see our driftwood attachment and rock attachment guides. Moss-covered hardscape is a continuous pasture.
- Moss walls/ledges: mesh panels of moss on the back glass create a living wall — enormous surface area in zero footprint.
- Free clumps: loose moss balls or clumps on the substrate become shrimplet nurseries; babies vanish into them and emerge weeks later as juveniles.
- Trim lightly: moss in shrimp tanks gets trimmed less than in show tanks — density is the point. Thin only when it's trapping detritus. Our trimming guide covers the technique; apply it sparingly here.
Hardscape for Shrimp: Texture Is Food
- Driftwood: the #1 shrimp hardscape. Wood grows biofilm continuously, provides climbing structure, and leaches beneficial tannins. Cholla wood is the shrimp-keeper's secret — its porous skeleton is pure grazing surface and perfect shrimplet shelter. Mopani, spider wood, and red moor all work; see single-wood layouts for composition.
- Stones: textured, pitted stones (dragon stone/Ohko is ideal — every pit is a micro-cave) beat smooth pebbles. Stack small caves and crevices; shrimp queue for them after molting.
- Leaf litter: catappa, oak, or guava leaves on the substrate — shrimp graze the biofilm as leaves decompose, and babies shelter underneath. The blackwater guide covers botanical selection; shrimp tanks use the same leaves for food rather than tint.
- Botanical pods: alder cones, seed pods (lotus, sterculia) — decorative, biofilm-covered, and shrimplet-sized shelters.
Substrate: active buffering soil (aquasoil) for Caridina (crystal shrimp need pH 5.8–6.8, which buffering soil provides); inert sand or gravel is fine for Neocaridina (cherries prefer pH 7+). Dark substrate makes shrimp colors pop and shows off berried females. Keep it 2–4 cm — deep enough for plants, shallow enough to siphon easily.
Plant Selection: The Shrimp Palette
- Mosses (all): the foundation — discussed above, can't have too much.
- Anubias 'Petite' / nana: broad leaves are grazing platforms; shrimp line up on them like diners at a counter.
- Bucephalandra: same role, smaller scale, often more colorful.
- Java fern: tall fronds add vertical grazing; plantlets on leaf tips become bonus plants.
- Subwassertang / Süsswassertang: the shrimplet nursery champion — its folded, liverwort-like structure is impenetrable to predators and crawling with infusoria.
- Floating plants: frogbit, Salvinia, red root floaters — roots dangle as mid-water grazing; they also diffuse light (shrimp prefer dimmer tanks) and absorb nitrates.
- Carpeting plants: Monte Carlo or Marsilea carpets harbor shrimplets; HC Cuba works but its fine texture traps detritus — keep it trimmed.
- Avoid: anything needing constant uprooting/replanting (disturbance stresses shrimp), copper-containing fertilizers or medications (copper kills invertebrates — check every product label), and CO2 levels pushed to the limit (shrimp prefer moderate CO2; keep drop checkers green, never yellow).
Layout Templates for Shrimp Tanks
The moss mountain (5–10 gal)
A central mound of dragon stone completely mossed over, carpet around the base, leaf litter scattered — a grazing volcano. Simple, maximal surface area, endlessly watchable. Our island-style guide is the compositional parent.
The root maze (10–20 gal)
Tangled red moor or spider wood across the tank, moss on every branch, Anubias in the forks, subwassertang draped in the shadows. Shrimp patrol the branches like monkeys in a canopy. Superb for larger colonies — the 3D structure multiplies usable space.
The leaf-litter flat (any size)
Minimalist: sand, scattered botanicals, a few mossy stones, floating plants above. Inspired by biotope stream beds. Less "designed" but biologically rich — shrimplets thrive in litter. The connoisseur's choice.
The Dutch shrimp farm (10+ gal)
Ordered plant rows Dutch-style but shrimp-optimized: moss between rows, no stem replanting churn (use slow growers), heavy floaters. Proves production tanks can be beautiful.
Filtration, Flow, and Safety
- Sponge filters are the shrimp standard — gentle flow, no intake to suck up babies, and the sponge itself is a grazing surface. Run one per 10 gallons.
- HOB/canister intakes need pre-filter sponges — shrimplets will find unprotected intakes.
- Gentle flow: shrimp hate blasting current; baffle outflows and aim for slow circulation.
- Lids: shrimp (especially Amanos) climb out. Keep a tight lid with no gaps around filter and heater cords.
- Copper-free everything: fertilizers, medications, algaecides — read labels. What's safe for fish kills shrimp.
- Drip acclimation: new shrimp get 1–2 hour drip acclimation, always. Parameter shock is the #1 killer of mail-order shrimp.
Cycling for Shrimp: Biofilm Before Livestock
Shrimp tanks must mature longer than fish tanks before stocking — you're not just cycling the filter, you're growing the pasture. Run the fully scaped tank for 4–6 weeks: the nitrogen cycle establishes in the first 2–3 weeks (verify with tests: ammonia and nitrite at zero), but the biofilm shrimp graze on needs weeks 4–6 to colonize every moss frond and wood surface. Speed it up with bacter-starter products, a pinch of powdered shrimp food every few days (feeds the biofilm), and leaves added from day one. The readiness test: wood surfaces feel slightly slimy, moss looks "dusty" with micro-life, and if you added a few pest snails early, they're visibly grazing everywhere. Only then drip-acclimate your shrimp. Adding $50 of Caridina to a sterile week-old tank is the hobby's most expensive impatience — the shrimp survive the cycle but starve on bare surfaces.
Frequently Asked Questions
Neocaridina or Caridina for my first shrimp tank?
Neocaridina (cherry shrimp and color morphs): hardy, breed in tap water, forgive beginner mistakes — start here. Caridina (crystal red/black, Taiwan bees): stunning but demand RO water, buffering soil, and tight parameters. Master cherries for six months before attempting crystals. The scaping principles are identical; only the water chemistry differs.
Can I keep fish with shrimp?
Small, peaceful micro-fish (ember tetras, chili rasboras, otos) in a heavily planted tank — adults coexist fine, but expect shrimplet predation; the colony grows slower. For maximum breeding, go fishless. Never keep anything big enough to eat adult shrimp, and avoid long-finned or aggressive species regardless of size.
How many shrimp should I start with?
10–15 of one color morph. They breed readily in good conditions, and a colony of 100+ within a year is normal. Starting with mixed colors produces wild-type brown offspring within generations — pick one color line and commit if you want the colony to stay red/blue/yellow.
Why are my shrimp hiding all the time?
Usually: too little cover (paradoxically — insecure shrimp hide; secure shrimp parade), recent parameter swing, predators (even "peaceful" fish), or they're new (give them a week). Add more moss and leaf litter, check parameters, and observe at night with a dim flashlight — "hiding" shrimp are often just nocturnal.
Do shrimp tanks need CO2?
Not for the shrimp — mosses, Anubias, ferns, and floaters (the shrimp palette) thrive without it. CO2 is fine at moderate levels if you want demanding plants too, but keep it conservative: shrimp are more sensitive to CO2/pH swings than fish. Many award-winning shrimp tanks are low-tech.
How often should I do water changes in a shrimp tank?
Small and frequent beats large and rare: 10% weekly with parameter-matched water (same temperature, same GH/KH — remineralized RO for Caridina). Shrimp molt on environmental cues; a big water change can trigger mass molting, which is stressful. Consistency is the religion.
Scape for Grazing, Reap the Colony
The shrimp tank formula is simple: moss everywhere, textured hardscape, leaf litter, gentle filtration, copper-free everything, and the patience to let biofilm mature before adding livestock (cycle the tank 4–6 weeks — the biofilm needs to grow first). Do that, and a $30 starter colony becomes a self-sustaining city of hundreds. For the photographic side of tiny livestock, our aquascape photography guide includes macro tips — shrimp close-ups are some of the most rewarding shots in the hobby.
Tissue-culture plants are the exception — they’re grown in sterile gel and adapt with minimal melting, which is part of what you’re paying for. Plants bought submersed from another hobbyist’s tank also transition with little melt, since they’re already in the right form.
Which Plants Melt Most (and Least)
Heavy melters (expect significant leaf loss)
- Cryptocorynes — infamous for “crypt melt,” sometimes dropping every leaf after any disturbance. They almost always recover from the roots within weeks.
- Stem plants grown emersed — rotala, ludwigia, and hygrophila often shed lower emersed leaves while the growing tips transition.
- Amazon swords — emersed-grown swords typically lose their broad oval aerial leaves and replace them with longer submersed ribbon leaves.
Light melters
- Anubias, java fern, bucephalandra — slow-growing rhizome plants transition gradually; occasional old-leaf melt but rarely dramatic.
- Vallisneria — usually transitions well, though it dislikes the move itself and may sulk for a week.
- Floating plants — minimal melt since their leaves were already at the air-water interface.
The Acclimation Protocol
Step 1: Quarantine or dip first
Before acclimating to your tank’s conditions, make sure you’re not acclimating pests along with the plant. Run new arrivals through our quarantine and dip protocol — it adds days upfront but prevents months of regret.
Step 2: Float to temperature-match (30 minutes)
Float the bag or container in your tank for 20–30 minutes to equalize temperature. Plants are less temperature-sensitive than fish, but a 10°F shock on top of transplant stress is an avoidable insult.
Step 3: Trim before planting
Remove any leaves that are already damaged, yellowing, or heavily algae-covered — they won’t recover and they’ll rot in your tank, feeding algae. For stem plants, trim off the bottom inch and any emersed leaves that look unlikely to adapt; the plant wastes energy maintaining leaves it’s going to shed anyway. Keep the healthy growing tips — that’s where recovery starts.
Step 4: Plant correctly the first time
Follow our planting guide — right depth, crown exposed on rosettes, rhizomes unburied on epiphytes. Every uprooting and replanting restarts the acclimation clock, so get placement right on the first attempt. Decide where each plant goes before it goes in the water.
Step 5: Run a gentle first week
For the first 7 days after planting:
- Moderate light — run your normal photoperiod but consider dropping intensity 20–30% if your light is dimmable. Blast-level light on a melting plant grows algae on the dying leaves, not recovery.
- Stable CO2 — if you inject CO2, keep it consistent. Fluctuating CO2 during acclimation is a melt accelerator. If you’re low-tech, this doesn’t apply — see growing without CO2.
- Half-strength fertilizer — new plants with damaged leaves can’t use full dosing, and the excess feeds algae. Ramp to full strength over 2–3 weeks per our fertilizer schedule.
- No disturbance — don’t move, trim, or “check on” new plants for at least two weeks. Every touch resets root establishment. This is especially critical for crypts.
Step 6: Remove melt, keep the base
As emersed leaves melt, remove the mushy material promptly — decaying leaves release ammonia and grow fungus that can spread to healthy tissue. But never discard the plant while the crown, rhizome, or roots are firm and alive. A crypt that’s lost every leaf but has firm roots is a plant that’s about to recover, not a dead plant. Give it 3–4 weeks before judging.
Telling Normal Melt From Real Problems
Normal transition melt:
- Affects oldest/emersed leaves first, newest growth last
- New submersed leaves emerge even as old ones dissolve
- Roots and crown stay firm and white/green
- Timeline: 1–4 weeks, then obvious new growth
Concerning melt (see our full melting diagnosis guide):
- New growth also melts or emerges deformed
- Rhizome or crown turns mushy and brown — this is rot, not transition
- Entire plant dissolves within days with no new growth after 4+ weeks
- Melting spreads to established plants that weren’t recently moved
Buying Tips to Minimize Melt
- Buy submersed-grown when available — hobbyist-grown cuttings transition with almost no melt.
- Choose tissue culture for sensitive species — crypts and delicate stems establish far more reliably from sterile cups.
- Avoid plants already melting in the store tank — some melt is normal, but a plant that’s mostly mush at purchase has less energy for recovery.
- Transport carefully — keep plants damp and out of direct sun/heat. A plant that dries out or cooks in a hot car melts far worse than one transported properly.
The First-Month Timeline: What to Expect Week by Week
Knowing what’s normal when removes most acclimation anxiety. Here’s the typical timeline for a healthy plant adapting to a new tank:
Week 1: The quiet week
Almost nothing visible happens. The plant is growing roots you can’t see and assessing its new environment. Some species (vallisneria, stem plants) may start shedding their lowest leaves. This is normal. Resist the urge to “help” — no moving, no extra fertilizer, no light changes. The most common beginner mistake is intervening during a week when the correct action is nothing.
Week 2: Melt peaks
This is when emersed leaves give up in earnest. Crypts may drop everything; swords shed their broad aerial leaves; stem plants lose lower foliage. It looks catastrophic and it’s usually fine. Keep removing mushy material, keep conditions stable, and watch the crown and growing tips — if those are firm and green, recovery is already underway.
Week 3: The turn
New submersed-adapted leaves emerge — smaller, thinner, often a slightly different shade of green than the emersed foliage. Stem plant tips start growing visibly; crypts push tiny curled leaves from the crown; swords unfurl narrow ribbon leaves. This is the moment most beginners exhale for the first time.
Week 4+: Established
New growth outpaces melt, and the plant is functionally yours. You can resume full-strength fertilizer, normal trimming, and stop treating it as fragile. Some slow growers (anubias, bucephalandra) take 6–8 weeks to show obvious progress — that’s their normal speed, not a problem.
Acclimating Different Plant Formats
Tissue-culture cups
Sterile, pest-free, and already adapted to high-humidity (not emersed) growth — tissue cultures melt the least of any format. Rinse the agar gel off gently (leftover gel rots and feeds fungus), split the portion into small plantlets, and plant per our planting guide. They establish slowly for the first two weeks, then accelerate. No dip needed, minimal acclimation stress — this is the premium experience you’re paying for.
Potted plants
Remove the pot and strip away the rockwool completely — leftover rockwool traps debris and rots. Tease the root mass apart gently; if it’s a dense mat, splitting it into 2–3 smaller portions actually establishes faster than planting one big clump (more growing points, better water flow around roots). Potted plants are usually emersed-grown, so expect the standard 2–4 week melt cycle.
Bare-root / bunched stems
Typically sold as weighted bunches. Remove any bands, foam, or weights, strip the lower leaves, and plant stems individually or in small groups. Bunched stems from the store are often already transitioning — check for new submersed growth at the tips, which tells you the plant is mid-adaptation and will settle quickly.
Hobbyist cuttings
Already submersed-grown and the fastest to establish — often showing new growth within days. The main acclimation factor is water-parameter difference between the two tanks. Float to temperature-match, plant promptly, and they’ll usually take off with minimal melt. This is why experienced hobbyists prefer trading cuttings over buying potted plants.
Frequently Asked Questions
Should I use a “plant starter” or transplant fertilizer?
Products marketed for transplant shock are mostly B-vitamins and mild hormones. They don’t hurt, but there’s no strong evidence they help aquarium plants specifically. Stable conditions and patience outperform any bottle. Save the money for more plants.
My new plant melted completely — bare crown, no leaves. Is it dead?
Probably not, if the crown or rhizome is firm. Crypts and swords routinely lose 100% of their leaves and regrow from the base within a month. The test is firmness: firm and pale/green means alive; mushy and brown/black means rot. Give firm-but-leafless plants a full 4 weeks before declaring them dead.
Can I speed up acclimation with extra light or CO2?
No — and trying usually backfires. A melting plant can’t use extra light; the excess just grows algae on its dying leaves. Keep light moderate and CO2 stable (not boosted) during acclimation. Growth speed comes from the plant’s own adaptation timeline, which you can’t rush, only avoid delaying.
Should new plants go straight into my main display tank?
After quarantine/dipping, yes — there’s no benefit to a separate “growing-in” tank for most plants. They acclimate to your water fastest in the tank they’ll live in. The exception is very delicate species going into a tank with boisterous fish; give those a few weeks in a calm corner or breeder box first.
The Patience Rule
The single most important acclimation skill is restraint: plant it right, set gentle conditions, remove decay, and then leave it alone for a month. The hobbyists with the best plant growth aren’t doing something clever in week one — they’re simply not interfering in weeks two through four while the plants do what they’ve evolved to do. Melt looks like failure and feels like failure, but in most cases it’s the visible part of a plant successfully becoming yours.