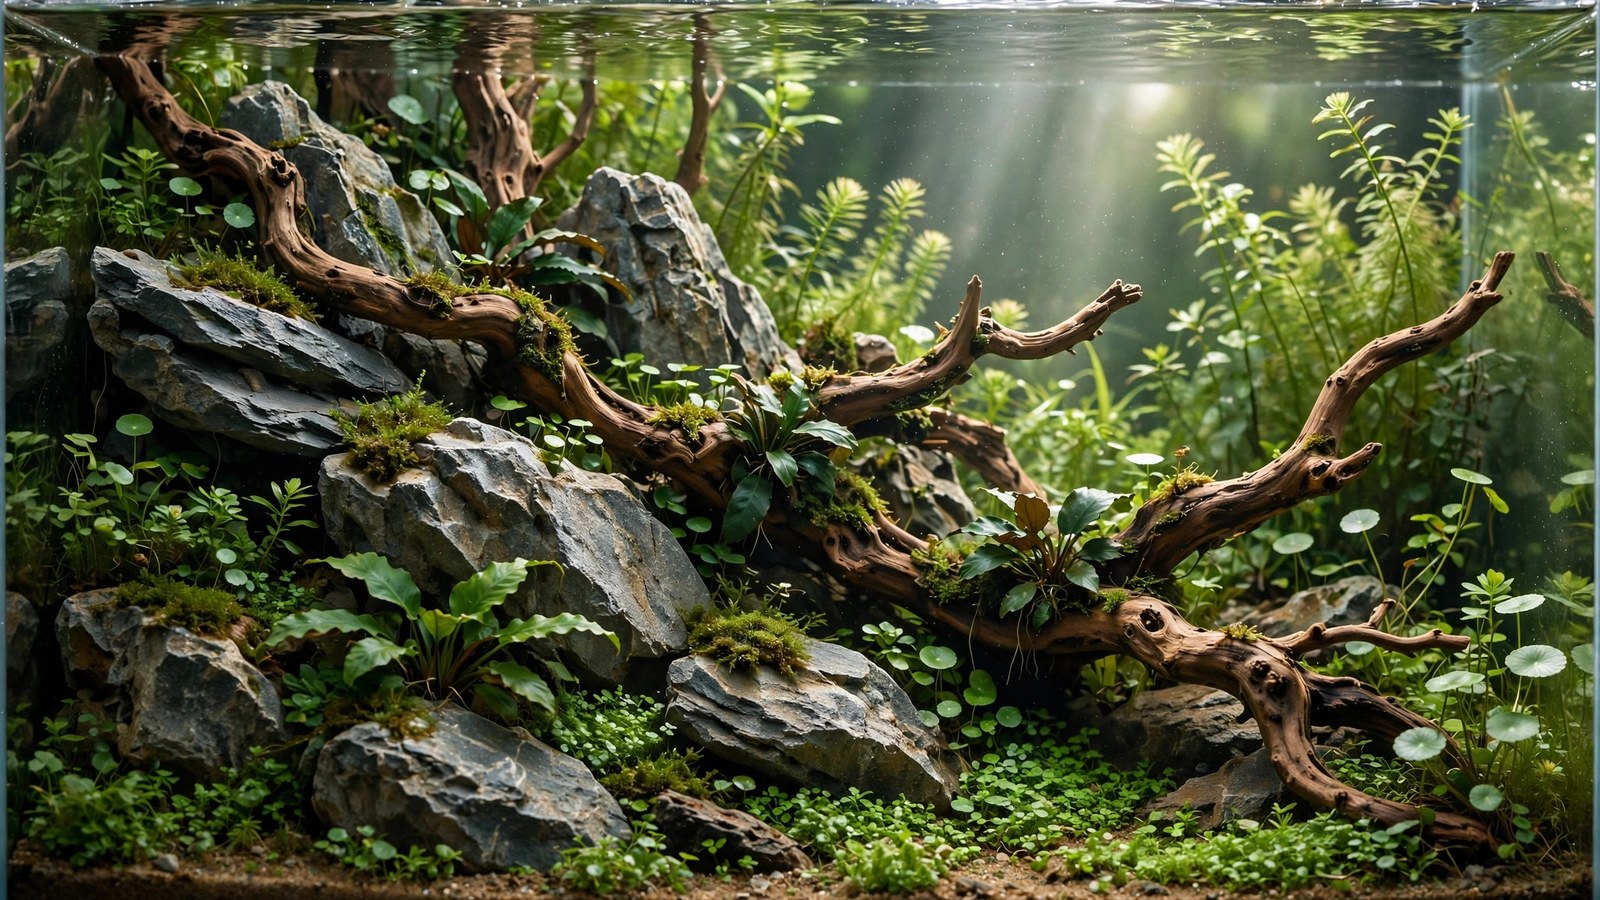
Most beginners plant first and arrange hardscape around the plants. Professionals do the opposite: hardscape first, plants second. The hardscape-first method treats stone and wood as the layout's skeleton — placed, photographed, adjusted, and lived with for days before a single plant goes in — because hardscape is permanent and plants are adjustable. Get the geology right and planting becomes decoration of a good structure; get it wrong and no plant arrangement saves the tank. This is the workflow behind the best aquascapes in the world, formalized step by step.
Why Hardscape Comes First
- Permanence: moving a 10-lb stone in a planted tank destroys the planting around it. Moving it in an empty tank costs nothing. Finalize positions while changes are free.
- Structure dictates planting: the hardscape determines where tall plants go (behind the high stone), where carpet goes (the open plain), where epiphytes live (the wood). Planting first means guessing; hardscape first means responding.
- Composition is visible bare: a great hardscape arrangement looks compelling even without plants — like a zen garden. If your bare hardscape looks boring, plants will only partially rescue it. The bare-tank test is brutally honest.
- Substrate topography follows hardscape: hills, valleys, and terraces are shaped around stone and wood positions (see our substrate sloping guide) — you can't grade soil properly before knowing where the rocks sit.
Phase 1: Selection (The Shop Trip)
Hardscape-first begins at the store, not the tank. Bring your tank's dimensions and a plan:
- Buy more than you need: for a 60cm tank, buy 1.5–2× the stone you think you need. Selection happens at home by elimination — you can't choose the best five stones from exactly five stones. Return or save the rejects for the next tank.
- One material per layout (with rare, deliberate exceptions). Mixed stone types look geologically confused. Pick your stone family and commit.
- Graded sizes: you need one hero piece (1/2–2/3 tank height), 2–4 supporting pieces (1/3–1/2 hero size), and a handful of small detail stones. A pile of same-size rocks builds nothing.
- Wood: gesture over quantity. One or two pieces with clear directional flow beat five interesting sticks. Check our single-wood guide for selection criteria.
- Photograph candidates at the shop from multiple angles — the piece that looked great under shop lighting may disappoint at home. Photos reveal character (and flaws) honestly.
Phase 2: The Dry Layout (The Most Important Hours)
With the empty tank in its final position:
- Lay the substrate roughly — approximate depths; you'll refine after hardscape is placed.
- Place the hero piece first, at the golden-ratio point (~1/3 or 2/3 across), buried 1/3 deep. Everything else responds to this piece. See focal point placement for the positioning logic.
- Add supporting pieces in descending size order, each placed to support the hero — echoing its angle, leading the eye toward it, filling the composition's secondary zones. Odd numbers total (3, 5, 7).
- Step back. Photograph. Leave the room. Come back in an hour with fresh eyes. Rearrange. Repeat. The best aquascapers spend hours to days on this phase — Amano famously lived with hardscape arrangements for a week before planting.
- Test from the viewing position: sit where you'll actually view the tank. Crouch to the tank's midline. The arrangement must work from the real viewing angle, not just standing over it.
- The squint test: squint at the arrangement until it's blurry — you should still see a clear composition: masses, lines, focal point, negative space. If the blur is mush, the composition is mush.
- Finalize substrate topography around the placed hardscape — mound toward stone bases, grade the slopes, terrace where needed.
Phase 3: The Wet Test
Before planting, do a partial fill test: add a few inches of water (or mist heavily and photograph). Water changes everything — stone colors deepen, wood tones shift, and the arrangement reads differently through the refraction. Check:
- Does the hardscape still read clearly, or does water flatten it?
- Are there unintended gaps or sightlines to the back glass?
- Does anything wobble or shift when water moves around it? (Fix now — silicone, wedge, or rebury.)
- Photograph wet and compare to dry photos — the wet version is the truth.
Drain (or proceed directly to planting if you're confident — many aquascapers plant into the damp tank after the wet test, which segues naturally into a dry start for the carpet).
Phase 4: Planting in Response to Hardscape
Now — and only now — plants. The hardscape tells you what goes where:
- Behind height: tall stems behind the tallest hardscape, descending with the composition's height profile (triangle logic).
- On the hardscape: epiphytes (Anubias, Bucephalandra, moss, ferns) at branch forks, stone crevices, and upper surfaces — see driftwood and rock attachment guides.
- At the base: transition plants (crypts, Staurogyne) softening every stone-soil and wood-soil junction — the "collar" that sells the geology.
- The open areas: carpet or negative space, kept clean per the layout's design (see concave and diagonal guides for how open space functions).
- Species restraint: 6–10 species for a 60cm, fewer for nanos. The hardscape is already providing visual interest — the plants don't need to.
Common Hardscape-First Mistakes
- Rushing the dry layout: 20 minutes of arranging, then planting. The phase that determines 70% of the result deserves more than 20 minutes.
- Too many pieces: beginners add stones until the tank feels "full." Full isn't the goal — composed is. When in doubt, remove one.
- Ignoring the back: hardscape arranged only for the front view collapses when viewed slightly from the side. Walk around (mentally) the composition.
- Perching instead of burying: stones sitting on substrate look placed. Bury a third of every stone — the single most repeated advice in aquascaping because it's the most ignored.
- Planting before the wet test: discovering a wobbling hero stone after the carpet is planted is a special kind of heartbreak.
These overlap with our beginner mistakes guide — the hardscape errors cluster together because they share a cause: impatience.
Hardscape-First for Wood-Dominant Layouts
The method adapts slightly when wood leads instead of stone. Wood pieces are harder to "place and leave" because they float until waterlogged — so the dry layout must include anchoring decisions: which stones wedge the base, where the slate anchor hides, how the substrate mound buries the joint. Arrange the wood, then arrange its supports as part of the composition (support stones should look intentional, not like afterthoughts). Also plan epiphyte positions during the dry phase — mark branch forks with tiny dots of chalk where Anubias and moss will go, so planting day is execution, not improvisation. A wood-dominant dry layout photographed from three angles gives you the planting map; without it, epiphytes end up scattered randomly instead of clustered naturally.
Frequently Asked Questions
How long should the dry-layout phase take?
Minimum: an uninterrupted hour with photography and fresh-eye breaks. Ideal: 2–3 sessions over several days — you'll see problems on day two that were invisible on day one. There's no maximum; some contest aquascapers iterate hardscape for weeks. The plants wait patiently (keep them humid); the hardscape doesn't improve after planting.
Can I hardscape-first in an already-planted tank?
Partially — you can adjust and add hardscape during a rescape, working in sections. But the full method (free rearrangement, wet test, topography grading) needs an empty or near-empty tank. For major hardscape changes, a planned rescape with temporary livestock housing is the honest approach.
Should I glue or mortar my hardscape?
For stacked or towering structures: yes — aquarium-safe cyanoacrylate gel, epoxy, or drilled acrylic pins. For naturalistic single-level arrangements: usually unnecessary if pieces are well-buried and stable. Test stability by gently pushing each piece; anything that rocks gets secured. In large tanks, structural securing is mandatory, not optional.
What if I can't find good hardscape locally?
Order online from reputable aquascaping suppliers (many photograph the exact pieces you'll receive), join local clubs (members trade/sell), or collect responsibly from nature (our budget guide covers field collection). Never let poor local selection force a bad layout — waiting for the right stone beats building with the wrong one.
Does hardscape-first work for Dutch-style tanks?
Dutch layouts are plant-dominant with minimal hardscape — but the principle still applies: place whatever hardscape exists (often just a subtle stone or wood accent, per our Dutch guide) first, then plant the streets and groups around it. Even a single accent stone deserves deliberate placement.
How do I know when the hardscape is "done"?
The bare-tank test: photograph the hardscape-only tank, and if the photo is interesting — clear focal point, depth, balance, negative space — it's done. If it's boring bare, plants will only partially save it. Also the overnight test: if you wake up wanting to change something, change it; if you wake up satisfied two days running, plant.
Structure First, Always
The hardscape-first method is really a discipline of patience: select deliberately, arrange without rushing, test wet, and plant in response. It front-loads the hard decisions into the phase where changes are free, so the planting phase — the fun part — becomes pure execution of a proven structure. Adopt it for every build, from 5-gallon nanos to showpiece tanks, and your layouts will gain the structural conviction that separates good aquascapes from great ones. When the structure is mature and needs documenting, our photography guide shows you how to capture it.
Tissue-culture plants are the exception — they’re grown in sterile gel and adapt with minimal melting, which is part of what you’re paying for. Plants bought submersed from another hobbyist’s tank also transition with little melt, since they’re already in the right form.
Which Plants Melt Most (and Least)
Heavy melters (expect significant leaf loss)
- Cryptocorynes — infamous for “crypt melt,” sometimes dropping every leaf after any disturbance. They almost always recover from the roots within weeks.
- Stem plants grown emersed — rotala, ludwigia, and hygrophila often shed lower emersed leaves while the growing tips transition.
- Amazon swords — emersed-grown swords typically lose their broad oval aerial leaves and replace them with longer submersed ribbon leaves.
Light melters
- Anubias, java fern, bucephalandra — slow-growing rhizome plants transition gradually; occasional old-leaf melt but rarely dramatic.
- Vallisneria — usually transitions well, though it dislikes the move itself and may sulk for a week.
- Floating plants — minimal melt since their leaves were already at the air-water interface.
The Acclimation Protocol
Step 1: Quarantine or dip first
Before acclimating to your tank’s conditions, make sure you’re not acclimating pests along with the plant. Run new arrivals through our quarantine and dip protocol — it adds days upfront but prevents months of regret.
Step 2: Float to temperature-match (30 minutes)
Float the bag or container in your tank for 20–30 minutes to equalize temperature. Plants are less temperature-sensitive than fish, but a 10°F shock on top of transplant stress is an avoidable insult.
Step 3: Trim before planting
Remove any leaves that are already damaged, yellowing, or heavily algae-covered — they won’t recover and they’ll rot in your tank, feeding algae. For stem plants, trim off the bottom inch and any emersed leaves that look unlikely to adapt; the plant wastes energy maintaining leaves it’s going to shed anyway. Keep the healthy growing tips — that’s where recovery starts.
Step 4: Plant correctly the first time
Follow our planting guide — right depth, crown exposed on rosettes, rhizomes unburied on epiphytes. Every uprooting and replanting restarts the acclimation clock, so get placement right on the first attempt. Decide where each plant goes before it goes in the water.
Step 5: Run a gentle first week
For the first 7 days after planting:
- Moderate light — run your normal photoperiod but consider dropping intensity 20–30% if your light is dimmable. Blast-level light on a melting plant grows algae on the dying leaves, not recovery.
- Stable CO2 — if you inject CO2, keep it consistent. Fluctuating CO2 during acclimation is a melt accelerator. If you’re low-tech, this doesn’t apply — see growing without CO2.
- Half-strength fertilizer — new plants with damaged leaves can’t use full dosing, and the excess feeds algae. Ramp to full strength over 2–3 weeks per our fertilizer schedule.
- No disturbance — don’t move, trim, or “check on” new plants for at least two weeks. Every touch resets root establishment. This is especially critical for crypts.
Step 6: Remove melt, keep the base
As emersed leaves melt, remove the mushy material promptly — decaying leaves release ammonia and grow fungus that can spread to healthy tissue. But never discard the plant while the crown, rhizome, or roots are firm and alive. A crypt that’s lost every leaf but has firm roots is a plant that’s about to recover, not a dead plant. Give it 3–4 weeks before judging.
Telling Normal Melt From Real Problems
Normal transition melt:
- Affects oldest/emersed leaves first, newest growth last
- New submersed leaves emerge even as old ones dissolve
- Roots and crown stay firm and white/green
- Timeline: 1–4 weeks, then obvious new growth
Concerning melt (see our full melting diagnosis guide):
- New growth also melts or emerges deformed
- Rhizome or crown turns mushy and brown — this is rot, not transition
- Entire plant dissolves within days with no new growth after 4+ weeks
- Melting spreads to established plants that weren’t recently moved
Buying Tips to Minimize Melt
- Buy submersed-grown when available — hobbyist-grown cuttings transition with almost no melt.
- Choose tissue culture for sensitive species — crypts and delicate stems establish far more reliably from sterile cups.
- Avoid plants already melting in the store tank — some melt is normal, but a plant that’s mostly mush at purchase has less energy for recovery.
- Transport carefully — keep plants damp and out of direct sun/heat. A plant that dries out or cooks in a hot car melts far worse than one transported properly.
The First-Month Timeline: What to Expect Week by Week
Knowing what’s normal when removes most acclimation anxiety. Here’s the typical timeline for a healthy plant adapting to a new tank:
Week 1: The quiet week
Almost nothing visible happens. The plant is growing roots you can’t see and assessing its new environment. Some species (vallisneria, stem plants) may start shedding their lowest leaves. This is normal. Resist the urge to “help” — no moving, no extra fertilizer, no light changes. The most common beginner mistake is intervening during a week when the correct action is nothing.
Week 2: Melt peaks
This is when emersed leaves give up in earnest. Crypts may drop everything; swords shed their broad aerial leaves; stem plants lose lower foliage. It looks catastrophic and it’s usually fine. Keep removing mushy material, keep conditions stable, and watch the crown and growing tips — if those are firm and green, recovery is already underway.
Week 3: The turn
New submersed-adapted leaves emerge — smaller, thinner, often a slightly different shade of green than the emersed foliage. Stem plant tips start growing visibly; crypts push tiny curled leaves from the crown; swords unfurl narrow ribbon leaves. This is the moment most beginners exhale for the first time.
Week 4+: Established
New growth outpaces melt, and the plant is functionally yours. You can resume full-strength fertilizer, normal trimming, and stop treating it as fragile. Some slow growers (anubias, bucephalandra) take 6–8 weeks to show obvious progress — that’s their normal speed, not a problem.
Acclimating Different Plant Formats
Tissue-culture cups
Sterile, pest-free, and already adapted to high-humidity (not emersed) growth — tissue cultures melt the least of any format. Rinse the agar gel off gently (leftover gel rots and feeds fungus), split the portion into small plantlets, and plant per our planting guide. They establish slowly for the first two weeks, then accelerate. No dip needed, minimal acclimation stress — this is the premium experience you’re paying for.
Potted plants
Remove the pot and strip away the rockwool completely — leftover rockwool traps debris and rots. Tease the root mass apart gently; if it’s a dense mat, splitting it into 2–3 smaller portions actually establishes faster than planting one big clump (more growing points, better water flow around roots). Potted plants are usually emersed-grown, so expect the standard 2–4 week melt cycle.
Bare-root / bunched stems
Typically sold as weighted bunches. Remove any bands, foam, or weights, strip the lower leaves, and plant stems individually or in small groups. Bunched stems from the store are often already transitioning — check for new submersed growth at the tips, which tells you the plant is mid-adaptation and will settle quickly.
Hobbyist cuttings
Already submersed-grown and the fastest to establish — often showing new growth within days. The main acclimation factor is water-parameter difference between the two tanks. Float to temperature-match, plant promptly, and they’ll usually take off with minimal melt. This is why experienced hobbyists prefer trading cuttings over buying potted plants.
Frequently Asked Questions
Should I use a “plant starter” or transplant fertilizer?
Products marketed for transplant shock are mostly B-vitamins and mild hormones. They don’t hurt, but there’s no strong evidence they help aquarium plants specifically. Stable conditions and patience outperform any bottle. Save the money for more plants.
My new plant melted completely — bare crown, no leaves. Is it dead?
Probably not, if the crown or rhizome is firm. Crypts and swords routinely lose 100% of their leaves and regrow from the base within a month. The test is firmness: firm and pale/green means alive; mushy and brown/black means rot. Give firm-but-leafless plants a full 4 weeks before declaring them dead.
Can I speed up acclimation with extra light or CO2?
No — and trying usually backfires. A melting plant can’t use extra light; the excess just grows algae on its dying leaves. Keep light moderate and CO2 stable (not boosted) during acclimation. Growth speed comes from the plant’s own adaptation timeline, which you can’t rush, only avoid delaying.
Should new plants go straight into my main display tank?
After quarantine/dipping, yes — there’s no benefit to a separate “growing-in” tank for most plants. They acclimate to your water fastest in the tank they’ll live in. The exception is very delicate species going into a tank with boisterous fish; give those a few weeks in a calm corner or breeder box first.
The Patience Rule
The single most important acclimation skill is restraint: plant it right, set gentle conditions, remove decay, and then leave it alone for a month. The hobbyists with the best plant growth aren’t doing something clever in week one — they’re simply not interfering in weeks two through four while the plants do what they’ve evolved to do. Melt looks like failure and feels like failure, but in most cases it’s the visible part of a plant successfully becoming yours.