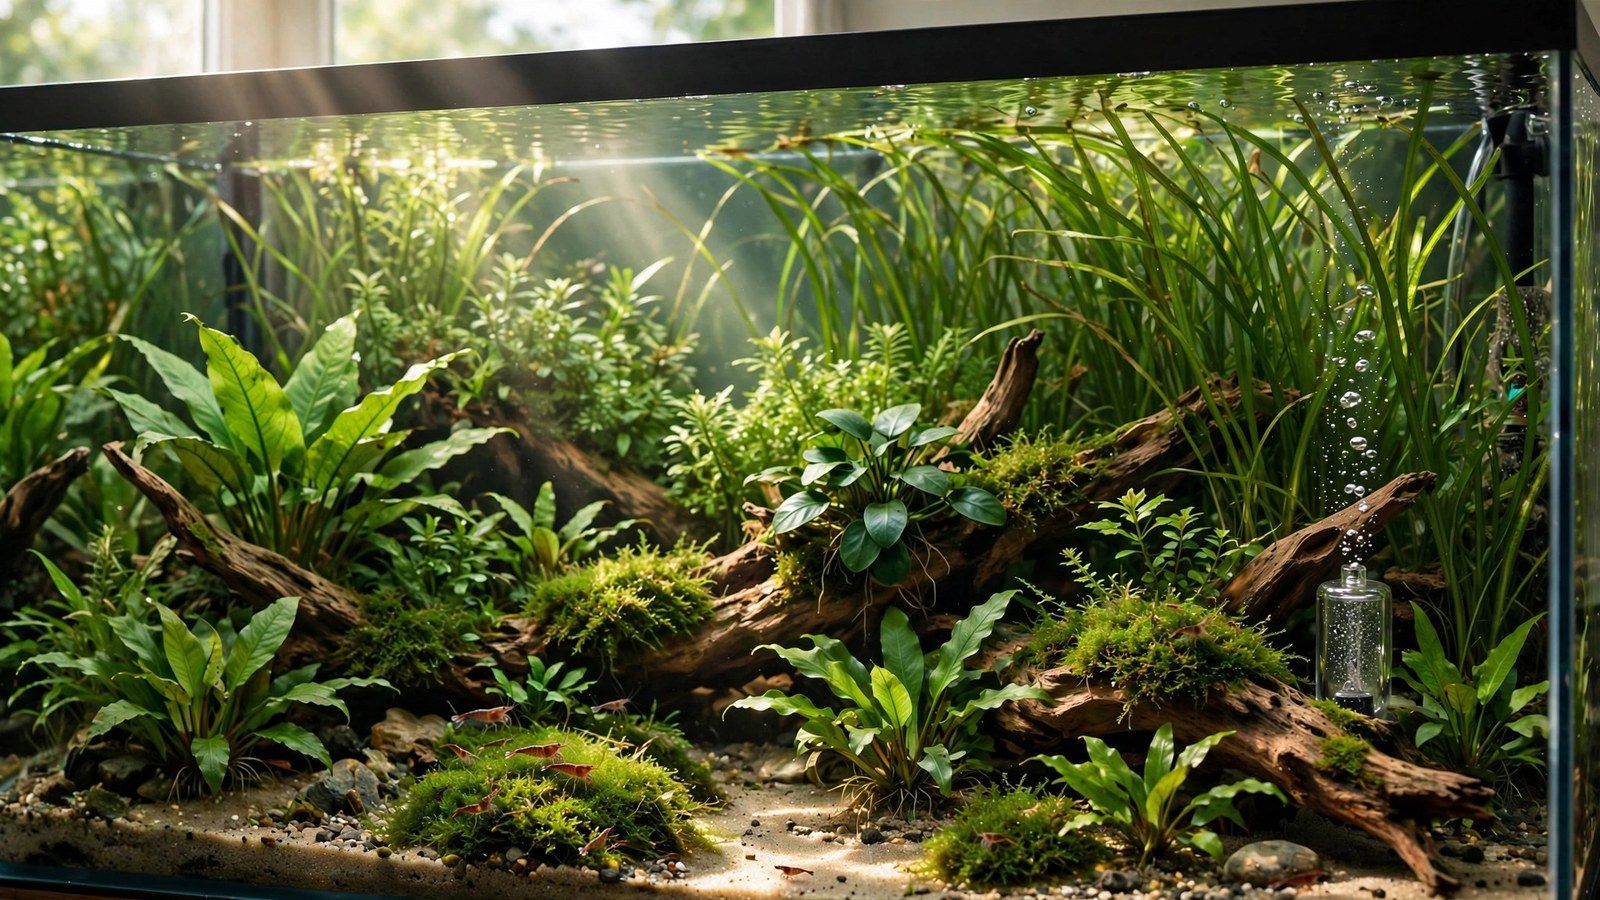
Here's the good news about leaving your planted tank for two weeks: plants are far more self-sufficient than fish. They don't need feeding, they don't panic, and a healthy planted tank is basically a tiny ecosystem that hums along fine without you — provided you set it up right before you walk out the door. This guide is the complete pre-vacation checklist plus the recovery protocol for when you return, whether you're gone for a long weekend or a full fortnight.
The Golden Rule: Prepare Before, Not After
Every vacation tank disaster shares one trait: the keeper planned to "do a big maintenance when I get back." By then, the algae has bloomed, the floaters have smothered the light, and the filter has clogged. Do the big maintenance 2–3 days before you leave — not the morning of (you want a day to confirm everything's running right) and definitely not after you return.
The Pre-Vacation Checklist (2–3 Days Before Departure)
1. Major maintenance session
- Big water change (40–50%) — resets nutrients and waste to baseline. Use our planted-tank water change technique for the full protocol.
- Trim aggressively. Cut stem plants back harder than usual — two weeks of growth on untrimmed stems means a tangled, light-blocking jungle. Trim properly and replant or discard the tops.
- Remove all dead and dying leaves. Decaying matter is an ammonia and algae starter kit. Be ruthless — if a leaf is more than half gone, it's gone.
- Thin floating plants hard. Floaters double fast; two weeks unchecked and they'll carpet the surface, starving everything below of light. Remove 70–80% — it feels brutal, it'll grow back. See managing floating plants for the technique.
- Clean the filter (rinse media in old tank water) and verify flow rate. A filter that clogs on day 5 of your absence crashes water quality for the remaining 9 days.
- Scrape the glass and siphon detritus from the substrate surface. Start clean.
2. Dial back the growth engine
Your goal for the vacation is slow, steady, low-drama growth — not maximum performance. Turn down the inputs that drive fast growth and algae:
- Reduce photoperiod to 6 hours (from the usual 7–8). Less light = slower everything, including algae. Put lights on a reliable timer — this is non-negotiable for any absence over 3 days.
- Reduce CO2 slightly (20–30% lower bubble rate) if you inject. Slower growth needs less carbon, and the safety margin for livestock widens if anything drifts while you're gone.
- Dose fertilizer normally before leaving (or set an auto-doser). Don't skip — two weeks without nutrients stalls plants and invites deficiencies. If you use all-in-one, dose the full two weeks' worth split across the departure week, or have your sitter dose once mid-trip.
3. Automate and back up
- Lights on timers — test the timer for a full on/off cycle before you leave. A light stuck ON for two weeks grows a spectacular algae farm; stuck OFF starves plants.
- Heater check: verify it's holding temperature and the indicator light cycles normally. Summer travelers: set up a fan for heat (see seasonal care).
- Top off the tank to the maximum safe level — evaporation over two weeks can drop the waterline several inches, exposing heater elements or filter intakes. An auto-top-off (ATO) unit is the gold standard for frequent travelers.
- Feeding plan for fish: healthy adult fish easily fast 5–7 days; for two weeks, use an automatic feeder with less food than usual (underfeeding is safe, overfeeding fouls water) or pre-portion daily rations for a sitter. Never use vacation feeder blocks — they dissolve into ammonia bombs.
4. Brief your sitter (if you have one)
A non-hobbyist sitter should have exactly three jobs: feed (pre-portioned), top off evaporated water (mark the fill line with tape), and call you if something looks wrong. Write it down. Tape the instructions to the tank. Do NOT ask a novice to do water changes, dose fertilizer, or "fix" anything — enthusiastic wrong interventions kill more vacation tanks than neglect does. Leave your number and your local fish shop's number.
Duration Guide: What Changes by Trip Length
| Trip length | What's needed |
|---|---|
| 2–3 days | Almost nothing. Feed fish normally before leaving (they'll be fine), ensure timers work. Plants won't notice. |
| 1 week | Pre-trip maintenance + trimmed floaters + 6-hour photoperiod + auto-feeder or fasting. No sitter strictly needed for the plants. |
| 2 weeks | Full checklist above. A mid-trip check by a sitter (top-off + visual inspection) is wise but optional if automation is solid. |
| 3–4 weeks | Everything above, plus: sitter does one mid-trip water change (pre-mix the water, write exact steps), auto-doser for fertilizer or sitter-dosed, and a video call walkthrough so you can spot problems remotely. |
Beyond a month, you're really asking someone to keep the tank, not just watch it — at that point, pay an experienced hobbyist or simplify the tank drastically before leaving (reduce stocking, pull demanding plants, go low-tech for the duration).
Special Cases
- High-tech CO2 tanks: The highest vacation risk. A CO2 cylinder running dry mid-trip swings carbon levels and triggers algae; a malfunctioning solenoid can gas livestock. Mitigate: ensure the cylinder is full, set a slightly lower rate, and consider having the sitter glance at the drop checker color (leave a color chart taped nearby — green good, yellow bad).
- New tanks (under 2 months): Don't leave a cycling or newly planted tank for two weeks if you can avoid it — this is the highest-maintenance phase. If unavoidable, the pre-trip prep matters doubly, and a mid-trip sitter check is strongly recommended. See our first 90 days guide for why this phase is so hands-on.
- Shrimp breeding tanks: Shrimp are actually excellent vacationers — they graze biofilm and need no feeding for two weeks. Just ensure stable temperature and topped-off water. Don't let a sitter "feed the shrimp" — they'll overfeed catastrophically.
- Emersed setups: If you grow plants emersed, humidity is the risk — a sealed tub is fine for weeks, an open tray dries out in days. Seal it or set up a wick-watering system before leaving.
The Return: Recovery Protocol
Walk in, look before touching. Then:
- Assess first (15 minutes, no tools). Check temperature, water level, equipment running, livestock alive and behaving normally. Note algae levels and plant condition. Resist the urge to immediately "fix" everything — observe first.
- Top off evaporated water if needed, then do a 30–40% water change to reset whatever accumulated.
- Remove dead material. Two weeks will have produced some melted leaves and possibly dead floaters — clear them out before they rot further.
- Thin and trim. Even at 6-hour photoperiods, two weeks of growth needs cutting back. Restore your normal aquascape shape.
- Clean the glass — there will be some algae film; that's normal and not a crisis.
- Restore normal settings gradually: photoperiod back to 7–8 hours over 3–4 days (not all at once — sudden light increases trigger algae), CO2 back to normal rate, resume your regular fertilizer schedule.
- Don't panic about minor algae. A little green dust or thread algae after two weeks is normal and clears within 1–2 weeks of resumed routine. Only escalate if it's severe (then see cleaning algae off leaves).
Frequently Asked Questions
Will my plants survive two weeks with no fertilizer?
Probably, but they'll do better with it. Established plants in a mature tank coast on substrate reserves and fish waste for two weeks without catastrophe — but you'll return to stalled growth and possibly early deficiency signs. Dosing before you leave (or auto-dosing) costs nothing and keeps everything growing steadily. The risk of dosing isn't the fertilizer, it's a sitter overdosing — which is why pre-dosing or auto-dosers beat sitter-dosing.
Should I leave the lights on longer so plants "store up" energy?
No — the opposite. Longer photoperiods before a vacation just grow more biomass (more trimming needed) and more algae risk while you're gone. The pre-vacation move is less light (6 hours), not more. Plants don't "store up" light meaningfully; they respond to current conditions.
Can fish really go two weeks without food?
Most healthy adult community fish handle 10–14 days without food — their metabolism slows and they graze biofilm, algae, and microorganisms in a planted tank. It's far safer than the alternative (a sitter overfeeding and fouling the water). Fry, very small fish, and high-metabolism species are exceptions — arrange feeding for those. When in doubt, an auto-feeder with conservative portions covers all cases.
What if the power goes out while I'm away?
Short outages (a few hours) are harmless — tanks hold temperature well and plants don't care. Multi-day outages are the real risk: no filtration, no heat, no light. Mitigation: a battery-powered air pump (~$15) keeps oxygen up; for winter, there's little you can do remotely beyond insulation (a blanket over the tank slows heat loss). A smart plug with power monitoring can alert your phone to outages so you can dispatch your sitter.
Is it better to have a sitter do water changes or leave the tank alone?
For two weeks: leave it alone (with the pre-trip prep done). An inexperienced sitter doing a water change risks temperature shock, chlorine poisoning (forgotten dechlorinator), and substrate disruption — all worse than slightly aged water. For 3+ weeks, one careful mid-trip change by a briefed sitter (pre-mixed, temperature-matched water waiting in a bucket, written steps) is worth it.
Come Home to a Garden, Not a Rescue Mission
The entire vacation strategy fits in one sentence: leave the tank cleaner, dimmer, and more automated than usual, and it'll wait patiently for you. Plants are the easy part of vacation planning — they're the one aquarium inhabitants that genuinely prefer you leave them alone. Do the work upfront, set the timers, tape the instructions to the glass, and go enjoy your trip.
Tissue-culture plants are the exception — they’re grown in sterile gel and adapt with minimal melting, which is part of what you’re paying for. Plants bought submersed from another hobbyist’s tank also transition with little melt, since they’re already in the right form.
Which Plants Melt Most (and Least)
Heavy melters (expect significant leaf loss)
- Cryptocorynes — infamous for “crypt melt,” sometimes dropping every leaf after any disturbance. They almost always recover from the roots within weeks.
- Stem plants grown emersed — rotala, ludwigia, and hygrophila often shed lower emersed leaves while the growing tips transition.
- Amazon swords — emersed-grown swords typically lose their broad oval aerial leaves and replace them with longer submersed ribbon leaves.
Light melters
- Anubias, java fern, bucephalandra — slow-growing rhizome plants transition gradually; occasional old-leaf melt but rarely dramatic.
- Vallisneria — usually transitions well, though it dislikes the move itself and may sulk for a week.
- Floating plants — minimal melt since their leaves were already at the air-water interface.
The Acclimation Protocol
Step 1: Quarantine or dip first
Before acclimating to your tank’s conditions, make sure you’re not acclimating pests along with the plant. Run new arrivals through our quarantine and dip protocol — it adds days upfront but prevents months of regret.
Step 2: Float to temperature-match (30 minutes)
Float the bag or container in your tank for 20–30 minutes to equalize temperature. Plants are less temperature-sensitive than fish, but a 10°F shock on top of transplant stress is an avoidable insult.
Step 3: Trim before planting
Remove any leaves that are already damaged, yellowing, or heavily algae-covered — they won’t recover and they’ll rot in your tank, feeding algae. For stem plants, trim off the bottom inch and any emersed leaves that look unlikely to adapt; the plant wastes energy maintaining leaves it’s going to shed anyway. Keep the healthy growing tips — that’s where recovery starts.
Step 4: Plant correctly the first time
Follow our planting guide — right depth, crown exposed on rosettes, rhizomes unburied on epiphytes. Every uprooting and replanting restarts the acclimation clock, so get placement right on the first attempt. Decide where each plant goes before it goes in the water.
Step 5: Run a gentle first week
For the first 7 days after planting:
- Moderate light — run your normal photoperiod but consider dropping intensity 20–30% if your light is dimmable. Blast-level light on a melting plant grows algae on the dying leaves, not recovery.
- Stable CO2 — if you inject CO2, keep it consistent. Fluctuating CO2 during acclimation is a melt accelerator. If you’re low-tech, this doesn’t apply — see growing without CO2.
- Half-strength fertilizer — new plants with damaged leaves can’t use full dosing, and the excess feeds algae. Ramp to full strength over 2–3 weeks per our fertilizer schedule.
- No disturbance — don’t move, trim, or “check on” new plants for at least two weeks. Every touch resets root establishment. This is especially critical for crypts.
Step 6: Remove melt, keep the base
As emersed leaves melt, remove the mushy material promptly — decaying leaves release ammonia and grow fungus that can spread to healthy tissue. But never discard the plant while the crown, rhizome, or roots are firm and alive. A crypt that’s lost every leaf but has firm roots is a plant that’s about to recover, not a dead plant. Give it 3–4 weeks before judging.
Telling Normal Melt From Real Problems
Normal transition melt:
- Affects oldest/emersed leaves first, newest growth last
- New submersed leaves emerge even as old ones dissolve
- Roots and crown stay firm and white/green
- Timeline: 1–4 weeks, then obvious new growth
Concerning melt (see our full melting diagnosis guide):
- New growth also melts or emerges deformed
- Rhizome or crown turns mushy and brown — this is rot, not transition
- Entire plant dissolves within days with no new growth after 4+ weeks
- Melting spreads to established plants that weren’t recently moved
Buying Tips to Minimize Melt
- Buy submersed-grown when available — hobbyist-grown cuttings transition with almost no melt.
- Choose tissue culture for sensitive species — crypts and delicate stems establish far more reliably from sterile cups.
- Avoid plants already melting in the store tank — some melt is normal, but a plant that’s mostly mush at purchase has less energy for recovery.
- Transport carefully — keep plants damp and out of direct sun/heat. A plant that dries out or cooks in a hot car melts far worse than one transported properly.
The First-Month Timeline: What to Expect Week by Week
Knowing what’s normal when removes most acclimation anxiety. Here’s the typical timeline for a healthy plant adapting to a new tank:
Week 1: The quiet week
Almost nothing visible happens. The plant is growing roots you can’t see and assessing its new environment. Some species (vallisneria, stem plants) may start shedding their lowest leaves. This is normal. Resist the urge to “help” — no moving, no extra fertilizer, no light changes. The most common beginner mistake is intervening during a week when the correct action is nothing.
Week 2: Melt peaks
This is when emersed leaves give up in earnest. Crypts may drop everything; swords shed their broad aerial leaves; stem plants lose lower foliage. It looks catastrophic and it’s usually fine. Keep removing mushy material, keep conditions stable, and watch the crown and growing tips — if those are firm and green, recovery is already underway.
Week 3: The turn
New submersed-adapted leaves emerge — smaller, thinner, often a slightly different shade of green than the emersed foliage. Stem plant tips start growing visibly; crypts push tiny curled leaves from the crown; swords unfurl narrow ribbon leaves. This is the moment most beginners exhale for the first time.
Week 4+: Established
New growth outpaces melt, and the plant is functionally yours. You can resume full-strength fertilizer, normal trimming, and stop treating it as fragile. Some slow growers (anubias, bucephalandra) take 6–8 weeks to show obvious progress — that’s their normal speed, not a problem.
Acclimating Different Plant Formats
Tissue-culture cups
Sterile, pest-free, and already adapted to high-humidity (not emersed) growth — tissue cultures melt the least of any format. Rinse the agar gel off gently (leftover gel rots and feeds fungus), split the portion into small plantlets, and plant per our planting guide. They establish slowly for the first two weeks, then accelerate. No dip needed, minimal acclimation stress — this is the premium experience you’re paying for.
Potted plants
Remove the pot and strip away the rockwool completely — leftover rockwool traps debris and rots. Tease the root mass apart gently; if it’s a dense mat, splitting it into 2–3 smaller portions actually establishes faster than planting one big clump (more growing points, better water flow around roots). Potted plants are usually emersed-grown, so expect the standard 2–4 week melt cycle.
Bare-root / bunched stems
Typically sold as weighted bunches. Remove any bands, foam, or weights, strip the lower leaves, and plant stems individually or in small groups. Bunched stems from the store are often already transitioning — check for new submersed growth at the tips, which tells you the plant is mid-adaptation and will settle quickly.
Hobbyist cuttings
Already submersed-grown and the fastest to establish — often showing new growth within days. The main acclimation factor is water-parameter difference between the two tanks. Float to temperature-match, plant promptly, and they’ll usually take off with minimal melt. This is why experienced hobbyists prefer trading cuttings over buying potted plants.
Frequently Asked Questions
Should I use a “plant starter” or transplant fertilizer?
Products marketed for transplant shock are mostly B-vitamins and mild hormones. They don’t hurt, but there’s no strong evidence they help aquarium plants specifically. Stable conditions and patience outperform any bottle. Save the money for more plants.
My new plant melted completely — bare crown, no leaves. Is it dead?
Probably not, if the crown or rhizome is firm. Crypts and swords routinely lose 100% of their leaves and regrow from the base within a month. The test is firmness: firm and pale/green means alive; mushy and brown/black means rot. Give firm-but-leafless plants a full 4 weeks before declaring them dead.
Can I speed up acclimation with extra light or CO2?
No — and trying usually backfires. A melting plant can’t use extra light; the excess just grows algae on its dying leaves. Keep light moderate and CO2 stable (not boosted) during acclimation. Growth speed comes from the plant’s own adaptation timeline, which you can’t rush, only avoid delaying.
Should new plants go straight into my main display tank?
After quarantine/dipping, yes — there’s no benefit to a separate “growing-in” tank for most plants. They acclimate to your water fastest in the tank they’ll live in. The exception is very delicate species going into a tank with boisterous fish; give those a few weeks in a calm corner or breeder box first.
The Patience Rule
The single most important acclimation skill is restraint: plant it right, set gentle conditions, remove decay, and then leave it alone for a month. The hobbyists with the best plant growth aren’t doing something clever in week one — they’re simply not interfering in weeks two through four while the plants do what they’ve evolved to do. Melt looks like failure and feels like failure, but in most cases it’s the visible part of a plant successfully becoming yours.