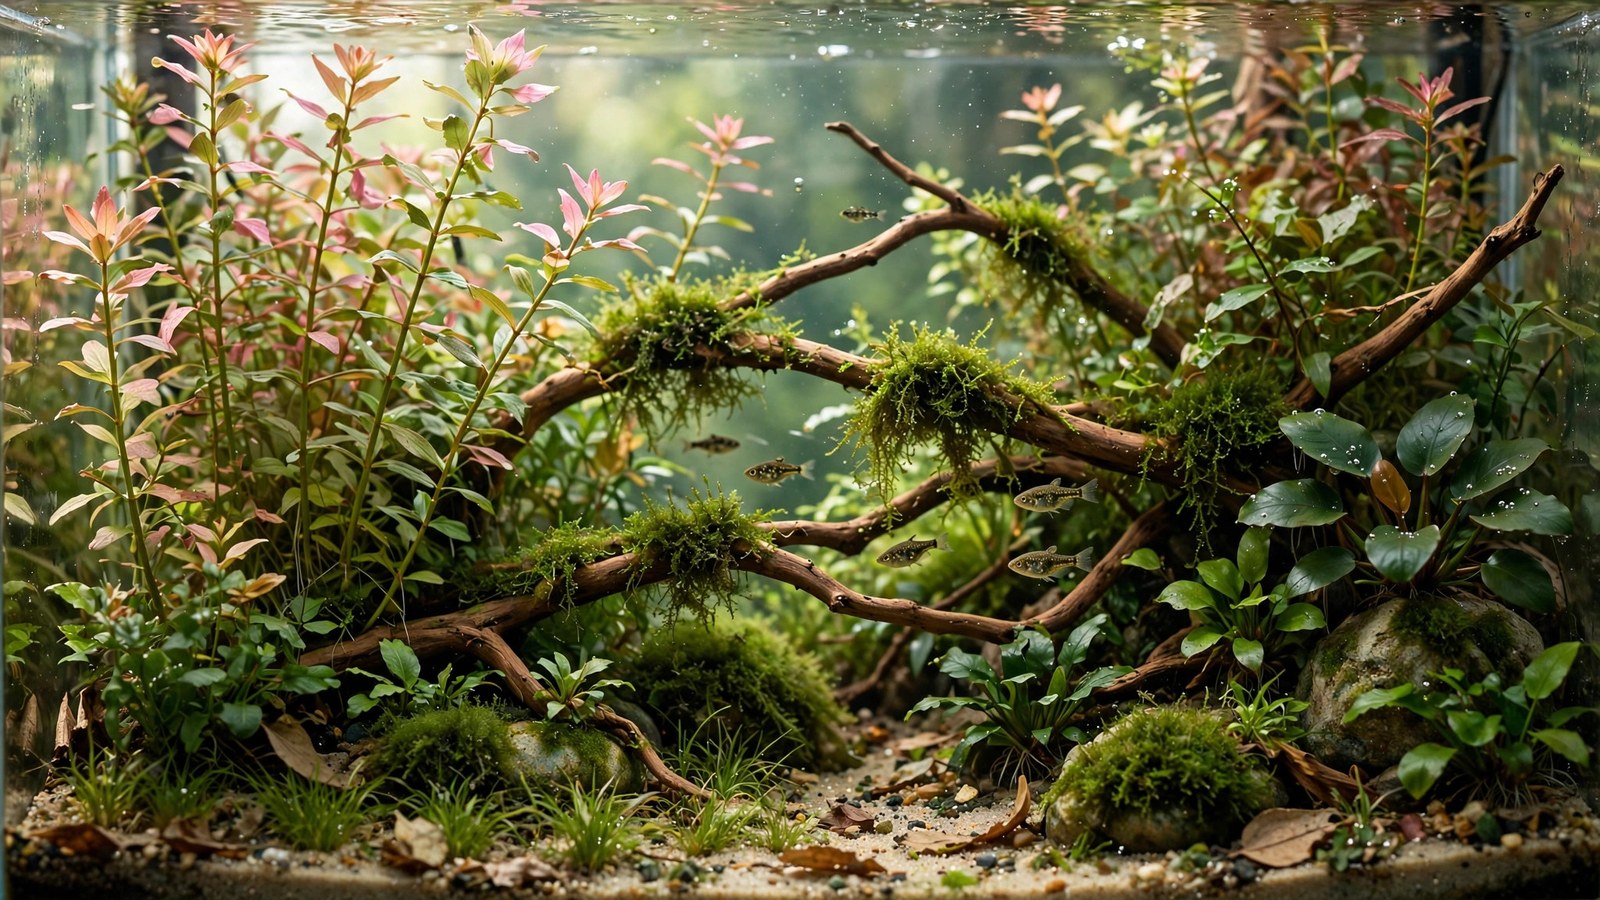
Pea puffers — tiny, intelligent, helicopter-eyed predators the size of a grape — are among the most personality-dense fish in the hobby. They're also finicky about their environment: pea puffers kept in bare tanks get bored, stressed, and aggressive, while pea puffers in densely planted tanks become curious, interactive, endlessly entertaining little hunters. A planted pea puffer tank isn't optional enrichment — it's the difference between a surviving puffer and a thriving one.
Why Pea Puffers Demand Dense Planting
In the wild, pea puffers (Carinotetraodon travancoricus) inhabit heavily vegetated waters in Kerala, India. They're ambush micro-predators that navigate plant thickets, and they're also territorial — in a bare tank, a dominant puffer sees every tankmate constantly and harasses them without pause. Plants break sightlines, create micro-territories, and give subordinate puffers somewhere to vanish.
The rule of thumb: if you can see from one end of the tank to the other without plants blocking the view, it's not planted enough for pea puffers. This is the most heavily planted-per-gallon build in this guide, and deliberately so.
Tank Size and Group Size
Pea puffers are small but territorial — space planning is about sightlines, not swimming room:
- Single puffer: 5–10 gallons, densely planted
- Group of 6: 20 gallons long, very densely planted — the recommended build
- Rule: roughly 5 gallons per puffer, with planting density doing the real work
Keep them in groups of 6+ or singly — never 2–3. Small groups concentrate aggression on the weakest fish; a group of six spreads it, and dense plants let everyone escape. Our 20-gallon planted tank setup covers the equipment for the ideal group tank. A single puffer in a planted 10-gallon — our 10-gallon planted setup — makes a wonderful desktop predator.
Water Parameters
| Parameter | Target range |
|---|---|
| Temperature | 74–80°F (23–27°C) |
| pH | 6.5–7.5 |
| GH | 5–12 dGH |
| KH | 3–8 dKH |
| Ammonia / nitrite | 0 ppm — puffers are scaleless and sensitive |
| Nitrate | Under 20 ppm |
Pea puffers are scaleless fish, which makes them more sensitive to medications, salt, and water-quality lapses than scaled fish. Pristine, stable water isn't a preference — it's a health requirement. Our planted tank water parameters guide covers the chemistry behind the numbers.
Substrate and Hardscape
Sand or fine smooth gravel, 1.5–2 inches, in a dark tone — dark substrate makes puffers feel secure and shows off their patterns. Puffers occasionally sift substrate hunting for snails, so avoid anything sharp.
Hardscape for territory structure: driftwood tangles, smooth stones, and coconut caves create the broken-up floor plan puffers need. Each piece of hardscape should support plant attachment — wood wrapped in moss, stones ringed with anubias. Think of hardscape as the skeleton and plants as the walls of each puffer's micro-territory.
The Pea Puffer Plant List: Maximum Density
Prioritize fast-growing, fine-leaved, bushy plants that create the thicket effect quickly:
The thicket core (plant heavily)
- Java moss / Christmas moss — the puffer tank essential. Wrap every wood piece, fill every corner. Puffers hunt through moss constantly, and it hosts the microfauna they snack on between feedings.
- Guppy grass, hornwort — fast-growing fine thickets that fill the midwater in weeks. The instant density a new puffer tank needs.
- Water sprite — plant it and float it; both forms create puffer-scale cover.
- Pearl weed — bushy midground that trims into dense hedges; puffers weave through it.
Structure plants
- Anubias nana/petite on wood and stone — broad leaves are puffer perches; they rest on them like tiny gargoyles.
- Java fern — tough midground structure that needs nothing.
- Amazon sword (small varieties) — a compact sword anchors the scape; big leaves break sightlines vertically.
- Cryptocoryne wendtii — fills the lower levels where puffers patrol.
- Floating plants — frogbit or salvinia for shade; puffers are bolder under dappled light. See our floating plant guide.
Target 70–80% planted from day one — denser than any other build here. Our planting quantity guide helps with amounts; then add 50% more. Fast growers first for instant cover, slow growers for long-term structure. Our low-tech planted tank setup approach suits puffers perfectly — no CO2 complexity, just dense growth.
Filtration: Gentle and Fry-Safe
Sponge filters are the puffer standard: gentle flow (puffers are weak swimmers), impossible to injure a curious puffer, and they grow the biofilm and microfauna puffers graze on. Run two in a 20-gallon for redundancy. A baffled hang-on-back with a pre-filter sponge works for display setups.
Keep flow low. Puffers hover and dart; they don't cruise currents. If your puffer is constantly fighting flow instead of exploring, baffle it down. The gentle approach matches our planted shrimp tank setup filtration philosophy.
Feeding: The Live-Food Commitment
This is the part that filters out casual keepers: pea puffers generally won't eat flake or pellets. They need:
- Live/frozen bloodworms — the staple; most puffers accept frozen readily
- Live snails (pest snails, ramshorns) — essential for beak maintenance; puffer teeth grow continuously and crunching snail shells files them down. Maintain a separate snail breeding jar — a colony of pest snails in a planted jar produces endless puffer food
- Frozen brine shrimp, daphnia, mysis — variety for nutrition
- Live grindal worms, blackworms — trigger the full hunting sequence
Feed small amounts twice daily — puffers have tiny stomachs but fast metabolisms. A puffer's belly should look gently rounded after feeding, never bloated or pinched. If you can't commit to frozen/live foods long-term, choose a different fish; a flake-fed puffer slowly starves.
Overgrown beaks are the classic puffer health crisis: a puffer that can't close its mouth needs its beak trimmed (a delicate procedure). Regular snail feeding prevents it entirely — another reason the snail jar is mandatory equipment, not optional.
Tankmates: Mostly No
Pea puffers are fin-nippers that harass most tankmates to death. The safe list is short:
- Otocinclus — the one widely accepted tankmate; fast, armored-ish, ignored by most puffers
- Cherry shrimp — adults usually survive in dense plants; shrimplets become snacks (acceptable losses or a self-sustaining snack colony)
- Fast snails — nerites are usually too tough to harass; pest snails are food
Everything else — tetras, guppies, bettas, corys — gets nipped, stressed, or killed eventually. The planted pea puffer tank is a species tank, and it's better for it: six puffers hunting through a jungle is a complete show that needs no supporting cast.
Cycling and Introduction
Plant densely, cycle, mature 4+ weeks — puffers need established tanks with microfauna populations already living in the moss. Our plant-assisted cycling guide covers the cycle; the maturation wait builds the hunting ground.
Add all puffers simultaneously after drip acclimation — introducing puffers one at a time lets the residents claim the whole tank and brutalize newcomers. Quarantine 2–3 weeks; wild-caught puffers frequently carry internal parasites. Treat prophylactically for internal parasites during quarantine — it's standard practice for this species, since most wild puffers arrive infected.
Maintenance
- 25% weekly water change — puffers are messy eaters; meaty foods foul water fast.
- Siphon uneaten food promptly — bloodworm bits rot quickly in warm tanks.
- Trim fast growers every 2–3 weeks — but never clear-cut; always leave thicket zones intact. Rotate trimming sections so cover is never fully removed.
- Maintain the snail jar — a separate small planted container breeding pest snails; harvest weekly.
- Watch beaks monthly — if snails are fed regularly you'll never see overgrowth, but check anyway.
Frequently Asked Questions
Why is my pea puffer glass-surfing?
Boredom or stress — almost always insufficient plant cover. A puffer pacing the glass is a puffer with nowhere to be. Add more plants (especially moss thickets), break up sightlines, and check water quality. Well-planted puffers patrol and hunt; they don't pace.
Can pea puffers live with bettas?
No — this ends badly for one or both. Puffers nip betta fins relentlessly, and bettas stress puffers. Both are territorial fish that need their own space. The planted puffer tank is a species tank; the betta gets its own setup — our planted betta tank setup is the right build for it.
My puffer won't eat frozen food. What do I do?
Start with live foods (blackworms, live daphnia) to trigger the hunting response, then gradually mix in frozen — wiggle frozen bloodworms with tweezers to simulate life. Most puffers convert within 1–2 weeks. Truly stubborn individuals may need ongoing live food, which is why the snail jar and worm cultures matter.
How do I trim a puffer's overgrown beak?
Prevention beats treatment: feed snails regularly and you'll never need to. If the beak is already overgrown, the procedure involves sedating the fish with clove oil and carefully filing the beak with a nail file or cuticle trimmer — genuinely delicate work best learned from an experienced keeper or vet in person, not from text. This is the strongest argument for the snail jar.
Are pea puffers aggressive to each other?
They're territorial, not murderous — in proper groups (6+) with dense planting, aggression stays at the level of chases and displays. Problems arise from too few puffers, too little cover, or skewed sex ratios (aim for more females; males are the territorial ones, identifiable by their eye wrinkles and darker coloration). A well-built planted tank keeps the peace.
How long do pea puffers live?
Four to five years with good care — longer than most people expect from a fish this small. The keys are varied meaty diet, pristine water, beak maintenance via snails, and the low stress of a densely planted territory. Puffers in bare tanks rarely see year two.
The Puffer Tank Payoff
A planted pea puffer tank is the hobby's best reality TV: six tiny predators with distinct personalities, hunting through moss, squabbling over perches, watching you with those independently swiveling eyes. They recognize their keeper, beg at feeding time, and display problem-solving intelligence that shames fish ten times their size. Build the thicket, commit to the food, and you'll understand why puffer keepers never go back to "normal" fish.
For the wild-habitat data behind this heavily-planted setup, see SeriouslyFish’s dwarf puffer species profile.
Tissue-culture plants are the exception — they’re grown in sterile gel and adapt with minimal melting, which is part of what you’re paying for. Plants bought submersed from another hobbyist’s tank also transition with little melt, since they’re already in the right form.
Which Plants Melt Most (and Least)
Heavy melters (expect significant leaf loss)
- Cryptocorynes — infamous for “crypt melt,” sometimes dropping every leaf after any disturbance. They almost always recover from the roots within weeks.
- Stem plants grown emersed — rotala, ludwigia, and hygrophila often shed lower emersed leaves while the growing tips transition.
- Amazon swords — emersed-grown swords typically lose their broad oval aerial leaves and replace them with longer submersed ribbon leaves.
Light melters
- Anubias, java fern, bucephalandra — slow-growing rhizome plants transition gradually; occasional old-leaf melt but rarely dramatic.
- Vallisneria — usually transitions well, though it dislikes the move itself and may sulk for a week.
- Floating plants — minimal melt since their leaves were already at the air-water interface.
The Acclimation Protocol
Step 1: Quarantine or dip first
Before acclimating to your tank’s conditions, make sure you’re not acclimating pests along with the plant. Run new arrivals through our quarantine and dip protocol — it adds days upfront but prevents months of regret.
Step 2: Float to temperature-match (30 minutes)
Float the bag or container in your tank for 20–30 minutes to equalize temperature. Plants are less temperature-sensitive than fish, but a 10°F shock on top of transplant stress is an avoidable insult.
Step 3: Trim before planting
Remove any leaves that are already damaged, yellowing, or heavily algae-covered — they won’t recover and they’ll rot in your tank, feeding algae. For stem plants, trim off the bottom inch and any emersed leaves that look unlikely to adapt; the plant wastes energy maintaining leaves it’s going to shed anyway. Keep the healthy growing tips — that’s where recovery starts.
Step 4: Plant correctly the first time
Follow our planting guide — right depth, crown exposed on rosettes, rhizomes unburied on epiphytes. Every uprooting and replanting restarts the acclimation clock, so get placement right on the first attempt. Decide where each plant goes before it goes in the water.
Step 5: Run a gentle first week
For the first 7 days after planting:
- Moderate light — run your normal photoperiod but consider dropping intensity 20–30% if your light is dimmable. Blast-level light on a melting plant grows algae on the dying leaves, not recovery.
- Stable CO2 — if you inject CO2, keep it consistent. Fluctuating CO2 during acclimation is a melt accelerator. If you’re low-tech, this doesn’t apply — see growing without CO2.
- Half-strength fertilizer — new plants with damaged leaves can’t use full dosing, and the excess feeds algae. Ramp to full strength over 2–3 weeks per our fertilizer schedule.
- No disturbance — don’t move, trim, or “check on” new plants for at least two weeks. Every touch resets root establishment. This is especially critical for crypts.
Step 6: Remove melt, keep the base
As emersed leaves melt, remove the mushy material promptly — decaying leaves release ammonia and grow fungus that can spread to healthy tissue. But never discard the plant while the crown, rhizome, or roots are firm and alive. A crypt that’s lost every leaf but has firm roots is a plant that’s about to recover, not a dead plant. Give it 3–4 weeks before judging.
Telling Normal Melt From Real Problems
Normal transition melt:
- Affects oldest/emersed leaves first, newest growth last
- New submersed leaves emerge even as old ones dissolve
- Roots and crown stay firm and white/green
- Timeline: 1–4 weeks, then obvious new growth
Concerning melt (see our full melting diagnosis guide):
- New growth also melts or emerges deformed
- Rhizome or crown turns mushy and brown — this is rot, not transition
- Entire plant dissolves within days with no new growth after 4+ weeks
- Melting spreads to established plants that weren’t recently moved
Buying Tips to Minimize Melt
- Buy submersed-grown when available — hobbyist-grown cuttings transition with almost no melt.
- Choose tissue culture for sensitive species — crypts and delicate stems establish far more reliably from sterile cups.
- Avoid plants already melting in the store tank — some melt is normal, but a plant that’s mostly mush at purchase has less energy for recovery.
- Transport carefully — keep plants damp and out of direct sun/heat. A plant that dries out or cooks in a hot car melts far worse than one transported properly.
The First-Month Timeline: What to Expect Week by Week
Knowing what’s normal when removes most acclimation anxiety. Here’s the typical timeline for a healthy plant adapting to a new tank:
Week 1: The quiet week
Almost nothing visible happens. The plant is growing roots you can’t see and assessing its new environment. Some species (vallisneria, stem plants) may start shedding their lowest leaves. This is normal. Resist the urge to “help” — no moving, no extra fertilizer, no light changes. The most common beginner mistake is intervening during a week when the correct action is nothing.
Week 2: Melt peaks
This is when emersed leaves give up in earnest. Crypts may drop everything; swords shed their broad aerial leaves; stem plants lose lower foliage. It looks catastrophic and it’s usually fine. Keep removing mushy material, keep conditions stable, and watch the crown and growing tips — if those are firm and green, recovery is already underway.
Week 3: The turn
New submersed-adapted leaves emerge — smaller, thinner, often a slightly different shade of green than the emersed foliage. Stem plant tips start growing visibly; crypts push tiny curled leaves from the crown; swords unfurl narrow ribbon leaves. This is the moment most beginners exhale for the first time.
Week 4+: Established
New growth outpaces melt, and the plant is functionally yours. You can resume full-strength fertilizer, normal trimming, and stop treating it as fragile. Some slow growers (anubias, bucephalandra) take 6–8 weeks to show obvious progress — that’s their normal speed, not a problem.
Acclimating Different Plant Formats
Tissue-culture cups
Sterile, pest-free, and already adapted to high-humidity (not emersed) growth — tissue cultures melt the least of any format. Rinse the agar gel off gently (leftover gel rots and feeds fungus), split the portion into small plantlets, and plant per our planting guide. They establish slowly for the first two weeks, then accelerate. No dip needed, minimal acclimation stress — this is the premium experience you’re paying for.
Potted plants
Remove the pot and strip away the rockwool completely — leftover rockwool traps debris and rots. Tease the root mass apart gently; if it’s a dense mat, splitting it into 2–3 smaller portions actually establishes faster than planting one big clump (more growing points, better water flow around roots). Potted plants are usually emersed-grown, so expect the standard 2–4 week melt cycle.
Bare-root / bunched stems
Typically sold as weighted bunches. Remove any bands, foam, or weights, strip the lower leaves, and plant stems individually or in small groups. Bunched stems from the store are often already transitioning — check for new submersed growth at the tips, which tells you the plant is mid-adaptation and will settle quickly.
Hobbyist cuttings
Already submersed-grown and the fastest to establish — often showing new growth within days. The main acclimation factor is water-parameter difference between the two tanks. Float to temperature-match, plant promptly, and they’ll usually take off with minimal melt. This is why experienced hobbyists prefer trading cuttings over buying potted plants.
Frequently Asked Questions
Should I use a “plant starter” or transplant fertilizer?
Products marketed for transplant shock are mostly B-vitamins and mild hormones. They don’t hurt, but there’s no strong evidence they help aquarium plants specifically. Stable conditions and patience outperform any bottle. Save the money for more plants.
My new plant melted completely — bare crown, no leaves. Is it dead?
Probably not, if the crown or rhizome is firm. Crypts and swords routinely lose 100% of their leaves and regrow from the base within a month. The test is firmness: firm and pale/green means alive; mushy and brown/black means rot. Give firm-but-leafless plants a full 4 weeks before declaring them dead.
Can I speed up acclimation with extra light or CO2?
No — and trying usually backfires. A melting plant can’t use extra light; the excess just grows algae on its dying leaves. Keep light moderate and CO2 stable (not boosted) during acclimation. Growth speed comes from the plant’s own adaptation timeline, which you can’t rush, only avoid delaying.
Should new plants go straight into my main display tank?
After quarantine/dipping, yes — there’s no benefit to a separate “growing-in” tank for most plants. They acclimate to your water fastest in the tank they’ll live in. The exception is very delicate species going into a tank with boisterous fish; give those a few weeks in a calm corner or breeder box first.
The Patience Rule
The single most important acclimation skill is restraint: plant it right, set gentle conditions, remove decay, and then leave it alone for a month. The hobbyists with the best plant growth aren’t doing something clever in week one — they’re simply not interfering in weeks two through four while the plants do what they’ve evolved to do. Melt looks like failure and feels like failure, but in most cases it’s the visible part of a plant successfully becoming yours.