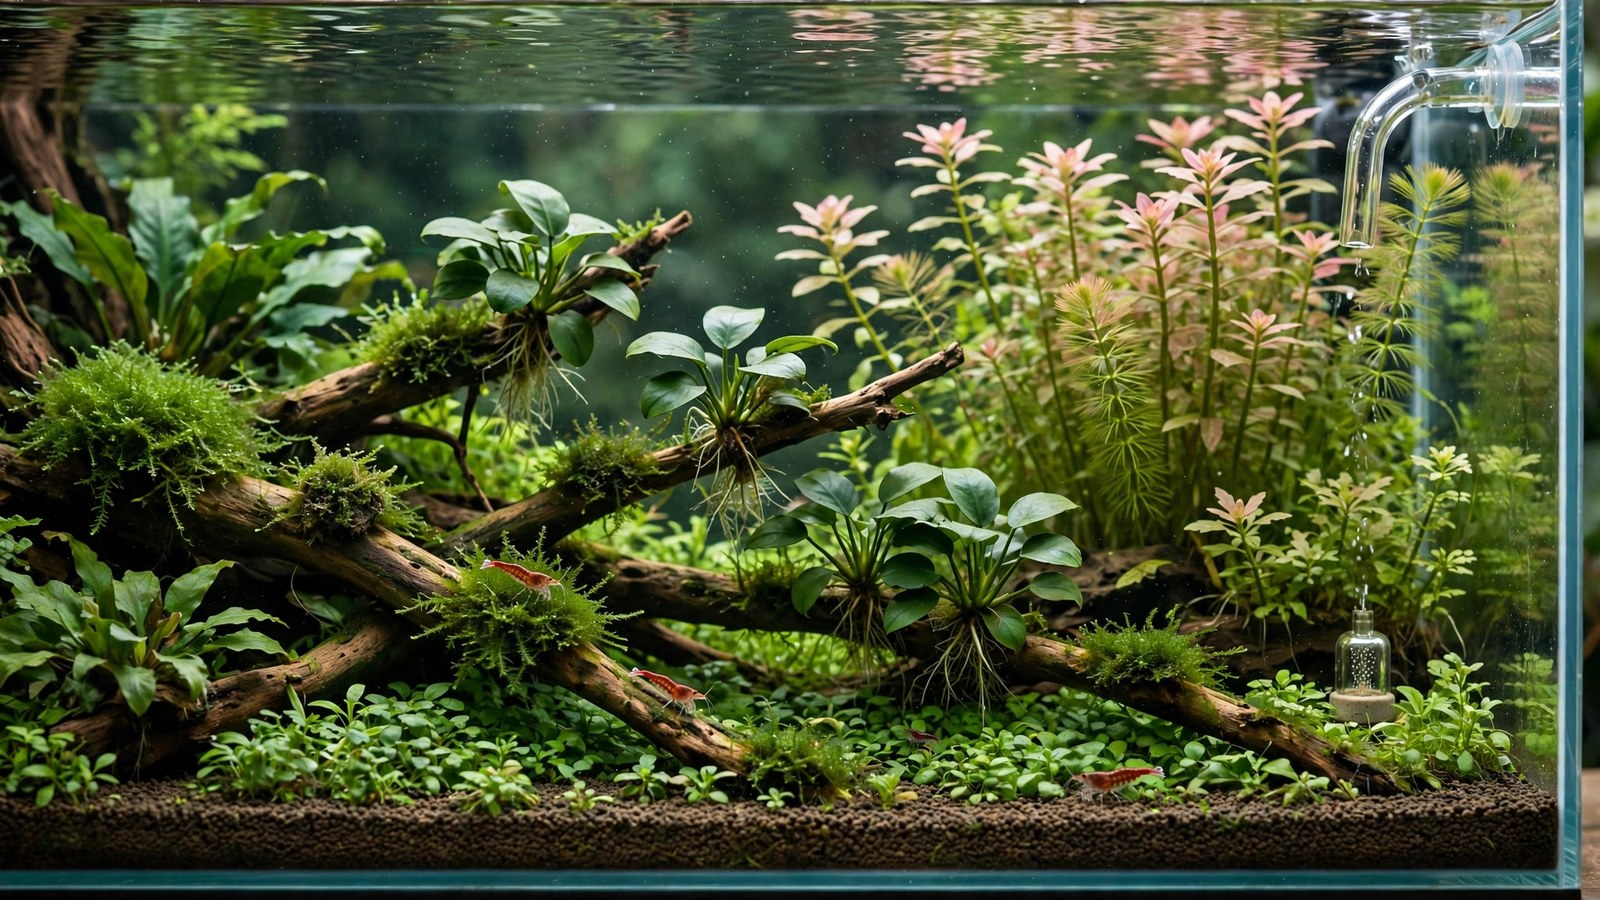
Cherry shrimp turning pale, hiding, or vanishing one by one in a bare tank is a heartbreak almost every shrimp keeper knows. The difference between a tank where shrimp merely survive and one where they breed like rabbits almost always comes down to one thing: plants. A proper planted shrimp tank setup gives shrimplets hiding places, biofilm-covered grazing surfaces, and water stability that no bare tank can match — and it doesn't have to be complicated.
Why Plants Are Non-Negotiable for Shrimp
Dwarf shrimp — neocaridina like cherry shrimp and caridina like crystal reds — are prey animals whose entire biology expects cover. In the wild they live in vegetation-choked shallows, and every instinct tells them an open tank is a death sentence. Give them dense planting and you see an immediate personality change: shrimp grazing openly, females berried, shrimplets venturing out within days of birth.
Plants also do invisible work. Biofilm — the slippery layer of bacteria and microalgae on leaves — is the primary food of newborn shrimplets, whose mouths are too small for commercial food for the first week. A mature planted tank produces a constant buffet; a bare tank starves shrimplets silently. Plants also absorb nitrate, stabilize pH swings, and host the grazing surfaces adults feed from all day. If you're comparing approaches, our guide to low-tech planted tank setup shows how to build this kind of stable, low-energy system from scratch.
Choosing the Tank: Size, Shape, and Lid
How big should a shrimp tank be?
A 10-gallon tank is the sweet spot for a first colony: large enough that water parameters stay stable, small enough to plant densely on a budget. A 5-gallon works — see our 5-gallon planted tank setup — but smaller volumes swing faster in temperature and chemistry, which shrimp punish. A 20-gallon long is the breeder's classic: huge footprint for foraging, easy to divide into breeding zones, and parameters that barely budge.
Skip anything under 5 gallons unless you're experienced. Nano tanks can absolutely thrive — our nano planted tank ideas covers the concept — but their parameter swings kill shrimp before the keeper notices anything changed.
Lids and escape attempts
Shrimp climb. They walk up filter tubes, over silicone corners, and out of open-top tanks, especially at night or when water quality irritates them. A tight-fitting lid is mandatory — mesh, glass, or plastic, with filter and airline cutouts covered. If you find shrimp dried on the floor, they're telling you something about the water inside.
Substrate: The Foundation Decision
Substrate choice in a shrimp tank is the single most consequential decision, because it interacts with your shrimp species' chemistry needs.
| Substrate type | Best for | Notes |
|---|---|---|
| Active buffering soil (e.g. aquasoil) | Caridina (crystal, Taiwan bee) | Drops pH to ~6.0–6.5 and KH to 0–1; exhausts in 1–2 years and needs replacing |
| Inert sand or fine gravel | Neocaridina (cherry, blue dream) | Parameters follow your tap water; zero maintenance; great for colonies |
| Dark fine gravel | Any neocaridina | Shows off red/blue shrimp best; pair with root tabs for heavy root feeders |
Neocaridina (cherry shrimp and all its color morphs) do best on inert substrate with your tap water's natural parameters. Caridina (crystal reds, Taiwan bees) need the soft, acidic water that active soils create — and remineralized RO water on top. Don't mix the strategies: buffering soil with hard tap water exhausts the soil fast and gives you unstable chemistry, the worst of both worlds.
Whatever you choose, keep it 1.5–2 inches deep — deep enough for rooted plants, shallow enough to avoid anaerobic pockets. Our dirted tank setup guide is an option for planted shrimp tanks on a budget, but cap soil firmly and let it mature before shrimp go in.
Filtration: Shrimp-Safe by Design
Standard filter intakes are shrimplet blenders. Every intake in a shrimp tank gets a pre-filter sponge — a coarse foam sleeve over the intake tube. Shrimplets survive the sponge and graze on it happily; without it they end up in the impeller.
Best filter choices, ranked for shrimp:
- Sponge filter — the gold standard for breeding. Gentle flow, impossible to suck up a shrimplet, massive surface area for biofilm and beneficial bacteria, and it aerates. Run one per 10 gallons minimum. The only downside is aesthetics, which a well-placed clump of plants hides completely.
- Hang-on-back with pre-filter sponge — fine for display colonies; the sponge sleeve handles the safety issue and adds biological capacity.
- Canister with intake sponge — overkill for most shrimp tanks but excellent on 20+ gallon setups where you want crystal water and room for filter media.
Avoid strong directional flow. Shrimp are weak swimmers; a tank with a powerhead blasting one end is a tank where shrimp huddle in the calm corner. Gentle, diffuse circulation is the target — you want leaves swaying softly, not streaming sideways.
Lighting and Plants: The Plant List That Works
Shrimp tanks do best with moderate light (6–8 hours daily) and plants chosen for grazing surface, not just looks. Dense, fine-leaved plants grow the most biofilm per square inch.
Top-tier shrimp plants
- Java moss / Christmas moss — the single best shrimp plant ever identified. Infinite hiding spots, enormous biofilm surface, shrimplets live inside it. Tie to wood or let it carpet the hardscape. Indestructible.
- Subwassertang — a liverwort that forms fluffy green balls of cover. Shrimplets vanish into it and emerge fat. Slow but bulletproof.
- Anubias nana petite — broad leaves are grazing tables; slow growth means stable biofilm communities. Attach to wood, never bury the rhizome.
- Java fern — same story as anubias: big leaf surface, near-zero demands. The Windeløv variety's branched tips add extra shrimplet cover.
- Hornwort or guppy grass — fast-growing stem/floater plants that suck up nitrate and provide midwater cover. Guppy grass is the classic fry-and-shrimplet refuge.
- Floating plants — frogbit, salvinia, or red root floaters dim the light (shrimp prefer it dimmer), absorb excess nutrients, and their trailing roots are grazing zones. Our guide to floating plants applies equally to shrimp tanks.
- Susswassertang, pearl weed, dwarf sagittaria — carpeting and midground options that fill the lower levels where shrimp spend most of their time.
Plants to avoid
Anything that needs CO2 injection and high light to survive will create instability in a shrimp tank — and CO2 injection itself is risky for shrimp, since a pH crash or CO2 overdose kills them fast. This is fundamentally a low-tech build. If you want to understand the full low-tech approach, read our low-tech planted tank setup guide.
Water Parameters: What Shrimp Actually Need
Get this table on your fridge. Most shrimp deaths trace to parameters outside these ranges or — more commonly — parameters that swing:
| Parameter | Neocaridina (cherry etc.) | Caridina (crystal etc.) |
|---|---|---|
| Temperature | 68–74°F (20–23°C) | 64–72°F (18–22°C) |
| pH | 6.8–7.8 | 5.8–6.8 |
| GH | 6–10 dGH | 4–6 dGH |
| KH | 2–6 dKH | 0–2 dKH |
| TDS | 150–250 ppm | 100–150 ppm |
| Ammonia / nitrite | 0, always | 0, always |
| Nitrate | Under 20 ppm | Under 10 ppm |
For deeper chemistry, see our planted tank water parameters guide. The golden rule: stability beats perfection. Cherry shrimp in steady pH 7.8 tap water outbreed shrimp in "perfect" pH 7.0 that swings weekly.
Cycling: Shrimp Need a Mature Tank, Not Just a Cycled One
A cycled tank (zero ammonia/nitrite) is the minimum. Shrimp need a mature tank — one with weeks of biofilm growth on every surface. Add plants first, cycle the tank, then wait another 2–3 weeks while the plants root and biofilm develops. Drop a blanched spinach leaf in during this period; if it grows a visible fuzz of biofilm in a few days, the tank is ready to graze.
Plants speed up cycling dramatically by absorbing ammonia directly — our guide to cycling a planted tank faster walks through the plant-assisted method. But don't rush the maturation wait even if your test kit reads zero early. Patience here is what separates colonies that explode from colonies that mysteriously die off over a month.
Stocking, Feeding, and the Breeding Explosion
Starting the colony
Start with 10–15 shrimp of one color variety. Mixing colors gives you wild-type brown offspring within a few generations — fine if you don't care, disappointing if you paid for blue dreams. Add them by slow drip acclimation over 1–2 hours; shrimp are far more sensitive to parameter differences than fish.
Tankmates: the safest tankmate is no tankmate. If you must add fish, tiny peaceful species like chili rasboras or ember tetras in a well-planted 15+ gallon tank will eat some shrimplets but leave the colony breeding. Anything with a mouth bigger than a shrimplet is a predator — bettas, gouramis, and most tetras will hunt shrimplets relentlessly. Our schooling fish for planted tanks guide notes which species are relatively shrimplet-safe.
Feeding
In a mature planted tank, shrimp need surprisingly little supplemental food: a quality shrimp pellet or blanched vegetable 2–3 times a week is plenty for a colony, with the rest coming from biofilm and algae. Overfeeding is the number-one colony killer — uneaten food rots, spikes ammonia, and breeds planaria and hydra. Feed only what disappears in 2–3 hours. Protein-rich foods (bloodworm, specialized breeding foods) a couple of times a week encourage berried females.
The breeding cycle
Once settled (usually 4–8 weeks), females berry up — carrying 20–30 eggs under their tails for about 3–4 weeks, fanning them constantly. Shrimplets hatch as perfect miniature shrimp, no larval stage, and immediately hide in moss and feed on biofilm. In a well-planted tank with no predators, survival rates are excellent and a starting colony of 12 can become 200+ within six months. That's when you start a second tank — ask any shrimp keeper.
Maintenance: The Gentle Routine
- Water changes: 10–15% weekly, matched for temperature and dechlorinated. Large water changes swing TDS and trigger molting problems. Drip the new water in slowly if your tap differs from tank water.
- Top off evaporation with distilled or RO water only — topping off with tap water concentrates minerals and creeps TDS upward over time.
- Trim plants monthly, but never all at once — removing half the biofilm habitat in one session stresses the colony. Rotate sections.
- Test GH, KH, and TDS monthly, not just ammonia/nitrate. Molting failures (the "white ring of death") are mineral problems, and only these tests catch them.
- Never use copper-based medications — copper kills shrimp at trace levels. Check every medication and fertilizer label. Most aquarium plant fertilizers are shrimp-safe at recommended doses, but verify.
Frequently Asked Questions
Can I keep shrimp in a tank with CO2 injection?
You can, but it's riskier than a low-tech shrimp tank. CO2 drops pH, and an equipment malfunction or a timer failure can gas shrimp overnight — they show distress (erratic swimming, gathering at the surface) with little warning. If you inject CO2 in a shrimp tank, run it conservatively (drop checker green, never yellow), put it on a reliable timer with the lights, and keep surface agitation moderate. Most dedicated shrimp breeders skip CO2 entirely.
Why are my shrimp dying but my fish are fine?
Shrimp are canaries: they die from things fish shrug off — copper traces, TDS swings from top-offs, GH/KH crashes, recent pesticide exposure on new plants, or a filter cleaned too aggressively. Test GH, KH, and TDS (not just ammonia/nitrite), review anything added to the tank in the last two weeks, and check whether deaths follow water changes, which points to the source water.
How many shrimp can I keep per gallon?
The old rule of 10 shrimp per gallon is conservative for a planted tank — a mature, heavily planted 10-gallon can support 100+ cherry shrimp because bioload per shrimp is tiny and plants absorb the waste. The real limit is grazing surface and your maintenance discipline, not a headcount. Start with 10–15 and let the colony find its own equilibrium.
Do shrimp eat aquarium plants?
Healthy shrimp don't eat healthy plants — they graze biofilm and algae off leaf surfaces, which actually keeps plants cleaner. They will eat decaying plant matter, which is beneficial cleanup. If you see shrimp on a plant, they're cleaning it, not destroying it. The exception is starving shrimp in a brand-new tank with no biofilm; feed them and the "damage" stops.
What's the white ring of death?
A white band around the carapace where a molt failed to split — the shrimp dies trapped in its old shell. It's caused by mineral imbalance: GH too low (not enough calcium/magnesium to harden the new shell) or TDS swings that disrupt the molting cycle. Fix it by stabilizing GH in the species' range with a shrimp-specific remineralizer and keeping water changes small and consistent.
Can different shrimp colors live together?
Yes, but all neocaridina color morphs interbreed freely, and the offspring revert toward wild-type brown within a few generations. If you want to keep red cherries red, keep one color per tank. Caridina and neocaridina can't interbreed, so a crystal red and a cherry shrimp colony can share a tank — though their ideal parameters differ enough that one species will always be compromising.
The Shrimp Tank Payoff
A planted shrimp tank is the closest thing the hobby has to a self-sustaining ecosystem you can watch from your desk: shrimplets grazing biofilm on moss, berried females fanning eggs, colonies doubling while you barely intervene. Build it plant-first, cycle it patiently, stock it lightly, and then get out of the way — the shrimp and the plants will handle the rest better than any amount of tinkering ever could.
Further reading: the red cherry shrimp detailed care, diet and breeding guide at Shrimp and Snail Breeder, and the 2Hr Aquarist aquarium plant care guides for the plant science behind this setup.
Tissue-culture plants are the exception — they’re grown in sterile gel and adapt with minimal melting, which is part of what you’re paying for. Plants bought submersed from another hobbyist’s tank also transition with little melt, since they’re already in the right form.
Which Plants Melt Most (and Least)
Heavy melters (expect significant leaf loss)
- Cryptocorynes — infamous for “crypt melt,” sometimes dropping every leaf after any disturbance. They almost always recover from the roots within weeks.
- Stem plants grown emersed — rotala, ludwigia, and hygrophila often shed lower emersed leaves while the growing tips transition.
- Amazon swords — emersed-grown swords typically lose their broad oval aerial leaves and replace them with longer submersed ribbon leaves.
Light melters
- Anubias, java fern, bucephalandra — slow-growing rhizome plants transition gradually; occasional old-leaf melt but rarely dramatic.
- Vallisneria — usually transitions well, though it dislikes the move itself and may sulk for a week.
- Floating plants — minimal melt since their leaves were already at the air-water interface.
The Acclimation Protocol
Step 1: Quarantine or dip first
Before acclimating to your tank’s conditions, make sure you’re not acclimating pests along with the plant. Run new arrivals through our quarantine and dip protocol — it adds days upfront but prevents months of regret.
Step 2: Float to temperature-match (30 minutes)
Float the bag or container in your tank for 20–30 minutes to equalize temperature. Plants are less temperature-sensitive than fish, but a 10°F shock on top of transplant stress is an avoidable insult.
Step 3: Trim before planting
Remove any leaves that are already damaged, yellowing, or heavily algae-covered — they won’t recover and they’ll rot in your tank, feeding algae. For stem plants, trim off the bottom inch and any emersed leaves that look unlikely to adapt; the plant wastes energy maintaining leaves it’s going to shed anyway. Keep the healthy growing tips — that’s where recovery starts.
Step 4: Plant correctly the first time
Follow our planting guide — right depth, crown exposed on rosettes, rhizomes unburied on epiphytes. Every uprooting and replanting restarts the acclimation clock, so get placement right on the first attempt. Decide where each plant goes before it goes in the water.
Step 5: Run a gentle first week
For the first 7 days after planting:
- Moderate light — run your normal photoperiod but consider dropping intensity 20–30% if your light is dimmable. Blast-level light on a melting plant grows algae on the dying leaves, not recovery.
- Stable CO2 — if you inject CO2, keep it consistent. Fluctuating CO2 during acclimation is a melt accelerator. If you’re low-tech, this doesn’t apply — see growing without CO2.
- Half-strength fertilizer — new plants with damaged leaves can’t use full dosing, and the excess feeds algae. Ramp to full strength over 2–3 weeks per our fertilizer schedule.
- No disturbance — don’t move, trim, or “check on” new plants for at least two weeks. Every touch resets root establishment. This is especially critical for crypts.
Step 6: Remove melt, keep the base
As emersed leaves melt, remove the mushy material promptly — decaying leaves release ammonia and grow fungus that can spread to healthy tissue. But never discard the plant while the crown, rhizome, or roots are firm and alive. A crypt that’s lost every leaf but has firm roots is a plant that’s about to recover, not a dead plant. Give it 3–4 weeks before judging.
Telling Normal Melt From Real Problems
Normal transition melt:
- Affects oldest/emersed leaves first, newest growth last
- New submersed leaves emerge even as old ones dissolve
- Roots and crown stay firm and white/green
- Timeline: 1–4 weeks, then obvious new growth
Concerning melt (see our full melting diagnosis guide):
- New growth also melts or emerges deformed
- Rhizome or crown turns mushy and brown — this is rot, not transition
- Entire plant dissolves within days with no new growth after 4+ weeks
- Melting spreads to established plants that weren’t recently moved
Buying Tips to Minimize Melt
- Buy submersed-grown when available — hobbyist-grown cuttings transition with almost no melt.
- Choose tissue culture for sensitive species — crypts and delicate stems establish far more reliably from sterile cups.
- Avoid plants already melting in the store tank — some melt is normal, but a plant that’s mostly mush at purchase has less energy for recovery.
- Transport carefully — keep plants damp and out of direct sun/heat. A plant that dries out or cooks in a hot car melts far worse than one transported properly.
The First-Month Timeline: What to Expect Week by Week
Knowing what’s normal when removes most acclimation anxiety. Here’s the typical timeline for a healthy plant adapting to a new tank:
Week 1: The quiet week
Almost nothing visible happens. The plant is growing roots you can’t see and assessing its new environment. Some species (vallisneria, stem plants) may start shedding their lowest leaves. This is normal. Resist the urge to “help” — no moving, no extra fertilizer, no light changes. The most common beginner mistake is intervening during a week when the correct action is nothing.
Week 2: Melt peaks
This is when emersed leaves give up in earnest. Crypts may drop everything; swords shed their broad aerial leaves; stem plants lose lower foliage. It looks catastrophic and it’s usually fine. Keep removing mushy material, keep conditions stable, and watch the crown and growing tips — if those are firm and green, recovery is already underway.
Week 3: The turn
New submersed-adapted leaves emerge — smaller, thinner, often a slightly different shade of green than the emersed foliage. Stem plant tips start growing visibly; crypts push tiny curled leaves from the crown; swords unfurl narrow ribbon leaves. This is the moment most beginners exhale for the first time.
Week 4+: Established
New growth outpaces melt, and the plant is functionally yours. You can resume full-strength fertilizer, normal trimming, and stop treating it as fragile. Some slow growers (anubias, bucephalandra) take 6–8 weeks to show obvious progress — that’s their normal speed, not a problem.
Acclimating Different Plant Formats
Tissue-culture cups
Sterile, pest-free, and already adapted to high-humidity (not emersed) growth — tissue cultures melt the least of any format. Rinse the agar gel off gently (leftover gel rots and feeds fungus), split the portion into small plantlets, and plant per our planting guide. They establish slowly for the first two weeks, then accelerate. No dip needed, minimal acclimation stress — this is the premium experience you’re paying for.
Potted plants
Remove the pot and strip away the rockwool completely — leftover rockwool traps debris and rots. Tease the root mass apart gently; if it’s a dense mat, splitting it into 2–3 smaller portions actually establishes faster than planting one big clump (more growing points, better water flow around roots). Potted plants are usually emersed-grown, so expect the standard 2–4 week melt cycle.
Bare-root / bunched stems
Typically sold as weighted bunches. Remove any bands, foam, or weights, strip the lower leaves, and plant stems individually or in small groups. Bunched stems from the store are often already transitioning — check for new submersed growth at the tips, which tells you the plant is mid-adaptation and will settle quickly.
Hobbyist cuttings
Already submersed-grown and the fastest to establish — often showing new growth within days. The main acclimation factor is water-parameter difference between the two tanks. Float to temperature-match, plant promptly, and they’ll usually take off with minimal melt. This is why experienced hobbyists prefer trading cuttings over buying potted plants.
Frequently Asked Questions
Should I use a “plant starter” or transplant fertilizer?
Products marketed for transplant shock are mostly B-vitamins and mild hormones. They don’t hurt, but there’s no strong evidence they help aquarium plants specifically. Stable conditions and patience outperform any bottle. Save the money for more plants.
My new plant melted completely — bare crown, no leaves. Is it dead?
Probably not, if the crown or rhizome is firm. Crypts and swords routinely lose 100% of their leaves and regrow from the base within a month. The test is firmness: firm and pale/green means alive; mushy and brown/black means rot. Give firm-but-leafless plants a full 4 weeks before declaring them dead.
Can I speed up acclimation with extra light or CO2?
No — and trying usually backfires. A melting plant can’t use extra light; the excess just grows algae on its dying leaves. Keep light moderate and CO2 stable (not boosted) during acclimation. Growth speed comes from the plant’s own adaptation timeline, which you can’t rush, only avoid delaying.
Should new plants go straight into my main display tank?
After quarantine/dipping, yes — there’s no benefit to a separate “growing-in” tank for most plants. They acclimate to your water fastest in the tank they’ll live in. The exception is very delicate species going into a tank with boisterous fish; give those a few weeks in a calm corner or breeder box first.
The Patience Rule
The single most important acclimation skill is restraint: plant it right, set gentle conditions, remove decay, and then leave it alone for a month. The hobbyists with the best plant growth aren’t doing something clever in week one — they’re simply not interfering in weeks two through four while the plants do what they’ve evolved to do. Melt looks like failure and feels like failure, but in most cases it’s the visible part of a plant successfully becoming yours.