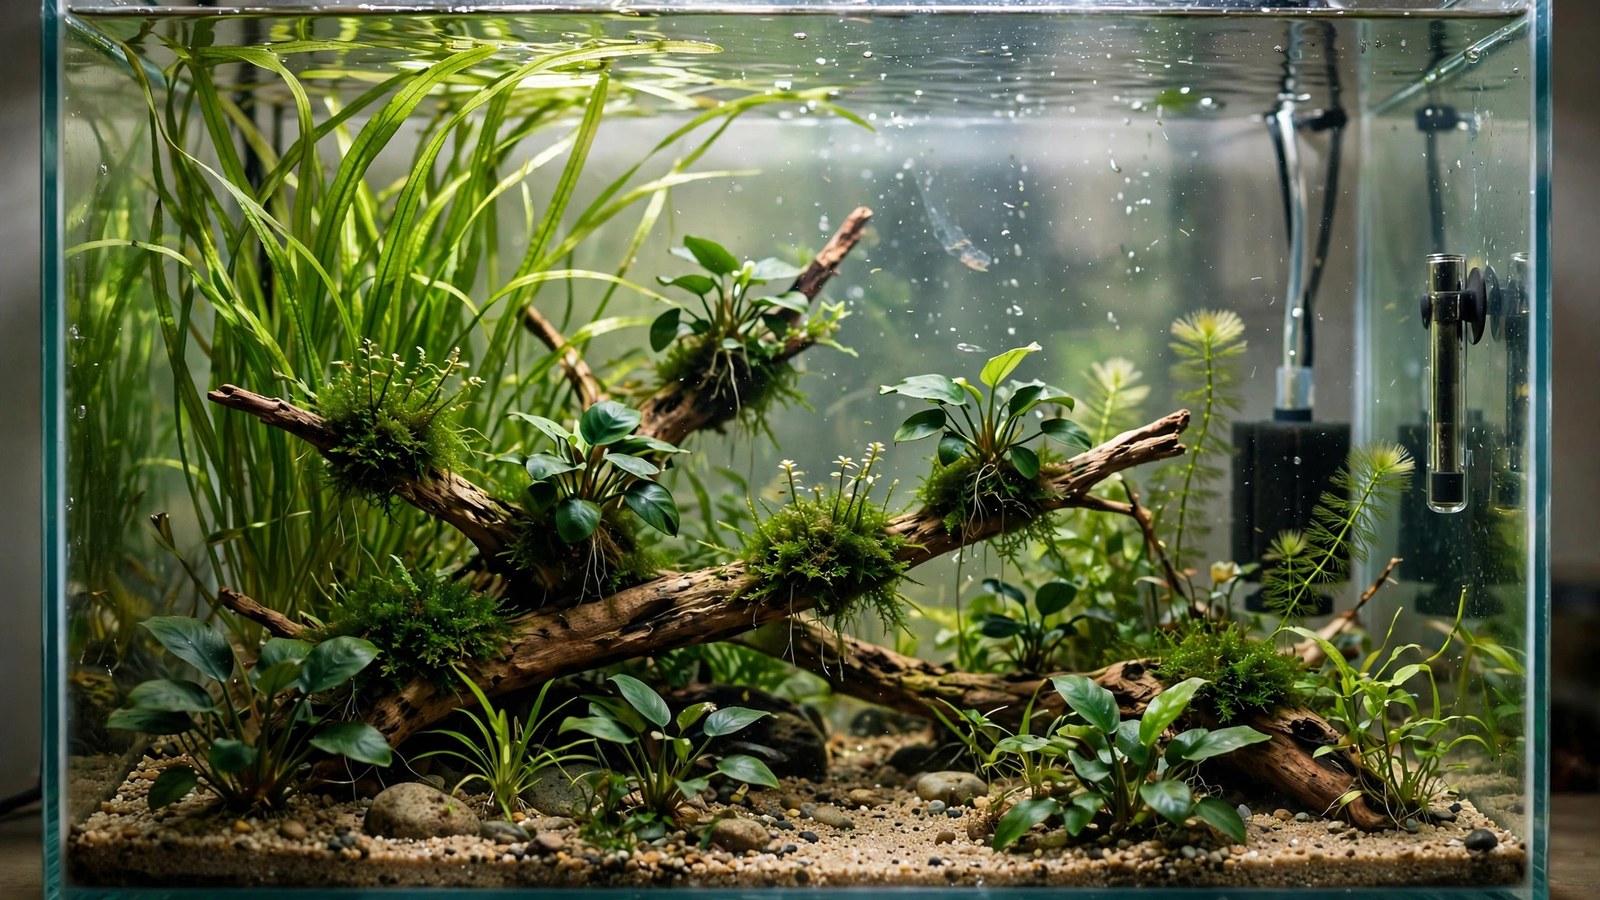
Quarantine tanks are supposed to be sterile, bare, easy-to-disinfect boxes — and that's exactly the problem. A stressed, sick fish in a bare glass box with nowhere to hide often gets worse, not better: stress suppresses immune function, which is the opposite of what quarantine is for. So should your quarantine tank have plants? The answer is yes — but the right plants, deployed the right way, with eyes-open trade-offs.
The Case For Plants in Quarantine
Quarantine serves two purposes: observation (spotting disease before it reaches the display) and treatment (medicating without nuking the main tank). Plants help the first and complicate the second:
- Stress reduction: a fish that can hide behind plants eats sooner, rests better, and mounts a stronger immune response. Bare-tank stress is real and measurable — cortisol suppresses immunity.
- Water stability: plants absorb ammonia between water changes — critical in quarantine tanks, which often run without mature biofilters.
- Natural behavior: you can't assess whether a fish is behaving normally if "normal" requires cover it doesn't have. Plants let you observe the actual animal.
- Oxygen and cover: gentle plant photosynthesis and physical refuge, both free.
The Case Against (and Why It's Weaker Than It Looks)
The traditional objections:
- "Plants harbor disease" — partially true: plants can carry parasites and eggs. But quarantine plants come from your own clean tanks or tissue culture, not from the store with the new fish. The vector risk is manageable.
- "Medications kill plants" — true for some treatments (copper, certain antibiotics, salt at high doses). Solution: use removable plants, or accept some plant losses as the cost of treatment.
- "Bare tanks are easier to clean" — true, and relevant. But "easy to clean" isn't the goal; "fish recovers" is. A slightly harder-to-clean tank with a recovering fish beats a sterile tank with a dead one.
- "You can't observe fish hidden in plants" — valid for dense jungle, not for the sparse, strategic planting this guide recommends. You observe better with moderate cover, because the fish behaves naturally.
The Right Way: Disposable, Removable, Simple
Quarantine planting follows different rules than display planting. The principles:
- Use fast-growing cheap plants — hornwort, guppy grass, water sprite, duckweed. If medication kills them, you're out pocket change.
- Keep them unplanted — float everything or weigh it down. No substrate means nothing to disinfect between quarantine rounds; just lift the plants out.
- Keep it sparse — 30–40% cover, not a jungle. Enough for hiding, open enough for observation.
- One-way plants — quarantine plants never return to the display tank. After each quarantine round, discard or bleach-dip them. This is the non-negotiable hygiene rule.
- Tissue culture or home-grown only — never introduce store plants into quarantine; they'd need quarantining themselves.
Quarantine Tank Setup With Plants
- Tank: 10 gallons for most fish; 20-long for larger species. Bare bottom or a thin layer of easily-removed sand.
- Filter: cycled sponge filter — ideally one kept running in the display tank's sump or back corner, moved to quarantine when needed (instant mature biofilter; see our plant-assisted cycling guide for maturing one fast).
- Heater: adjustable, matched to the species.
- Plants: floating hornwort/guppy grass bunches + a weighted water sprite + a floating plant patch. Total cost: minimal.
- Hide: one PVC pipe or small terracotta pot — in addition to plants, not instead of them.
- Lid: stressed fish jump.
- No substrate planting, no CO2, no fertilizer — ambient light or a basic LED is plenty for floaters.
This setup takes 20 minutes to assemble from supplies kept on hand — which is why experienced keepers maintain a "quarantine kit" (spare tank, sponge filter, heater, plant trimmings) ready to deploy. Our first planted tank shopping list covers the spare-equipment logic.
Quarantine Protocol: The 3–4 Week Standard
- Set up the quarantine tank 24+ hours before fish arrive — temperature stable, plants in, filter running.
- Acclimate new fish slowly — drip acclimation over 1–2 hours; stressed-from-shipping fish need gentleness.
- Observe for 2 weeks minimum — feed lightly, watch behavior, look for spots, clamped fins, flashing, labored breathing, white feces. The plants let you see normal behavior as a baseline.
- Prophylactic treatment (optional but common): many keepers run a gentle general treatment — the exact regimen varies by philosophy. Plants may suffer; that's acceptable.
- Week 3–4: final observation — no symptoms for two full weeks before the fish graduates to the display.
- After graduation: discard the plants (or bleach-dip and restart), disinfect the tank and equipment, dry everything completely.
Plants During Medication
When treatment is needed, the plants' fate depends on the medication:
- Survived by most plants: general antiparasitics (praziquantel), most antibiotics at normal doses, methylene blue, salt at low doses.
- Damaging to plants: copper-based treatments (also kills invertebrates — remove shrimp/snails regardless), high-dose salt, some antifungals.
- Strategy: if the treatment is plant-hostile, lift the floaters into a bucket of tank water for the treatment duration, then discard them after. The fish keeps its cover until treatment starts; the plants are sacrificial either way.
Never medicate the display tank to avoid quarantining — the display's plants, biofilter, and invertebrates all suffer, and you've solved nothing about future introductions.
Quarantining Plants Themselves
New plants need quarantine too — they carry snails, algae, and occasionally parasites. The plant quarantine protocol:
- Dip: alum, bleach, or potassium permanganate dip per standard protocols — kills snails, eggs, and most algae.
- Hold: 1–2 weeks in a separate container with light; watch for snail hatchlings and algae blooms.
- Tissue culture skips the line: sterile cups are pest-free by definition — the premium for quarantine-free planting.
This is separate from fish quarantine — don't quarantine new plants in the fish quarantine tank (or vice versa). One vector at a time.
The Quarantine Kit: Keep It Ready
The keepers who actually quarantine are the ones who can deploy a quarantine tank in 20 minutes — which means keeping a kit ready, not shopping after the fish arrive. The kit: a spare 10-gallon tank (stored dry), a sponge filter kept running in your display tank or sump (instant maturity when moved), a spare adjustable heater, a lid, a dedicated net and siphon labeled "quarantine only," a bag of dechlorinator, and a ziplock of hardy plant trimmings (hornwort, guppy grass) kept in a bucket with light. Total standby cost: minimal. Total value: the difference between quarantining every new fish and skipping it "just this once" because setup is a hassle. Store the dry goods together in a labeled bin; when new fish are on the way home, the tank is running before they're out of the bag.
Frequently Asked Questions
Won't plants in quarantine just give parasites more places to hide?
Parasites don't "hide" in plants meaningfully — free-swimming stages seek fish, not foliage. The realistic plant risk is introduction (plants carrying pests in), which the one-way-plant rule eliminates: quarantine plants come from clean sources and never return to the display. The stress-reduction benefit far outweighs the theoretical harbor risk.
Can I use plants from my display tank in quarantine?
Yes — trimmings from your own healthy display are the ideal quarantine plants: free, clean, and already adapted. The rule is one-directional: display → quarantine is fine; quarantine → display is never fine. After the quarantine round, discard those trimmings (or bleach-dip if they're valuable specimens).
How do I disinfect the quarantine tank between uses?
Empty it completely, scrub with a dilute bleach solution (1:20), rinse thoroughly, air-dry in sunlight for 24–48 hours. Bleach + drying kills essentially everything. Rinse until no chlorine smell remains, then refill and re-cycle the sponge filter before the next use. Keep a dedicated set of quarantine tools (net, siphon) that never touch the display.
Is quarantine really necessary for every new fish?
Yes — unequivocally. One skipped quarantine introducing ich, velvet, or internal parasites can wipe out a display tank worth far more than the 3–4 weeks quarantine costs. Every experienced keeper has a "the time I skipped quarantine" story, and it never ends well. The planted quarantine tank makes the wait productive rather than merely anxious.
My quarantined fish looks healthy after one week. Can I cut it short?
No — many pathogens have 2–3 week incubation periods, and stress-suppressed symptoms can take 10+ days to manifest as the fish settles. The 3–4 week standard exists because shorter quarantines demonstrably miss things. A healthy-looking fish at week one is probably fine; at week four it's verified fine. The difference matters.
The Planted Quarantine Payoff
A quarantine tank with simple floating plants is barely more work than a bare one — and it gives new fish the two things recovery demands: reduced stress and stable water. Keep the plants cheap, removable, and one-way; keep the protocol at 3–4 weeks; keep a quarantine kit ready to deploy. Your display tank's health is built in quarantine, and a little greenery builds it better. The keepers with the healthiest display tanks aren't lucky — they're the ones who never skip quarantine, and the planted quarantine tank is what makes the wait bearable for both you and the fish. Set up the kit this weekend — future you, with a disease-free display tank, will be grateful.
For the tank-establishment fundamentals behind this setup, see the 2Hr Aquarist Planted Tank 101 beginner’s guide.
Tissue-culture plants are the exception — they’re grown in sterile gel and adapt with minimal melting, which is part of what you’re paying for. Plants bought submersed from another hobbyist’s tank also transition with little melt, since they’re already in the right form.
Which Plants Melt Most (and Least)
Heavy melters (expect significant leaf loss)
- Cryptocorynes — infamous for “crypt melt,” sometimes dropping every leaf after any disturbance. They almost always recover from the roots within weeks.
- Stem plants grown emersed — rotala, ludwigia, and hygrophila often shed lower emersed leaves while the growing tips transition.
- Amazon swords — emersed-grown swords typically lose their broad oval aerial leaves and replace them with longer submersed ribbon leaves.
Light melters
- Anubias, java fern, bucephalandra — slow-growing rhizome plants transition gradually; occasional old-leaf melt but rarely dramatic.
- Vallisneria — usually transitions well, though it dislikes the move itself and may sulk for a week.
- Floating plants — minimal melt since their leaves were already at the air-water interface.
The Acclimation Protocol
Step 1: Quarantine or dip first
Before acclimating to your tank’s conditions, make sure you’re not acclimating pests along with the plant. Run new arrivals through our quarantine and dip protocol — it adds days upfront but prevents months of regret.
Step 2: Float to temperature-match (30 minutes)
Float the bag or container in your tank for 20–30 minutes to equalize temperature. Plants are less temperature-sensitive than fish, but a 10°F shock on top of transplant stress is an avoidable insult.
Step 3: Trim before planting
Remove any leaves that are already damaged, yellowing, or heavily algae-covered — they won’t recover and they’ll rot in your tank, feeding algae. For stem plants, trim off the bottom inch and any emersed leaves that look unlikely to adapt; the plant wastes energy maintaining leaves it’s going to shed anyway. Keep the healthy growing tips — that’s where recovery starts.
Step 4: Plant correctly the first time
Follow our planting guide — right depth, crown exposed on rosettes, rhizomes unburied on epiphytes. Every uprooting and replanting restarts the acclimation clock, so get placement right on the first attempt. Decide where each plant goes before it goes in the water.
Step 5: Run a gentle first week
For the first 7 days after planting:
- Moderate light — run your normal photoperiod but consider dropping intensity 20–30% if your light is dimmable. Blast-level light on a melting plant grows algae on the dying leaves, not recovery.
- Stable CO2 — if you inject CO2, keep it consistent. Fluctuating CO2 during acclimation is a melt accelerator. If you’re low-tech, this doesn’t apply — see growing without CO2.
- Half-strength fertilizer — new plants with damaged leaves can’t use full dosing, and the excess feeds algae. Ramp to full strength over 2–3 weeks per our fertilizer schedule.
- No disturbance — don’t move, trim, or “check on” new plants for at least two weeks. Every touch resets root establishment. This is especially critical for crypts.
Step 6: Remove melt, keep the base
As emersed leaves melt, remove the mushy material promptly — decaying leaves release ammonia and grow fungus that can spread to healthy tissue. But never discard the plant while the crown, rhizome, or roots are firm and alive. A crypt that’s lost every leaf but has firm roots is a plant that’s about to recover, not a dead plant. Give it 3–4 weeks before judging.
Telling Normal Melt From Real Problems
Normal transition melt:
- Affects oldest/emersed leaves first, newest growth last
- New submersed leaves emerge even as old ones dissolve
- Roots and crown stay firm and white/green
- Timeline: 1–4 weeks, then obvious new growth
Concerning melt (see our full melting diagnosis guide):
- New growth also melts or emerges deformed
- Rhizome or crown turns mushy and brown — this is rot, not transition
- Entire plant dissolves within days with no new growth after 4+ weeks
- Melting spreads to established plants that weren’t recently moved
Buying Tips to Minimize Melt
- Buy submersed-grown when available — hobbyist-grown cuttings transition with almost no melt.
- Choose tissue culture for sensitive species — crypts and delicate stems establish far more reliably from sterile cups.
- Avoid plants already melting in the store tank — some melt is normal, but a plant that’s mostly mush at purchase has less energy for recovery.
- Transport carefully — keep plants damp and out of direct sun/heat. A plant that dries out or cooks in a hot car melts far worse than one transported properly.
The First-Month Timeline: What to Expect Week by Week
Knowing what’s normal when removes most acclimation anxiety. Here’s the typical timeline for a healthy plant adapting to a new tank:
Week 1: The quiet week
Almost nothing visible happens. The plant is growing roots you can’t see and assessing its new environment. Some species (vallisneria, stem plants) may start shedding their lowest leaves. This is normal. Resist the urge to “help” — no moving, no extra fertilizer, no light changes. The most common beginner mistake is intervening during a week when the correct action is nothing.
Week 2: Melt peaks
This is when emersed leaves give up in earnest. Crypts may drop everything; swords shed their broad aerial leaves; stem plants lose lower foliage. It looks catastrophic and it’s usually fine. Keep removing mushy material, keep conditions stable, and watch the crown and growing tips — if those are firm and green, recovery is already underway.
Week 3: The turn
New submersed-adapted leaves emerge — smaller, thinner, often a slightly different shade of green than the emersed foliage. Stem plant tips start growing visibly; crypts push tiny curled leaves from the crown; swords unfurl narrow ribbon leaves. This is the moment most beginners exhale for the first time.
Week 4+: Established
New growth outpaces melt, and the plant is functionally yours. You can resume full-strength fertilizer, normal trimming, and stop treating it as fragile. Some slow growers (anubias, bucephalandra) take 6–8 weeks to show obvious progress — that’s their normal speed, not a problem.
Acclimating Different Plant Formats
Tissue-culture cups
Sterile, pest-free, and already adapted to high-humidity (not emersed) growth — tissue cultures melt the least of any format. Rinse the agar gel off gently (leftover gel rots and feeds fungus), split the portion into small plantlets, and plant per our planting guide. They establish slowly for the first two weeks, then accelerate. No dip needed, minimal acclimation stress — this is the premium experience you’re paying for.
Potted plants
Remove the pot and strip away the rockwool completely — leftover rockwool traps debris and rots. Tease the root mass apart gently; if it’s a dense mat, splitting it into 2–3 smaller portions actually establishes faster than planting one big clump (more growing points, better water flow around roots). Potted plants are usually emersed-grown, so expect the standard 2–4 week melt cycle.
Bare-root / bunched stems
Typically sold as weighted bunches. Remove any bands, foam, or weights, strip the lower leaves, and plant stems individually or in small groups. Bunched stems from the store are often already transitioning — check for new submersed growth at the tips, which tells you the plant is mid-adaptation and will settle quickly.
Hobbyist cuttings
Already submersed-grown and the fastest to establish — often showing new growth within days. The main acclimation factor is water-parameter difference between the two tanks. Float to temperature-match, plant promptly, and they’ll usually take off with minimal melt. This is why experienced hobbyists prefer trading cuttings over buying potted plants.
Frequently Asked Questions
Should I use a “plant starter” or transplant fertilizer?
Products marketed for transplant shock are mostly B-vitamins and mild hormones. They don’t hurt, but there’s no strong evidence they help aquarium plants specifically. Stable conditions and patience outperform any bottle. Save the money for more plants.
My new plant melted completely — bare crown, no leaves. Is it dead?
Probably not, if the crown or rhizome is firm. Crypts and swords routinely lose 100% of their leaves and regrow from the base within a month. The test is firmness: firm and pale/green means alive; mushy and brown/black means rot. Give firm-but-leafless plants a full 4 weeks before declaring them dead.
Can I speed up acclimation with extra light or CO2?
No — and trying usually backfires. A melting plant can’t use extra light; the excess just grows algae on its dying leaves. Keep light moderate and CO2 stable (not boosted) during acclimation. Growth speed comes from the plant’s own adaptation timeline, which you can’t rush, only avoid delaying.
Should new plants go straight into my main display tank?
After quarantine/dipping, yes — there’s no benefit to a separate “growing-in” tank for most plants. They acclimate to your water fastest in the tank they’ll live in. The exception is very delicate species going into a tank with boisterous fish; give those a few weeks in a calm corner or breeder box first.
The Patience Rule
The single most important acclimation skill is restraint: plant it right, set gentle conditions, remove decay, and then leave it alone for a month. The hobbyists with the best plant growth aren’t doing something clever in week one — they’re simply not interfering in weeks two through four while the plants do what they’ve evolved to do. Melt looks like failure and feels like failure, but in most cases it’s the visible part of a plant successfully becoming yours.