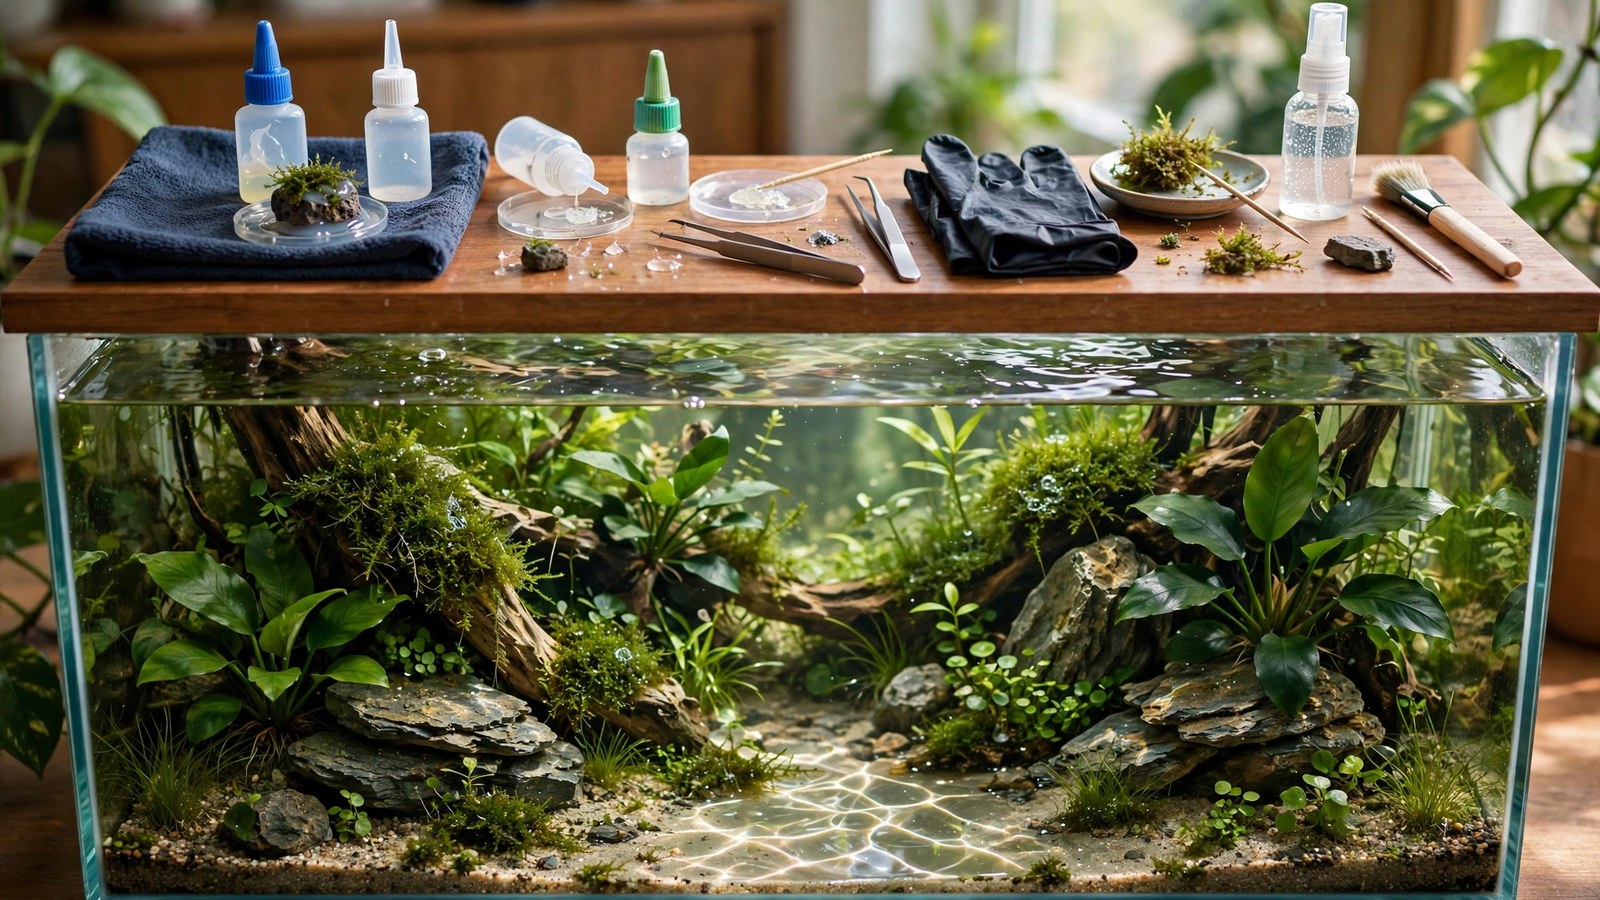
Modern aquascaping would be impossible without it: the little tube of super glue that bonds rocks into mountains, wood into trees, and moss into living sculptures — all underwater-safe once cured. But not all glue is aquarium-safe, and technique matters enormously. This guide covers aquascaping glue types, safety, and the techniques that separate invisible professional bonds from white crusty messes.
The Only Glue Chemistry You Need: Cyanoacrylate
Cyanoacrylate (super glue / Krazy Glue) is the aquascaping standard, and it's the only adhesive you should use inside a tank. Why it works:
- Cures via moisture — water actually accelerates the cure, so it bonds faster in the tank environment. You can glue fully submerged.
- Cured cyanoacrylate is inert and non-toxic — once polymerized (seconds to minutes), it's a stable plastic. It's even used in medical wound closure. Fish, shrimp, and plants are safe around cured bonds.
- Bonds rock, wood, and plant tissue — the three materials of aquascaping, all in one tube.
Use the GEL, not the liquid. Liquid cyanoacrylate runs everywhere, bonds your fingers instantly, and creates a mess. Gel stays where you put it, fills small gaps, and gives you working time. Thick "aquascaping glue" branded gels are just cyanoacrylate gel at a markup — hardware-store super glue gel is chemically identical and far cheaper.
What NOT to use
- Silicone sealant — great for building tanks, terrible for aquascaping: needs 24–48h cure, doesn't bond well underwater, and looks awful as visible blobs. (Use it for its actual job: sealing glass.)
- Epoxy putty — aquarium-safe epoxies exist and have structural uses, but they're bulky, ugly, and overkill for most bonds. Reserve for heavy structural joins.
- Hot glue — not reliably aquarium-safe long-term; softens in warm water and the composition varies by brand.
- Any glue with added "tougheners," fragrances, or colorants — plain cyanoacrylate only. If the ingredient list has extras, skip it.
Safety: The Real Rules
- Plain cyanoacrylate gel only. No "odorless" variants with undisclosed additives, no brush-on formulas with extra solvents.
- Let it cure before livestock exposure — cured in seconds, but give bonds 5–10 minutes before placing near sensitive animals. Uncured glue can irritate gills and eyes.
- Don't glue inside a stocked tank casually — small touch-ups are fine (the glue cures on contact with water), but major construction belongs in a dry or drained tank. Drain the tank to the work area when possible.
- Ventilation matters for you — cyanoacrylate fumes irritate eyes and lungs. Work in ventilated space; the "aquascaping headache" is real.
- Fingers: you will glue your fingers. Keep acetone (nail polish remover) nearby — it dissolves uncured bonds. Don't panic-peel; soak and roll apart.
Core Techniques
Technique 1: Direct bonding (rock to rock, wood to rock)
For pieces that fit together with good contact: apply gel to one surface, press together firmly for 30–60 seconds. The bond sets fast but reaches full strength in 24 hours. Works best on dry surfaces — towel-dry the contact points even if the pieces are damp elsewhere.
Technique 2: The tissue method (the pro secret)
For gaps, irregular surfaces, or structural bonds: pack the gap with tissue paper, cigarette filter, or paper towel, then saturate with cyanoacrylate gel. The tissue acts as a fibrous matrix — the glue wicks through and cures into a rock-hard composite that fills gaps and bonds enormously stronger than glue alone. This is how professionals build tall stone structures and bond wood branches at angles. Steps:
- Dry-fit the pieces; note the gaps.
- Pack tissue tightly into the gap/contact zone.
- Apply gel generously — it wicks through the tissue in seconds.
- Hold 60 seconds. The bond is workable immediately, full-strength in hours.
- Camouflage: while still tacky, dust the joint with crushed stone powder, sand, or soil from your scape — the joint disappears visually.
Technique 3: Gluing plants (moss, epiphytes)
- Moss: apply a thin gel layer to the rock/wood, press a thin moss portion onto it, hold 10 seconds. Less is more — thick glue blobs kill the moss underneath and show white. Small dots every inch beat big smears.
- Anubias/bucephalandra: glue the rhizome (never the roots — they need to breathe and grow). A small gel dot on the rhizome's underside, pressed to the hardscape for 15 seconds.
- Underwater gluing: possible — gel a plant portion, press to the surface underwater, hold 30 seconds. The water accelerates cure. It's fiddlier than dry gluing but works for touch-ups in a filled tank.
- The white haze: cyanoacrylate cures white. On dark wood/rock it's visible initially — camouflage with stone dust/sand while tacky, or let algae and biofilm cover it in weeks (they will).
Technique 4: Building the bonsai tree
The iconic aquascaping project — manzanita trunk, moss "foliage":
- Select a manzanita piece with good branch spread; trim to shape with a saw.
- Glue the trunk base to a slate tile (buried later) for stability.
- Apply small gel dots along branch tips; press moss portions on. Work from the inside out, building foliage density.
- Let cure fully, then flood the tank. Trim the moss as it grows to maintain the "canopy" silhouette.
Structural Building: When Glue Isn't Enough
Glue handles most aquascaping bonds, but know its limits:
- Shear vs tension: cyanoacrylate is strong in shear (sliding) but weaker in tension (pulling apart) and brittle under impact. Tall stacks in earthquake zones or high-traffic tanks need mechanical support too.
- Heavy structures: for genuinely heavy stone assemblies, drill and pin (stainless steel or fiberglass rods through drilled holes) plus glue — the mechanical pin carries the load, the glue locks it. This is the method behind tall terrace retaining walls and large dragon stone formations.
- Underwater longevity: cured cyanoacrylate lasts years submerged, but very old bonds (5+ years) in high-flow areas can weaken. Inspect tall glued structures annually.
- Porous rock bonus: glue grips lava rock's vesicular texture exceptionally well — the gel wicks into the pores and creates a deep mechanical bond stronger than on smooth stone.
- Alternative: mortar. For permanent large structures, aquarium-safe cement/mortar (or pond foam carved and coated) creates monolithic builds glue can't match. That's advanced territory — glue covers 95% of hobby needs.
Troubleshooting Glue Problems
- White crusty blobs: too much glue. Use less, camouflage while tacky, or scrape off with a blade and redo. Prevention beats correction.
- Bond failed: surfaces were wet/oily, or gap too large for glue alone — dry the surfaces, use the tissue method.
- Glue won't set: old tube (cyanoacrylate degrades once opened — replace tubes every few months), or extremely acidic wood surfaces. Fresh tube + tissue method solves it.
- Stuck fingers: acetone soak, then gentle rolling — never yank.
- Moss died under the glue: normal for the tiny portion in direct contact — the surrounding moss grows over it in weeks. If large areas died, you used too much glue.
Glue in the Aquascaper's Toolkit: What Else to Stock
Cyanoacrylate gel is the star, but a complete hardscape toolkit includes its supporting cast:
- Cyanoacrylate gel (multiple tubes): the workhorse. Buy more than you think — a serious hardscape build consumes 3–6 tubes. Unopened tubes keep ~12 months; opened tubes degrade in weeks (the tip clogs, the gel thickens).
- Tissue/paper towel/cigarette filters: the bonding matrix for the tissue method. Unscented, unbleached if you're particular.
- Stone dust and sand: collected from your actual hardscape materials for camouflaging joints — the joint literally becomes the surrounding rock.
- Fishing line or cotton thread: for temporary positioning while glue cures, and for plants you prefer not to glue (cotton rots away harmlessly in weeks).
- Aquarium-safe epoxy putty: for the rare structural joint glue can't handle alone — heavy overhangs, load-bearing bonds. Knead, apply, cures underwater in hours.
- Acetone: for your fingers. Not for the tank — keep it away from the aquarium entirely; it's for skin cleanup at the workbench.
Frequently Asked Questions
Is super glue really safe for fish and shrimp?
Cured cyanoacrylate gel: yes — it's inert plastic, used medically, and the hobby has decades of safe use including in sensitive shrimp breeding tanks. The rules are: plain gel formula, let it cure (seconds to minutes), and don't squeeze uncured glue directly onto animals. Uncured liquid glue in quantity is an irritant; cured bonds are inert.
Can I glue things underwater in a stocked tank?
Small touch-ups, yes — gel a plant portion, press and hold 30 seconds; it cures on contact with water. Keep it minor: a dab here, a moss patch there. Major construction (rock towers, big wood assemblies) belongs in a drained or dry tank — partly for bond quality, partly because flailing around a stocked tank with glue is asking for trouble.
How long do glue bonds last underwater?
Years — typically 3–7+ for well-made tissue-method bonds in normal conditions. High flow, very warm water, and mechanical stress shorten life. Inspect structural bonds annually; plant-attachment bonds don't matter long-term (roots take over within months).
What's the difference between aquascaping glue and hardware-store super glue gel?
Essentially nothing chemically — both are cyanoacrylate gel. "Aquascaping glue" charges more for a hobby label and sometimes a better applicator nozzle. Buy whichever is cheaper per gram; check it's plain cyanoacrylate gel with no additives either way.
Can I glue plants to rocks instead of tying them?
Yes — and it's better than tying for most epiphytes: faster, cleaner, no thread to remove later or that rots messily. Glue the rhizome (anubias, buce, java fern), never bury it. For moss, small gel dots beat thread every time. Thread still wins for very delicate work or when you want zero chemicals near ultra-sensitive setups.
Glue Like You Mean It
Aquascaping glue is the closest thing the hobby has to a cheat code: invisible bonds, instant structures, plants exactly where you want them, all from a $4 tube. The entire technique is gel not liquid, tissue for gaps, less than you think, camouflage while tacky. Master those four points and your hardscape will do things gravity never intended — which, in aquascaping, is exactly the intention.
Tissue-culture plants are the exception — they’re grown in sterile gel and adapt with minimal melting, which is part of what you’re paying for. Plants bought submersed from another hobbyist’s tank also transition with little melt, since they’re already in the right form.
Which Plants Melt Most (and Least)
Heavy melters (expect significant leaf loss)
- Cryptocorynes — infamous for “crypt melt,” sometimes dropping every leaf after any disturbance. They almost always recover from the roots within weeks.
- Stem plants grown emersed — rotala, ludwigia, and hygrophila often shed lower emersed leaves while the growing tips transition.
- Amazon swords — emersed-grown swords typically lose their broad oval aerial leaves and replace them with longer submersed ribbon leaves.
Light melters
- Anubias, java fern, bucephalandra — slow-growing rhizome plants transition gradually; occasional old-leaf melt but rarely dramatic.
- Vallisneria — usually transitions well, though it dislikes the move itself and may sulk for a week.
- Floating plants — minimal melt since their leaves were already at the air-water interface.
The Acclimation Protocol
Step 1: Quarantine or dip first
Before acclimating to your tank’s conditions, make sure you’re not acclimating pests along with the plant. Run new arrivals through our quarantine and dip protocol — it adds days upfront but prevents months of regret.
Step 2: Float to temperature-match (30 minutes)
Float the bag or container in your tank for 20–30 minutes to equalize temperature. Plants are less temperature-sensitive than fish, but a 10°F shock on top of transplant stress is an avoidable insult.
Step 3: Trim before planting
Remove any leaves that are already damaged, yellowing, or heavily algae-covered — they won’t recover and they’ll rot in your tank, feeding algae. For stem plants, trim off the bottom inch and any emersed leaves that look unlikely to adapt; the plant wastes energy maintaining leaves it’s going to shed anyway. Keep the healthy growing tips — that’s where recovery starts.
Step 4: Plant correctly the first time
Follow our planting guide — right depth, crown exposed on rosettes, rhizomes unburied on epiphytes. Every uprooting and replanting restarts the acclimation clock, so get placement right on the first attempt. Decide where each plant goes before it goes in the water.
Step 5: Run a gentle first week
For the first 7 days after planting:
- Moderate light — run your normal photoperiod but consider dropping intensity 20–30% if your light is dimmable. Blast-level light on a melting plant grows algae on the dying leaves, not recovery.
- Stable CO2 — if you inject CO2, keep it consistent. Fluctuating CO2 during acclimation is a melt accelerator. If you’re low-tech, this doesn’t apply — see growing without CO2.
- Half-strength fertilizer — new plants with damaged leaves can’t use full dosing, and the excess feeds algae. Ramp to full strength over 2–3 weeks per our fertilizer schedule.
- No disturbance — don’t move, trim, or “check on” new plants for at least two weeks. Every touch resets root establishment. This is especially critical for crypts.
Step 6: Remove melt, keep the base
As emersed leaves melt, remove the mushy material promptly — decaying leaves release ammonia and grow fungus that can spread to healthy tissue. But never discard the plant while the crown, rhizome, or roots are firm and alive. A crypt that’s lost every leaf but has firm roots is a plant that’s about to recover, not a dead plant. Give it 3–4 weeks before judging.
Telling Normal Melt From Real Problems
Normal transition melt:
- Affects oldest/emersed leaves first, newest growth last
- New submersed leaves emerge even as old ones dissolve
- Roots and crown stay firm and white/green
- Timeline: 1–4 weeks, then obvious new growth
Concerning melt (see our full melting diagnosis guide):
- New growth also melts or emerges deformed
- Rhizome or crown turns mushy and brown — this is rot, not transition
- Entire plant dissolves within days with no new growth after 4+ weeks
- Melting spreads to established plants that weren’t recently moved
Buying Tips to Minimize Melt
- Buy submersed-grown when available — hobbyist-grown cuttings transition with almost no melt.
- Choose tissue culture for sensitive species — crypts and delicate stems establish far more reliably from sterile cups.
- Avoid plants already melting in the store tank — some melt is normal, but a plant that’s mostly mush at purchase has less energy for recovery.
- Transport carefully — keep plants damp and out of direct sun/heat. A plant that dries out or cooks in a hot car melts far worse than one transported properly.
The First-Month Timeline: What to Expect Week by Week
Knowing what’s normal when removes most acclimation anxiety. Here’s the typical timeline for a healthy plant adapting to a new tank:
Week 1: The quiet week
Almost nothing visible happens. The plant is growing roots you can’t see and assessing its new environment. Some species (vallisneria, stem plants) may start shedding their lowest leaves. This is normal. Resist the urge to “help” — no moving, no extra fertilizer, no light changes. The most common beginner mistake is intervening during a week when the correct action is nothing.
Week 2: Melt peaks
This is when emersed leaves give up in earnest. Crypts may drop everything; swords shed their broad aerial leaves; stem plants lose lower foliage. It looks catastrophic and it’s usually fine. Keep removing mushy material, keep conditions stable, and watch the crown and growing tips — if those are firm and green, recovery is already underway.
Week 3: The turn
New submersed-adapted leaves emerge — smaller, thinner, often a slightly different shade of green than the emersed foliage. Stem plant tips start growing visibly; crypts push tiny curled leaves from the crown; swords unfurl narrow ribbon leaves. This is the moment most beginners exhale for the first time.
Week 4+: Established
New growth outpaces melt, and the plant is functionally yours. You can resume full-strength fertilizer, normal trimming, and stop treating it as fragile. Some slow growers (anubias, bucephalandra) take 6–8 weeks to show obvious progress — that’s their normal speed, not a problem.
Acclimating Different Plant Formats
Tissue-culture cups
Sterile, pest-free, and already adapted to high-humidity (not emersed) growth — tissue cultures melt the least of any format. Rinse the agar gel off gently (leftover gel rots and feeds fungus), split the portion into small plantlets, and plant per our planting guide. They establish slowly for the first two weeks, then accelerate. No dip needed, minimal acclimation stress — this is the premium experience you’re paying for.
Potted plants
Remove the pot and strip away the rockwool completely — leftover rockwool traps debris and rots. Tease the root mass apart gently; if it’s a dense mat, splitting it into 2–3 smaller portions actually establishes faster than planting one big clump (more growing points, better water flow around roots). Potted plants are usually emersed-grown, so expect the standard 2–4 week melt cycle.
Bare-root / bunched stems
Typically sold as weighted bunches. Remove any bands, foam, or weights, strip the lower leaves, and plant stems individually or in small groups. Bunched stems from the store are often already transitioning — check for new submersed growth at the tips, which tells you the plant is mid-adaptation and will settle quickly.
Hobbyist cuttings
Already submersed-grown and the fastest to establish — often showing new growth within days. The main acclimation factor is water-parameter difference between the two tanks. Float to temperature-match, plant promptly, and they’ll usually take off with minimal melt. This is why experienced hobbyists prefer trading cuttings over buying potted plants.
Frequently Asked Questions
Should I use a “plant starter” or transplant fertilizer?
Products marketed for transplant shock are mostly B-vitamins and mild hormones. They don’t hurt, but there’s no strong evidence they help aquarium plants specifically. Stable conditions and patience outperform any bottle. Save the money for more plants.
My new plant melted completely — bare crown, no leaves. Is it dead?
Probably not, if the crown or rhizome is firm. Crypts and swords routinely lose 100% of their leaves and regrow from the base within a month. The test is firmness: firm and pale/green means alive; mushy and brown/black means rot. Give firm-but-leafless plants a full 4 weeks before declaring them dead.
Can I speed up acclimation with extra light or CO2?
No — and trying usually backfires. A melting plant can’t use extra light; the excess just grows algae on its dying leaves. Keep light moderate and CO2 stable (not boosted) during acclimation. Growth speed comes from the plant’s own adaptation timeline, which you can’t rush, only avoid delaying.
Should new plants go straight into my main display tank?
After quarantine/dipping, yes — there’s no benefit to a separate “growing-in” tank for most plants. They acclimate to your water fastest in the tank they’ll live in. The exception is very delicate species going into a tank with boisterous fish; give those a few weeks in a calm corner or breeder box first.
The Patience Rule
The single most important acclimation skill is restraint: plant it right, set gentle conditions, remove decay, and then leave it alone for a month. The hobbyists with the best plant growth aren’t doing something clever in week one — they’re simply not interfering in weeks two through four while the plants do what they’ve evolved to do. Melt looks like failure and feels like failure, but in most cases it’s the visible part of a plant successfully becoming yours.