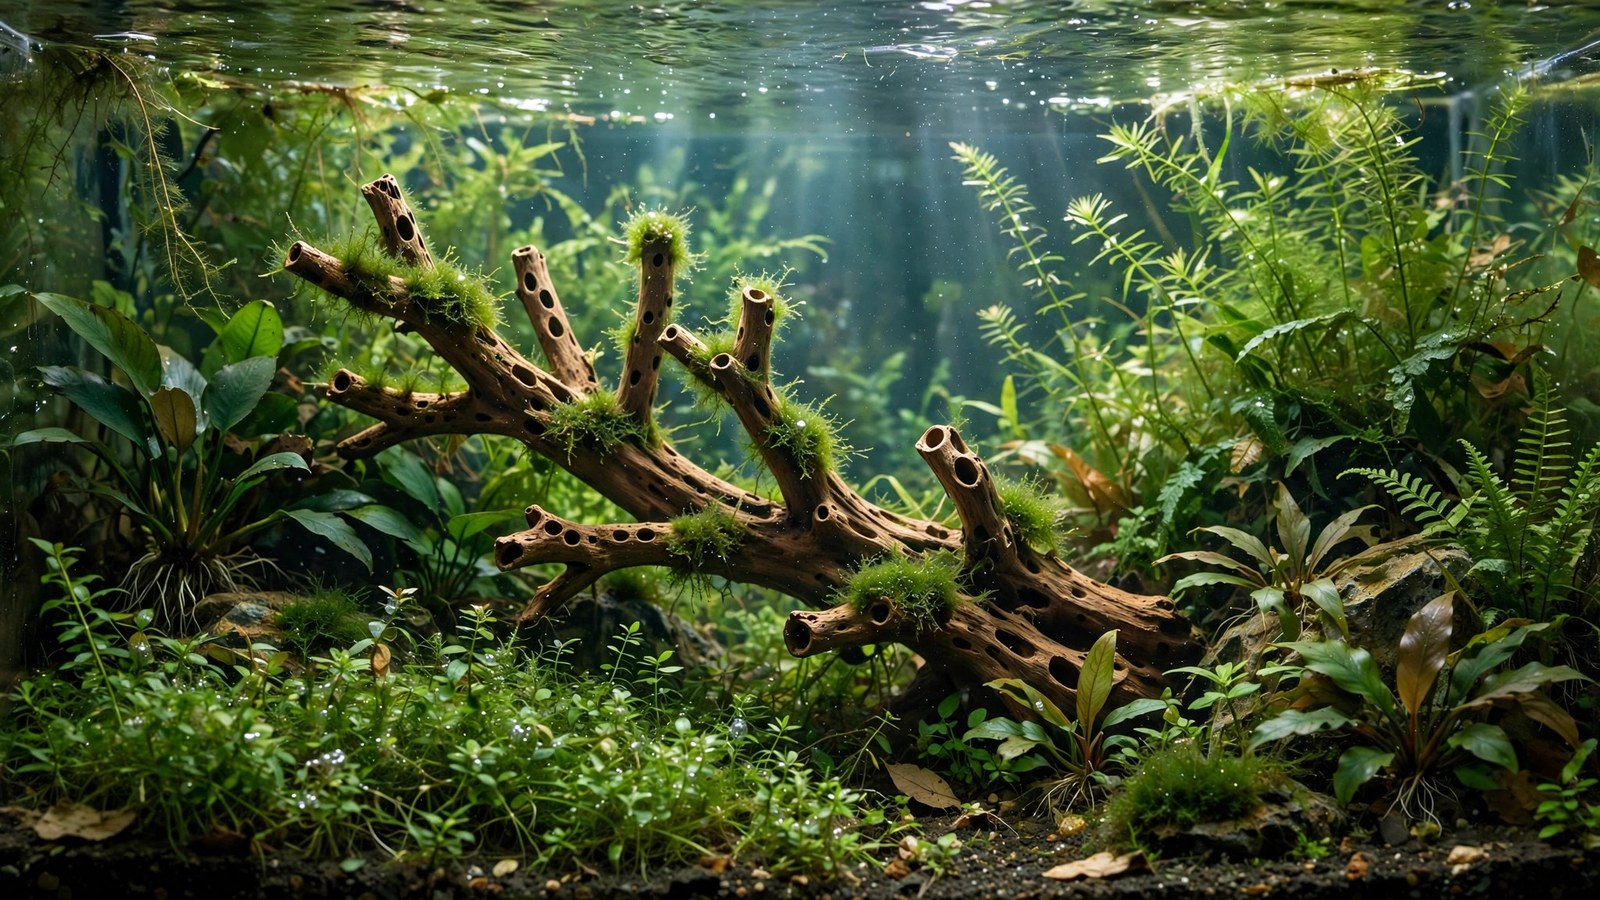
It looks like a hollow cactus skeleton, shrimp treat it like a condominium, and it leaches almost nothing — cholla wood is the quirky outlier of the driftwood world. It's not a traditional aquascaping centerpiece, but in planted tanks (especially shrimp tanks) it's one of the most functional natural decorations you can add. Here's what cholla wood does, how to use it, and its limits.
What Cholla Wood Is
Cholla wood is the skeleton of cholla cactus (Cylindropuntia) after the soft tissue rots away — a hollow tube latticed with holes, lightweight, tan-colored, and structurally fascinating. It's sold in sections from a few inches to over a foot, and occasionally as long "logs." Key properties:
- Hollow with natural holes — shrimp, fry, and small fish shelter inside; the holes are perfectly shrimp-sized doorways.
- Very light — floats initially; waterlogs in days to a couple of weeks (much faster than spider wood).
- Minimal tannins — among the lightest leachers of any aquarium wood. Your water stays clear.
- Soft for wood — it slowly softens and breaks down over 1–2 years, faster than hardwoods. It's semi-disposable by driftwood standards.
- Biofilm magnet — the porous surface grows biofilm prolifically, which is exactly what shrimp graze on. This is its killer feature in shrimp tanks.
Cholla in Shrimp Tanks: The Killer App
Cholla wood's fame comes from the shrimp hobby, where it's close to perfect:
- Shelter: shrimplets hide inside from fish and even from adult shrimp competition; berried females retreat into it. Survival rates visibly improve.
- Grazing surface: the lattice structure has enormous surface area for biofilm and aufwuchs — a constant, natural food source. Shrimp congregate on cholla like it's a buffet because it is.
- Tannin-free: shrimp keepers running crystal-clear caridina tanks (where pH stability is critical — see our buffering guide) love that cholla doesn't alter chemistry.
- Mineral contribution: as cholla slowly breaks down, it releases small amounts of minerals — harmless, and arguably beneficial in soft-water shrimp tanks.
Standard practice: one 4–6 inch section per 10 gallons, replaced when it gets soft and crumbly (12–24 months). At a few dollars per piece, it's consumable decor.
Cholla in Planted Tanks (Beyond Shrimp)
In a general planted tank, cholla is a texture accent, not a centerpiece:
- Moss poles: wrap java moss or Christmas moss around a cholla section — the holes grip moss naturally, and you get a moss-covered lattice pillar in weeks. It's one of the easiest moss structures to make.
- Epiphyte mounts: small anubias and bucephalandra wedge into the holes beautifully.
- Foreground interest: half-buried horizontal pieces create naturalistic detail in the foreground — like fallen cactus skeleton in a streambed.
- Fry shelter: in breeding tanks, cholla sections protect fry from predation better than plants alone.
It won't anchor a scape the way spider wood or manzanita does — it's too small, too pale, too uniform. Think of it as functional garnish: it earns its place through utility (shrimp, moss, fry) rather than visual drama. Our driftwood roundup covers the centerpiece woods.
Preparation
- Rinse well — cholla's holes trap desert dust and debris. Blast water through it, shake it out.
- Boil 20–30 minutes — sterilizes, waterlogs faster, and collapses the floating phase to days. (Shorter boil than dense woods — cholla is soft and prolonged boiling breaks it down.)
- Soak until it sinks — usually 3–10 days weighted down. Faster than any other common wood.
- Inspect the holes — ensure no sharp internal splinters where shrimp could get stuck. Sand any nasty edges.
Full wood-prep principles in our driftwood preparation guide.
Lifespan and Replacement
Cholla's softness is its built-in obsolescence: expect 12–24 months before a piece gets soft, crumbly, and starts shedding fibers. Signs it's done:
- It feels spongy when squeezed (gently).
- Fibers shed into the water column or collect on the filter intake.
- The lattice structure collapses in sections.
- It develops a persistent slimy texture that doesn't resolve (beyond normal biofilm).
Replacement is trivial — pull the old piece, drop in a new pre-soaked one. In shrimp tanks, stagger replacements (don't swap all cholla at once) so the colony always has established biofilm-covered shelter. The old piece, by the way, makes fine garden mulch — it's just cactus skeleton.
Cholla vs Other Shrimp Shelters
| Shelter | Shrimp shelter value | Biofilm surface | Lifespan | Cost |
|---|---|---|---|---|
| Cholla wood | Excellent | Excellent | 1–2 years | Very cheap |
| Indian almond leaves | Good (temporary) | Good | Weeks | Very cheap |
| Ceramic shrimp tubes | Excellent | Fair | Permanent | Cheap |
| Moss (dense) | Excellent | Excellent | Permanent (living) | Moderate |
| Coconut huts | Good | Fair | 1–2 years | Very cheap |
Cholla's unique combination — structure + biofilm + tannin-free + cheap — is why it persists in the shrimp hobby despite the short lifespan. Ceramic tubes last forever but grow less biofilm; moss is better but slower to establish; leaves are great but vanish in weeks. Many shrimp keepers run cholla plus moss for the complete package.
Cholla in Breeding Setups
Beyond shrimp, cholla earns its keep in fish breeding:
- Livebearer fry: guppy, platy, and molly fry instinctively dive into the cholla's holes when chased — survival rates in cholla-furnished breeding tanks are dramatically higher than in bare tanks, approaching dedicated breeding-box levels without separating mother from fry.
- Egg scatterers: for species like danios and tetras bred in groups, cholla sections (plus moss) give eggs somewhere to fall out of reach of hungry adults — the lattice traps eggs in its holes.
- Dwarf cichlid fry: apisto and ram fry use cholla as a satellite shelter around the parents' territory — close enough for the parents to guard, structured enough to hide in.
- Quarantine/hospital tanks: cheap, disposable, sterilizable-by-boiling shelter that reduces stress for new or sick fish. When the quarantine period ends, boil it and reuse or discard — no expensive decor to disinfect.
DIY Cholla Projects
Cholla's workability invites tinkering:
- Cholla moss pillars: stand a 6–8 inch section upright, wrap with moss and thread, bury the base in substrate. In 2 months you have a living column — shrimp graze it, fry hide in it, and it looks intentional rather than accidental.
- Cholla "log piles": stack 3–5 horizontal pieces log-cabin style, glued with cyanoacrylate at contact points. The resulting structure is a multi-chambered shelter complex — spectacular in a shrimp breeding tank.
- Cholla + anubias petite: wedge anubias petite rhizomes into the holes — no glue needed, and the tiny leaves emerging from the lattice look remarkably natural, like plants colonizing deadfall.
- Floating cholla rafts (temporary): a fresh, unwaterlogged piece floats for its first days — some keepers use this phase deliberately, letting shrimp and biofilm colonize a floating piece before it sinks. Novelty more than technique, but fun.
Sourcing Good Cholla
Not all cholla is equal. Look for dense, well-skeletonized pieces — the lattice should feel rigid, not papery, with clean holes free of residual cactus flesh (soft bits rot in the tank). Reputable aquarium and reptile suppliers sell pre-cleaned cholla; craft-store cholla sometimes carries dyes or preservatives — avoid anything colored or suspiciously fragrant. Size-wise, 4–6 inch sections are the versatile standard; 8–12 inch pieces make dramatic moss pillars but are harder to position. Buy a few extra — at a few dollars each, having spares for rotation (one soaking/colonizing while one is in the tank) is cheap insurance, and staggered replacement keeps biofilm coverage continuous.
Frequently Asked Questions
Will cholla wood affect my water parameters?
Negligibly. It's one of the lightest tannin leachers — no meaningful pH/KH effect, no ammonia. That's precisely why caridina shrimp keepers (who need rock-stable soft water — see our buffering guide) prefer it over tannin-heavy woods.
My cholla is growing white fuzz. Is it rotting?
Probably just the standard new-wood biofilm — harmless bacterial/fungal colonization that shrimp will graze off within weeks. True rotting feels soft/spongy and sheds fibers; biofilm is surface-only on firm wood. If shrimp are eating it enthusiastically, it's food, not decay.
Can I use cholla in a betta or community tank?
Yes — it's safe for all freshwater livestock. In community tanks it functions as shelter for fry and small fish, and as a moss/epiphyte mount. Just don't expect it to visually anchor the scape; pair it with a real centerpiece wood or rock formation.
How do I stop cholla from floating?
Boil 20–30 minutes, then soak weighted for up to two weeks. In the tank, wedge it under rocks or bury one end in substrate. It waterlogs faster than any other driftwood — if it's still floating after 3 weeks, the piece may have trapped air in a sealed chamber; drill a tiny hole to release it.
Can shrimp get stuck inside cholla holes?
Extremely rarely, and only in pieces with irregular sharp internal splinters — which is why you inspect and sand before adding. The natural holes are smooth and shrimp navigate them constantly. It's far safer than many artificial decorations with narrow gaps.
Small Wood, Big Job
Cholla wood will never win an aquascaping contest. But in the tanks where function beats form — shrimp colonies, breeding setups, moss gardens — it's one of the highest-value decorations in the hobby: a few dollars for shelter, grazing, and fry protection that your livestock will use every single day. Sometimes the best hardscape isn't the most beautiful piece in the tank; it's the one the inhabitants actually live in.
Tissue-culture plants are the exception — they’re grown in sterile gel and adapt with minimal melting, which is part of what you’re paying for. Plants bought submersed from another hobbyist’s tank also transition with little melt, since they’re already in the right form.
Which Plants Melt Most (and Least)
Heavy melters (expect significant leaf loss)
- Cryptocorynes — infamous for “crypt melt,” sometimes dropping every leaf after any disturbance. They almost always recover from the roots within weeks.
- Stem plants grown emersed — rotala, ludwigia, and hygrophila often shed lower emersed leaves while the growing tips transition.
- Amazon swords — emersed-grown swords typically lose their broad oval aerial leaves and replace them with longer submersed ribbon leaves.
Light melters
- Anubias, java fern, bucephalandra — slow-growing rhizome plants transition gradually; occasional old-leaf melt but rarely dramatic.
- Vallisneria — usually transitions well, though it dislikes the move itself and may sulk for a week.
- Floating plants — minimal melt since their leaves were already at the air-water interface.
The Acclimation Protocol
Step 1: Quarantine or dip first
Before acclimating to your tank’s conditions, make sure you’re not acclimating pests along with the plant. Run new arrivals through our quarantine and dip protocol — it adds days upfront but prevents months of regret.
Step 2: Float to temperature-match (30 minutes)
Float the bag or container in your tank for 20–30 minutes to equalize temperature. Plants are less temperature-sensitive than fish, but a 10°F shock on top of transplant stress is an avoidable insult.
Step 3: Trim before planting
Remove any leaves that are already damaged, yellowing, or heavily algae-covered — they won’t recover and they’ll rot in your tank, feeding algae. For stem plants, trim off the bottom inch and any emersed leaves that look unlikely to adapt; the plant wastes energy maintaining leaves it’s going to shed anyway. Keep the healthy growing tips — that’s where recovery starts.
Step 4: Plant correctly the first time
Follow our planting guide — right depth, crown exposed on rosettes, rhizomes unburied on epiphytes. Every uprooting and replanting restarts the acclimation clock, so get placement right on the first attempt. Decide where each plant goes before it goes in the water.
Step 5: Run a gentle first week
For the first 7 days after planting:
- Moderate light — run your normal photoperiod but consider dropping intensity 20–30% if your light is dimmable. Blast-level light on a melting plant grows algae on the dying leaves, not recovery.
- Stable CO2 — if you inject CO2, keep it consistent. Fluctuating CO2 during acclimation is a melt accelerator. If you’re low-tech, this doesn’t apply — see growing without CO2.
- Half-strength fertilizer — new plants with damaged leaves can’t use full dosing, and the excess feeds algae. Ramp to full strength over 2–3 weeks per our fertilizer schedule.
- No disturbance — don’t move, trim, or “check on” new plants for at least two weeks. Every touch resets root establishment. This is especially critical for crypts.
Step 6: Remove melt, keep the base
As emersed leaves melt, remove the mushy material promptly — decaying leaves release ammonia and grow fungus that can spread to healthy tissue. But never discard the plant while the crown, rhizome, or roots are firm and alive. A crypt that’s lost every leaf but has firm roots is a plant that’s about to recover, not a dead plant. Give it 3–4 weeks before judging.
Telling Normal Melt From Real Problems
Normal transition melt:
- Affects oldest/emersed leaves first, newest growth last
- New submersed leaves emerge even as old ones dissolve
- Roots and crown stay firm and white/green
- Timeline: 1–4 weeks, then obvious new growth
Concerning melt (see our full melting diagnosis guide):
- New growth also melts or emerges deformed
- Rhizome or crown turns mushy and brown — this is rot, not transition
- Entire plant dissolves within days with no new growth after 4+ weeks
- Melting spreads to established plants that weren’t recently moved
Buying Tips to Minimize Melt
- Buy submersed-grown when available — hobbyist-grown cuttings transition with almost no melt.
- Choose tissue culture for sensitive species — crypts and delicate stems establish far more reliably from sterile cups.
- Avoid plants already melting in the store tank — some melt is normal, but a plant that’s mostly mush at purchase has less energy for recovery.
- Transport carefully — keep plants damp and out of direct sun/heat. A plant that dries out or cooks in a hot car melts far worse than one transported properly.
The First-Month Timeline: What to Expect Week by Week
Knowing what’s normal when removes most acclimation anxiety. Here’s the typical timeline for a healthy plant adapting to a new tank:
Week 1: The quiet week
Almost nothing visible happens. The plant is growing roots you can’t see and assessing its new environment. Some species (vallisneria, stem plants) may start shedding their lowest leaves. This is normal. Resist the urge to “help” — no moving, no extra fertilizer, no light changes. The most common beginner mistake is intervening during a week when the correct action is nothing.
Week 2: Melt peaks
This is when emersed leaves give up in earnest. Crypts may drop everything; swords shed their broad aerial leaves; stem plants lose lower foliage. It looks catastrophic and it’s usually fine. Keep removing mushy material, keep conditions stable, and watch the crown and growing tips — if those are firm and green, recovery is already underway.
Week 3: The turn
New submersed-adapted leaves emerge — smaller, thinner, often a slightly different shade of green than the emersed foliage. Stem plant tips start growing visibly; crypts push tiny curled leaves from the crown; swords unfurl narrow ribbon leaves. This is the moment most beginners exhale for the first time.
Week 4+: Established
New growth outpaces melt, and the plant is functionally yours. You can resume full-strength fertilizer, normal trimming, and stop treating it as fragile. Some slow growers (anubias, bucephalandra) take 6–8 weeks to show obvious progress — that’s their normal speed, not a problem.
Acclimating Different Plant Formats
Tissue-culture cups
Sterile, pest-free, and already adapted to high-humidity (not emersed) growth — tissue cultures melt the least of any format. Rinse the agar gel off gently (leftover gel rots and feeds fungus), split the portion into small plantlets, and plant per our planting guide. They establish slowly for the first two weeks, then accelerate. No dip needed, minimal acclimation stress — this is the premium experience you’re paying for.
Potted plants
Remove the pot and strip away the rockwool completely — leftover rockwool traps debris and rots. Tease the root mass apart gently; if it’s a dense mat, splitting it into 2–3 smaller portions actually establishes faster than planting one big clump (more growing points, better water flow around roots). Potted plants are usually emersed-grown, so expect the standard 2–4 week melt cycle.
Bare-root / bunched stems
Typically sold as weighted bunches. Remove any bands, foam, or weights, strip the lower leaves, and plant stems individually or in small groups. Bunched stems from the store are often already transitioning — check for new submersed growth at the tips, which tells you the plant is mid-adaptation and will settle quickly.
Hobbyist cuttings
Already submersed-grown and the fastest to establish — often showing new growth within days. The main acclimation factor is water-parameter difference between the two tanks. Float to temperature-match, plant promptly, and they’ll usually take off with minimal melt. This is why experienced hobbyists prefer trading cuttings over buying potted plants.
Frequently Asked Questions
Should I use a “plant starter” or transplant fertilizer?
Products marketed for transplant shock are mostly B-vitamins and mild hormones. They don’t hurt, but there’s no strong evidence they help aquarium plants specifically. Stable conditions and patience outperform any bottle. Save the money for more plants.
My new plant melted completely — bare crown, no leaves. Is it dead?
Probably not, if the crown or rhizome is firm. Crypts and swords routinely lose 100% of their leaves and regrow from the base within a month. The test is firmness: firm and pale/green means alive; mushy and brown/black means rot. Give firm-but-leafless plants a full 4 weeks before declaring them dead.
Can I speed up acclimation with extra light or CO2?
No — and trying usually backfires. A melting plant can’t use extra light; the excess just grows algae on its dying leaves. Keep light moderate and CO2 stable (not boosted) during acclimation. Growth speed comes from the plant’s own adaptation timeline, which you can’t rush, only avoid delaying.
Should new plants go straight into my main display tank?
After quarantine/dipping, yes — there’s no benefit to a separate “growing-in” tank for most plants. They acclimate to your water fastest in the tank they’ll live in. The exception is very delicate species going into a tank with boisterous fish; give those a few weeks in a calm corner or breeder box first.
The Patience Rule
The single most important acclimation skill is restraint: plant it right, set gentle conditions, remove decay, and then leave it alone for a month. The hobbyists with the best plant growth aren’t doing something clever in week one — they’re simply not interfering in weeks two through four while the plants do what they’ve evolved to do. Melt looks like failure and feels like failure, but in most cases it’s the visible part of a plant successfully becoming yours.